

Nut Bar Recipe
 by Sommer Collier — last updated on Jan 21, 2026
There is nothing that satisfies a snack craving like biting into a super crunchy, slightly chewy, perfectly sweet and delicious energy bar. Especially when it’s homemade and you know exactly what ingredients are in there! My wholesome nut bar recipe is protein-packed with four different types of nuts and pepitas, all held together with a simple combination of organic coconut sugar and agave, and topped with a light chocolate drizzle. Not only are they incredibly scrumptious and more nutritious than prepackaged versions, my recipe happens to be gluten-free, vegan, and paleo-friendly!
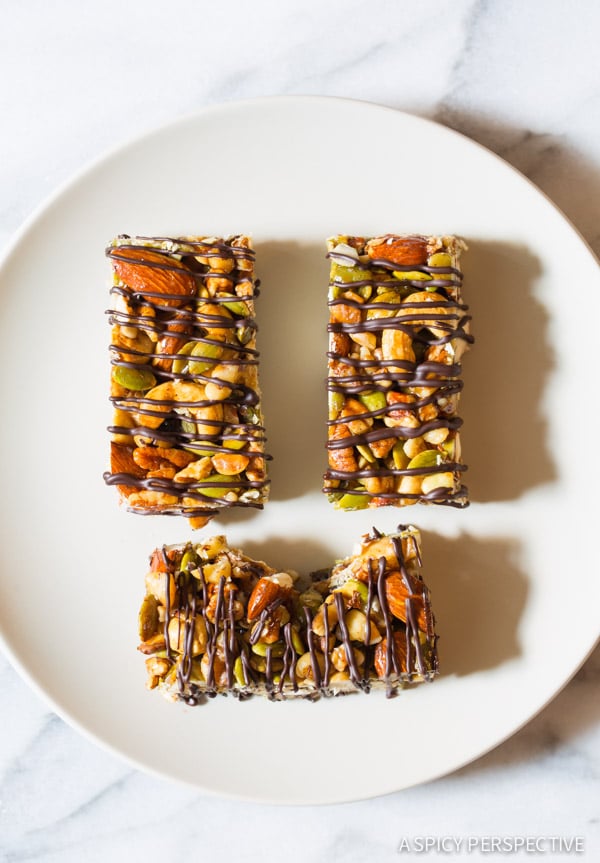
I’m a peppy person by nature, but even I have days where I need some help putting that spring in my step. I used to reach for those packaged energy bars, but now we all know they are filled with lots – and I mean lots – of unnecessary junk. That’s why I have made several recipes over the years for homemade energy bars and energy balls, and my fabulous whole foods granola bar recipe. My wholesome paleo nut bars recipe is a real winner and now a regular part of my good-and-good-for-you snacking lineup! It’s made almost entirely of nuts and seeds, organic and non-GMO sweeteners, and just a touch of spice. And when I need chocolate (when do I not?) I’ll add a simple dark chocolate drizzle on top of the paleo bars as well. Then I get that satisfying sweet and crunchy treat that I crave on occasion, but in a handy guilt-free snack bar stacked with nutrients.
M K – ⭐️⭐️⭐️⭐️⭐️ I have used this recipe commercially for years it has never let me down, I have doubled, trippled and quadrupled it, changed the ingredients to include all things, Oats, flaxseed, sunflower seed, chia, hemp seeds, buckwheat, almond meal etc… subbed the wet ingredients at times for others. As long as the wet and dry remain relatively similar and if you use something likes Oats or almond meal you slightly increase the wet… you cannot go wrong it’s an excellent combination, so forgiving and people LOVE IT”
Table of Contents

Sommer’s Recipe Highlights
Actually Wholesome – In a world of processed snacks, trying to find a store bought energy bar that uses simple ingredients where I can see exactly what is in it all the while still tasting good feels pretty impossible to find. That’s why I love recipes like these paleo nut bars and my other healthy granola bar recipe.
Very Versatile – I’m sharing my favorite combination of ingredients to make the best nut bars, in my opinion. That said, you absolutely can swap out the sugars (I use agave and coconut sugar), nuts, and it’s up to you whether or not to add that chocolate drizzle at the end. And as-is this recipe makes 24 bars, which I love because they are great to store on the counter for a week or in the fridge for up to a month. However, you can easily halve the recipe to make just a dozen.
Super Diet-Friendly – Obviously, paleo bars with nuts are not nut allergy friendly. But they are paleo and vegan-friendly, gluten-free, and dairy-free. Yup, even with the chocolate drizzle. Plus each bar has 6 grams of plant-based protein, which I love!
Ingredients and Key Tips
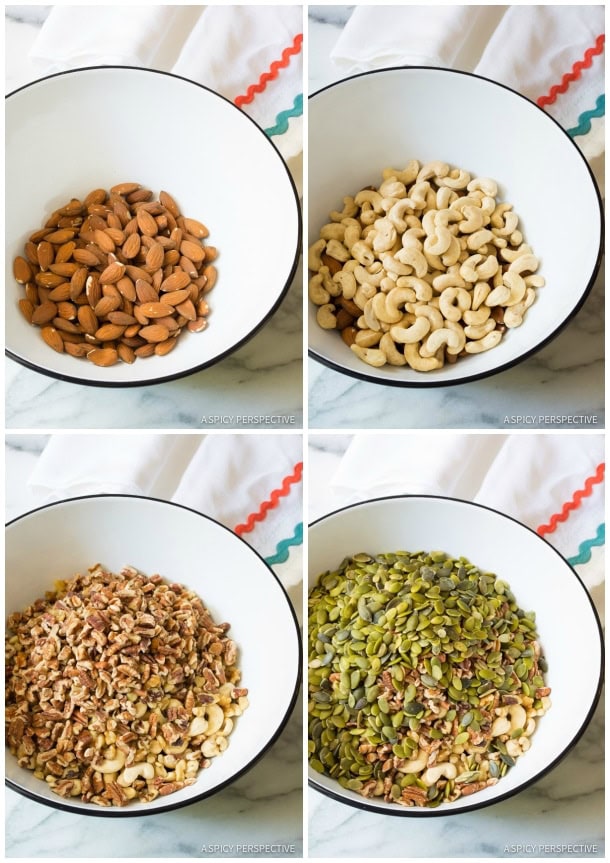
- Raw nuts and seeds – These are what the recipe is all about! I use a mix of whole nuts and small chopped up nuts. I typically am reaching for almonds, cashews, pecans and walnuts but you can try other nuts as well. I also use raw pepitas (pumpkin seeds), which is a perfect filler seed that also packs a punch in the nutrition department.
- Organic sweeteners – Organic coconut palm sugar and organic blue agave, plus 80% dark chocolate for the drizzle, are what I use to balance out the earthy and more savory tone of the nuts and seeds. The agave also serves as an excellent binder to form the nut bars and keep them sticking together.
- Spice and everything nice – I use vanilla extract, sea salt, and cinnamon to add decadent flavor to these otherwise simple snack bars. For vanilla extract I recommend organic for the most rich flavor. I also like to think of cinnamon as my “secret ingredient” … The vanilla helps enhance the sweetness of the organic sugars and chocolate, but the cinnamon really elevates it all with a little level of spice that brings the whole bar together. Of course a touch of sea salt is going to help balance out some of the sweetness along with your cinnamon.
- Dark chocolate – 80% dark chocolate is my fave as it has less sugar than other chocolates and typically is made without dairy (but check your labels!). You can use semi-sweet or even milk chocolate if you prefer.
How to Make
Find the full Nut Bar recipe with ingredient proportions, detailed instructions, storing instructions, and a video tutorial in the printable form at the bottom of the post.
Prep – First things first, I preheat the oven to 350 degrees F. I can’t stand it when I forget to do this first because then I end up having to wait around after I am done cooking for my oven to heat up. So do this first and save yourself some frustration. I then line a 9×13 baking dish with parchment paper. The parchment paper is great for this recipe because it saves you some mess but also makes it really easy to peel the bars out and separate them, but more on that later. I set aside my baking pan until I am ready to line it with my nut mixture.
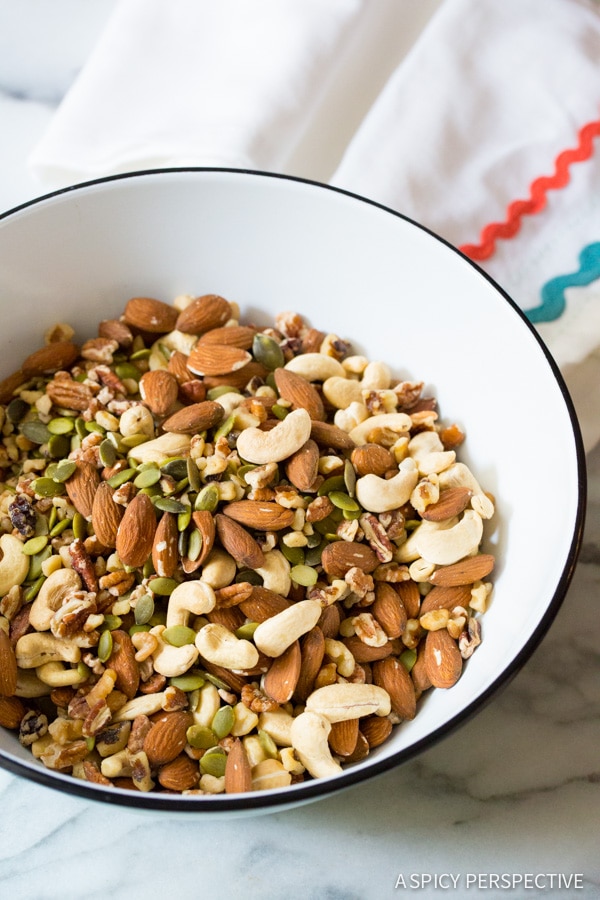
Next in a large bowl I will mix my cashews, almonds, pecans, walnuts and pepitas in a bowl.
Make the “Glue” – After I have everything prepped and my nuts are mixed and sitting in a bowl, I pour my Wholesome!™ Coconut Palm Sugar, Wholesome!™ Organic Blue Agave, the organic vanilla extract, sea salt, and cinnamon into my large sauce pot. I bring that to a simmer while I stir pretty continuously, until all the sugar is dissolved. Once I see that the sugar is completely melted and the edges of my pot are starting to lightly bubble I will turn the heat off and pour my liquid sugar into the bowl of nuts.

Mix and Form – I quickly mix the nuts with the liquid sugar with a wooden spoon – you have to go fast so the sugars don’t seize up and harden. I continue to mix until I can see that everything is completely coated with the liquid sugar. Next, I pour the nut mixture onto my prepped backing pan. I recommend using a piece of wax paper to help press down on the mixture to make sure it is even in the baking pan and firmly sticking together.
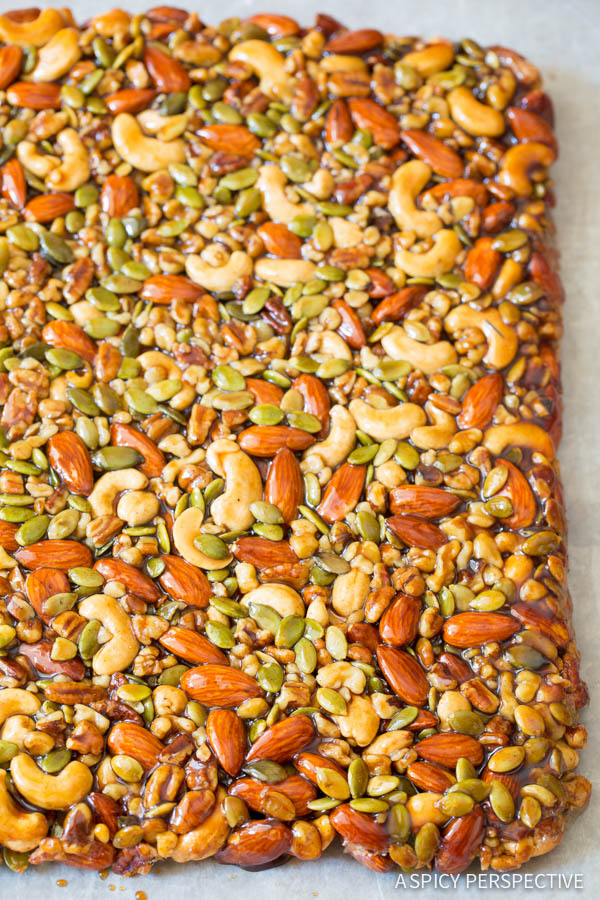
Bake! – Now after I have everything nice and sticky, I slide my baking dish into the oven in the center rack and bake for about 20 minutes, or until I see that the top of the bars have a light golden tint.

Cool and Slice – I will warn you this is the hard part, allowing the nut bars to cool for 45 mins in the baking sheet! As soon as it comes out of the oven, the smell is phenomenal and you will be ready for a bite. But trust me, let it sit so everything has a chance to get real firm. Once everything has cooled for 45 minutes, I lift the whole sheet of nut bars out of the baking sheet by holding the edges of the parchment paper, and cut into 24 bars. Spread the bars apart after slicing them… If you leave them right next to each other, they can get sticky and essentially glue themselves back together.
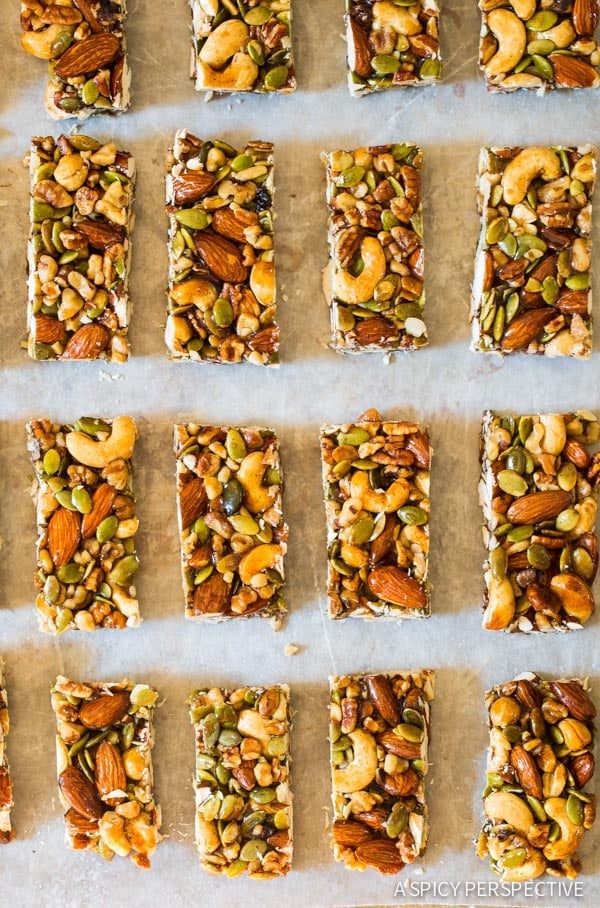
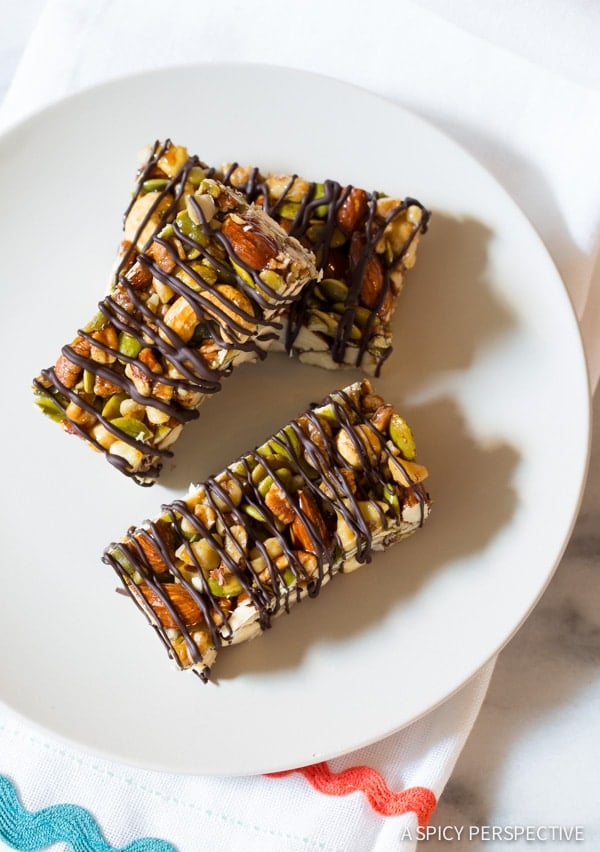
Drizzle with Chocolate – Again, this is optional, but highly recommended! I break apart the bar of dark chocolate and use a double-boiler to melt it into a smooth, thick liquid. Once the chocolate is melted I pour it into a plastic bag. Then snip off a tiny portion of the corner, and pipe the chocolate evenly over the bars. It should only take a few minutes for the chocolate to dry and harden so they are less messy to eat and easy to store.
Recipe Variations and Expert Tips
I know that buying nuts can be expensive so whenever I am preparing to make this bar recipe I try and buy nuts and seeds in bulk. And remember that this recipe makes 24 bars! So if you compare that to the $2-3 a piece for store-bought nut bars, then I hope you come to realize that this recipe really is a good bang for your buck!
Feel free to change up the ingredients however you like! If there is a certain nut or sweetener you want to swap out, the good news most work with this recipe. Rather than using agave you can try honey. If you want to try different nuts I would just recommend you have 3 cups of whole nuts and 3 cups of smaller nut pieces to ensure that the bars stick together well! If you have only whole nuts it’s going to make it a lot harder for the bar to stick together well. The smaller nut pieces almost serve as a filler to help glue everything together.
One note on changing the sweeteners… Once the coconut sugar melts into the agave, it creates a sticky base for the bars that will harden enough to form the bars, yet it isn’t tough on your teeth. I haven’t tried this recipe with honey or other granulated sugars, so I’m not sure how the texture will turn out.
And if you want to mix up things and add an extra bit of texture to your bars, I recommend trying to add some dried cranberries, dried apricots, dried cherries, raisins or even dates. I love that they give a little more chewiness and sweetness to the bars.

Storage Notes
Like I mentioned, this is a great make ahead and bulk recipe. You can easily double the ingredients and freeze for future use. They last for 2-3 months in the freezer in a plastic ziploc bag, just make sure that you individually wrap them in parchment paper or wax paper so they don’t stick together. Then I thaw them at room temperature for 15 minutes or so before eating.
If, however, you have a family like mine, these will somehow disappear impressively fast. So I usually keep them in air tight container at room temperature for about a week, or I store them in the fridge for up to a month.
Frequently Asked Questions
Many times when I have run into my bars falling apart is because I either do not have enough of a sticky binder (ie. my agave, coconut sugar, etc) or more than likely I didn’t let them sit long enough after they baked. Make sure to let them cool for the full 45 minutes and even maybe a little longer if you are unsure that they are cool enough before they are cut.
If you don’t have a double boiler you can still easily melt your chocolate! There are a few options you have. You can use two pots of similar size, filling the bottom with water and allowing it to boil, while the top one contains your chocolate. You can also use a heat proof bowl and a pot or pan to help heat up your chocolate. Same thing, filling the bottom with water, and the top with chocolate. Or you can use a microwave safe bowl and put your chocolate bar in the bowl and heat in 15 second intervals, stirring in between until you get the smooth chocolaty consistency we are looking for.
Help Me Spread the Word about this Fabulous Free Recipe! Sharing this recipe link on Pinterest and Facebook is super impactful, and I greatly appreciate it! Find the share buttons below the recipe form.
More Wholesome Recipes



Nut Bar Recipe
Ingredients
- 1 1/2 cups whole raw cashews
- 1 1/2 cups whole raw almonds
- 1 cup chopped raw pecans
- 1 cup chopped raw walnuts
- 1 cup raw pepitas pumpkin seeds
- 1 cup Wholesome!™ Organic Coconut Palm Sugar
- 1/3 cup Wholesome!™ Organic Blue Agave
- 1 tablespoon organic vanilla extract
- 2 teaspoons sea salt
- 1 teaspoon cinnamon
- 4 ounces organic 80% dark chocolate optional
Instructions
- Preheat the oven to 350 degrees F, and line a 9×13-inch baking dish with parchment paper. Set aside. In a large bowl, mix the cashews, almonds, pecans, walnuts, and pepitas.
- Pour the Wholesome!™ Coconut Palm Sugar, Agave, vanilla extract, sea salt, and cinnamon in a large sauce pot. Bring to a simmer and stir to dissolve the sugar. The moment the sugar is completely melted, and the edges are bubbling, turn off the heat and pour in the nuts. Quickly mix the nuts into the syrup with a wooden spoon, until they are completely coated. Pour the nut mixture into the prepared baking dish. Use a piece of wax paper to press the mixture firmly together.
- Bake the nut bars on the center rack for approximately 20 minutes until the tops are golden. Then (this is the hard part) allow the nut bars to cool for at least 45 minutes in the pan.
- Lift the whole pan of nut bars out of the pan, by the edges of the parchment paper. Cut into 24 bars. Spread the bars apart. Break one 4 ounce bar of dark chocolate into pieces and place over a double-boiler to melt. Once melted, pour the chocolate into a plastic bag. Snip off a tiny portion of the corner, and pipe the chocolate over the bars. Allow the chocolate to dry before wrapping. Store in an air-tight container at room temperature for 1 week, or in the fridge for up to a month.


Made today they are delicious. Though I forgot to chop 2 cups of nuts so mine are on the chunky side and herder to cut.
I’m interested in decreasing the sugar for the next round but now sure how to make the bars continue to stick together. Any recommendations?
hi can I cook some of the nuts 😋
I have used this recipe commercially for years it has never let me down, I have doubled, trippled and quadrupled it, changed the ingredients to include all things, Oats, flaxseed, sunflower seed, chia, hemp seeds, buckwheat, almong meal etc… subbed the wet ingredients at times for others. As long as the wet and dry remain relatively similar and if you use something likes Oats or almond meal you slightly increase the wet… you cannot go wrong it’s an excellent combination, so forgiving and people LOVE IT
Do.you think honey or maple syrup could be used in place of the agave? Should it make much difference?
Hi B,
Agave and maple syrup have a similar consistency and stickiness. I haven’t tried the recipe with maple syrup, but it should work!
Absolute favorite in my household!!
Or, if you are committed to the chocolate, you can always add a tablespoon of unsweetened cocoa powder to the wet mixture.
Just made these. While they are delicious, they are not solidifying after cooling. I’m wondering if it’s because I used an erythritol/monk fruit sweetener in place of the palm sugar. I will try baking a bit longer and see if that helps. Great recipe otherwise!
Great recipe! We all love it. I did change out the agave for manuka honey. Very tasty and much more benefits to using the honey.
These were SOO good, thank you for the recipe! My whole family LOVED them. The only change I made was adding 1 tsp of espresso-infused sugar on top of the chocolate drizzle, I used Nudie’s 80% chocolate made with coconut sugar and it was a bit too bitter for me so the sugar helped combat that. But you could totally just use monkfruit sweetener for a healthier way to accomplish the same thing, or use a sweeter chocolate of course.
NOTE: For those of you wanting to take a walk on the wild side, if you roughly chop up half a bar and throw it on top of a banana split, it’s guaranteed to make even the most stressful day a LITTLE bit better ^-^
I have been making these bars for several months now and experimenting a bit. I found that you can substitute honey for the agave but that makes it a little bit more sticky. I have tried maple syrup and that is really the best so far with the coconut sugar. The other thing I do that’s different is I delete the cinnamon because I’m not really fond of it And then when it comes out of the oven and still hot I have chocolate chips ready to press over the top which is an easy way to make the glaze without melting chocolate.
I was trying to imitate the Costco Kirkland nut bars which I love and these come the closest. Thank you so much for this recipe I love it.
I’m new to paleo.
Is so much sugar allowed in paleo?
I’m doing paleo for health reasons, so I wouldn’t want to risk it, even though your recipe i ssooo tempting :)
Thank you!
Hi Maya,
It depends on who you ask. From my understanding, you can eat natural sweeteners, but not processed sweeteners. How much you eat, is up to you.