Cathead Biscuit Recipe

I make my cathead biscuit recipe when I want big, fluffy southern-style biscuits that truly impress. I use cold butter and a simple, tried-and-true method to create those buttery golden tops that bake up flaky on the outside and perfectly pillowy soft on the inside. These ginormous breakfast biscuits are surprisingly easy to make and require just a handful of pantry staples, which makes them perfect for busy mornings or weekend brunch.

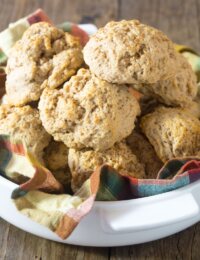
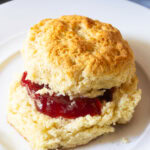
There are biscuits, and then there are biscuits like these giant Cathead biscuits, which get their name because they’re pretty much the size of a cat’s head. Nothing compares to making a buttery biscuit from scratch, and this recipe makes a seriously fluffy on the inside and crispy on the outside version of this Southern favorite. I split them open straight out of the oven and watch the steam rise up before I lather it with creamy butter, jam or a drizzle of honey. The best part is that these are made with simple ingredients and they’re ready in under an hour, just like my jalapeño cheddar cornbread! This dish is pure comfort, and trust me when I say that you won’t believe how quickly these disappear.
Kindra – ⭐⭐⭐⭐⭐ Made these biscuits as a test run before Thanksgiving and they were a hit!!!! I planned on testing a few recipes but was done searching after this one. The biscuits have such a nice crust on them and oh so delicious. Thank you for the recipe.
Table of Contents


Sommer’s Recipe Highlights
Easy to Make – From the simple pantry ingredients to the easy-to-follow steps, these biscuits are foolproof. You don’t need any fancy tools or techniques to make this fluffy and delectable southern favorite. However, I do suggest using speed and a gentle hand. *wink*
Feeds a Crowd – When it comes to bread, I believe bigger is better, especially when feeding a crowd. Whether you’re entertaining for brunch or having the entire family over for dinner, unlike traditional biscuits, these are big enough to share.
Versatile – Whether you’re using these biscuits to scoop up something sweet, like a jam, or something savory, like my famous sausage gravy, these are the perfect accompaniment to any dish!
Key Ingredients and Tips
- All-purpose flour – To make the foundation of this bread recipe you need a classic all-purpose flour. You can use your favorite brand. However, I have found the WhiteLily is great for biscuits. It’s slightly lighter than traditional AP flour, but not as light as cake flour. It’s a southern favorite for baking.
- Granulated sugar – Just a touch of sugar gives the right amount of sweetness to every bite. It also helps the crust to crisp.
- Baking powder and baking soda – Definitely don’t skip out on these! To get the biscuits super fluffy, you need this dynamic duo so that the dough rises as it bakes. Make sure your leavening agents are fresh. Old ingredients are often the culprit of flat baked goods.
- Sea salt – I love using a little sea salt because it delicately balances all the flavors.
- Butter – Using cold butter is key to getting those drool-worthy flaky layers we all love. I suggest keeping the butter in the fridge until just before its needed.
- Butter-flavored shortening – Like Crisco. Using this, along with butter, helps balance the outer crisp and the fluffy interior. Alternatively, you can use lard.
- Buttermilk – Buttermilk is essential because it gives that tangy flavor and, most importantly, it keeps the biscuits nice and moist. Buy it, or learn how to make buttermilk in minutes.
How to Make
Find the full recipe with ingredient proportions, detailed instructions, and a video tutorial in the printable form at the bottom of the post.
Prep the oven – The first thing I do is get the oven nice and hot so that those biscuits rise beautifully. Then I grease my cast-iron skillet with some butter.
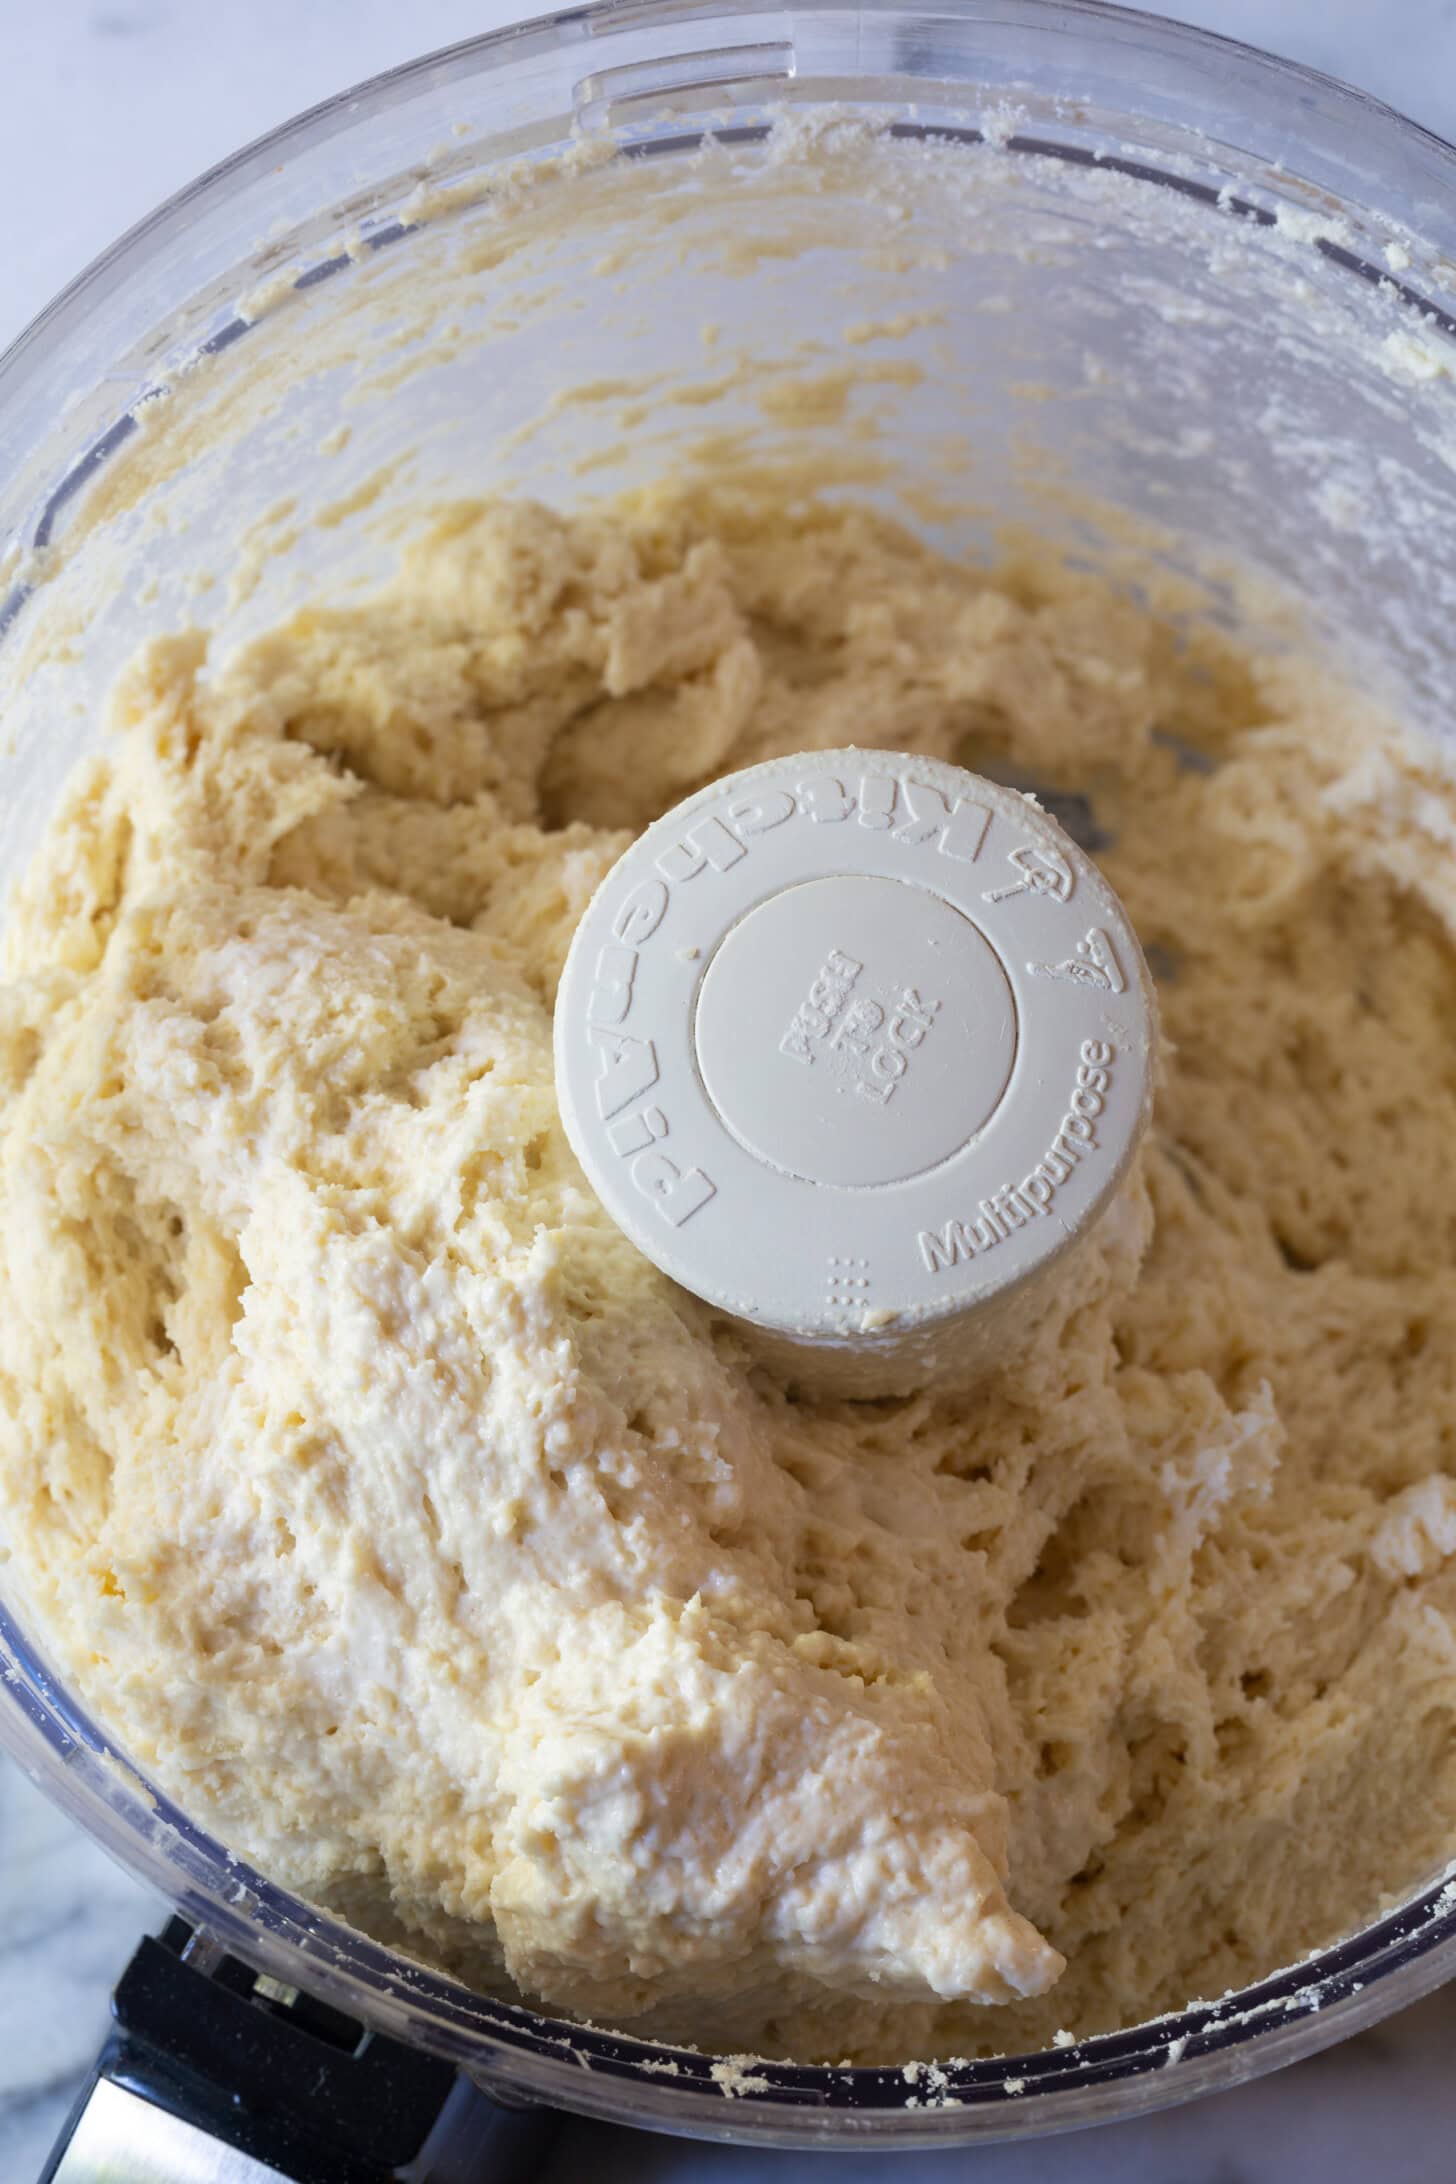
Mix the dry ingredients – After I sift the flour, I add the sugar, baking powder, baking soda, and salt into a food processor, and I pulse that with the flour a few times to get it combined.
Make the flaky layers – Now it’s time to make those flaky, buttery layers we all love. It starts by adding the cold shortening and some of the cold butter, then mixing well. I keep pulsing as I slowly add in the cold buttermilk. The dough should be nice and sticky at this point, with small pieces of butter in it.
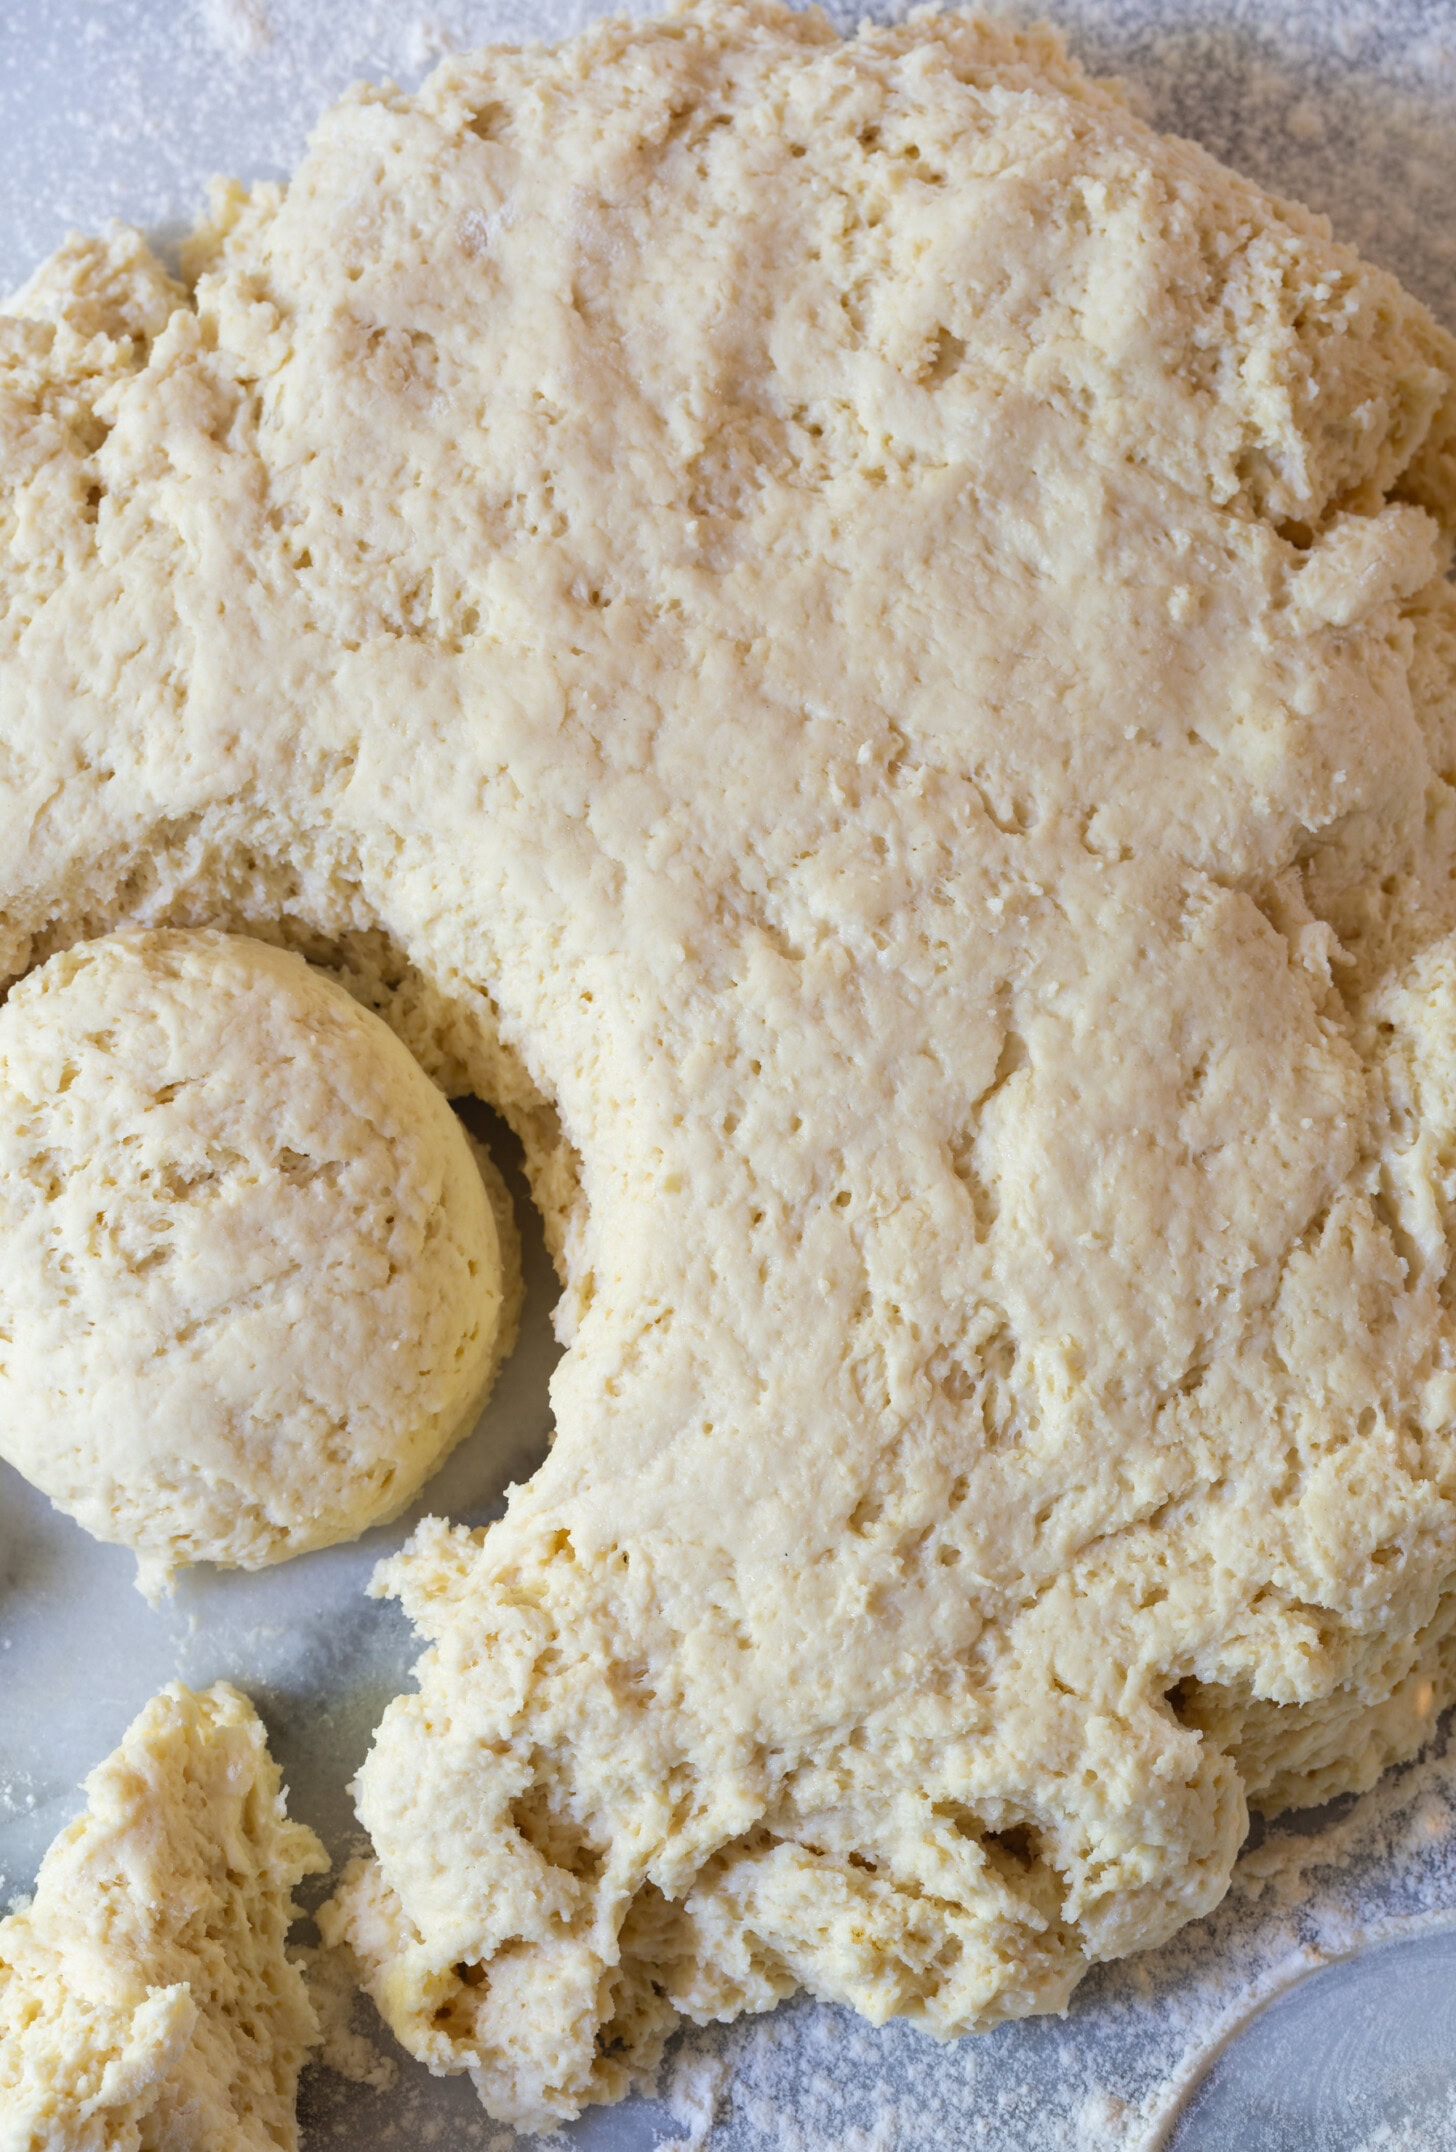
Shape the dough – Once the dough is ready, I scoop it up and throw it onto a surface, where I even it out. Then, I use a drinking glass (or a large biscuit cutter) to cut out 8 even biscuits.
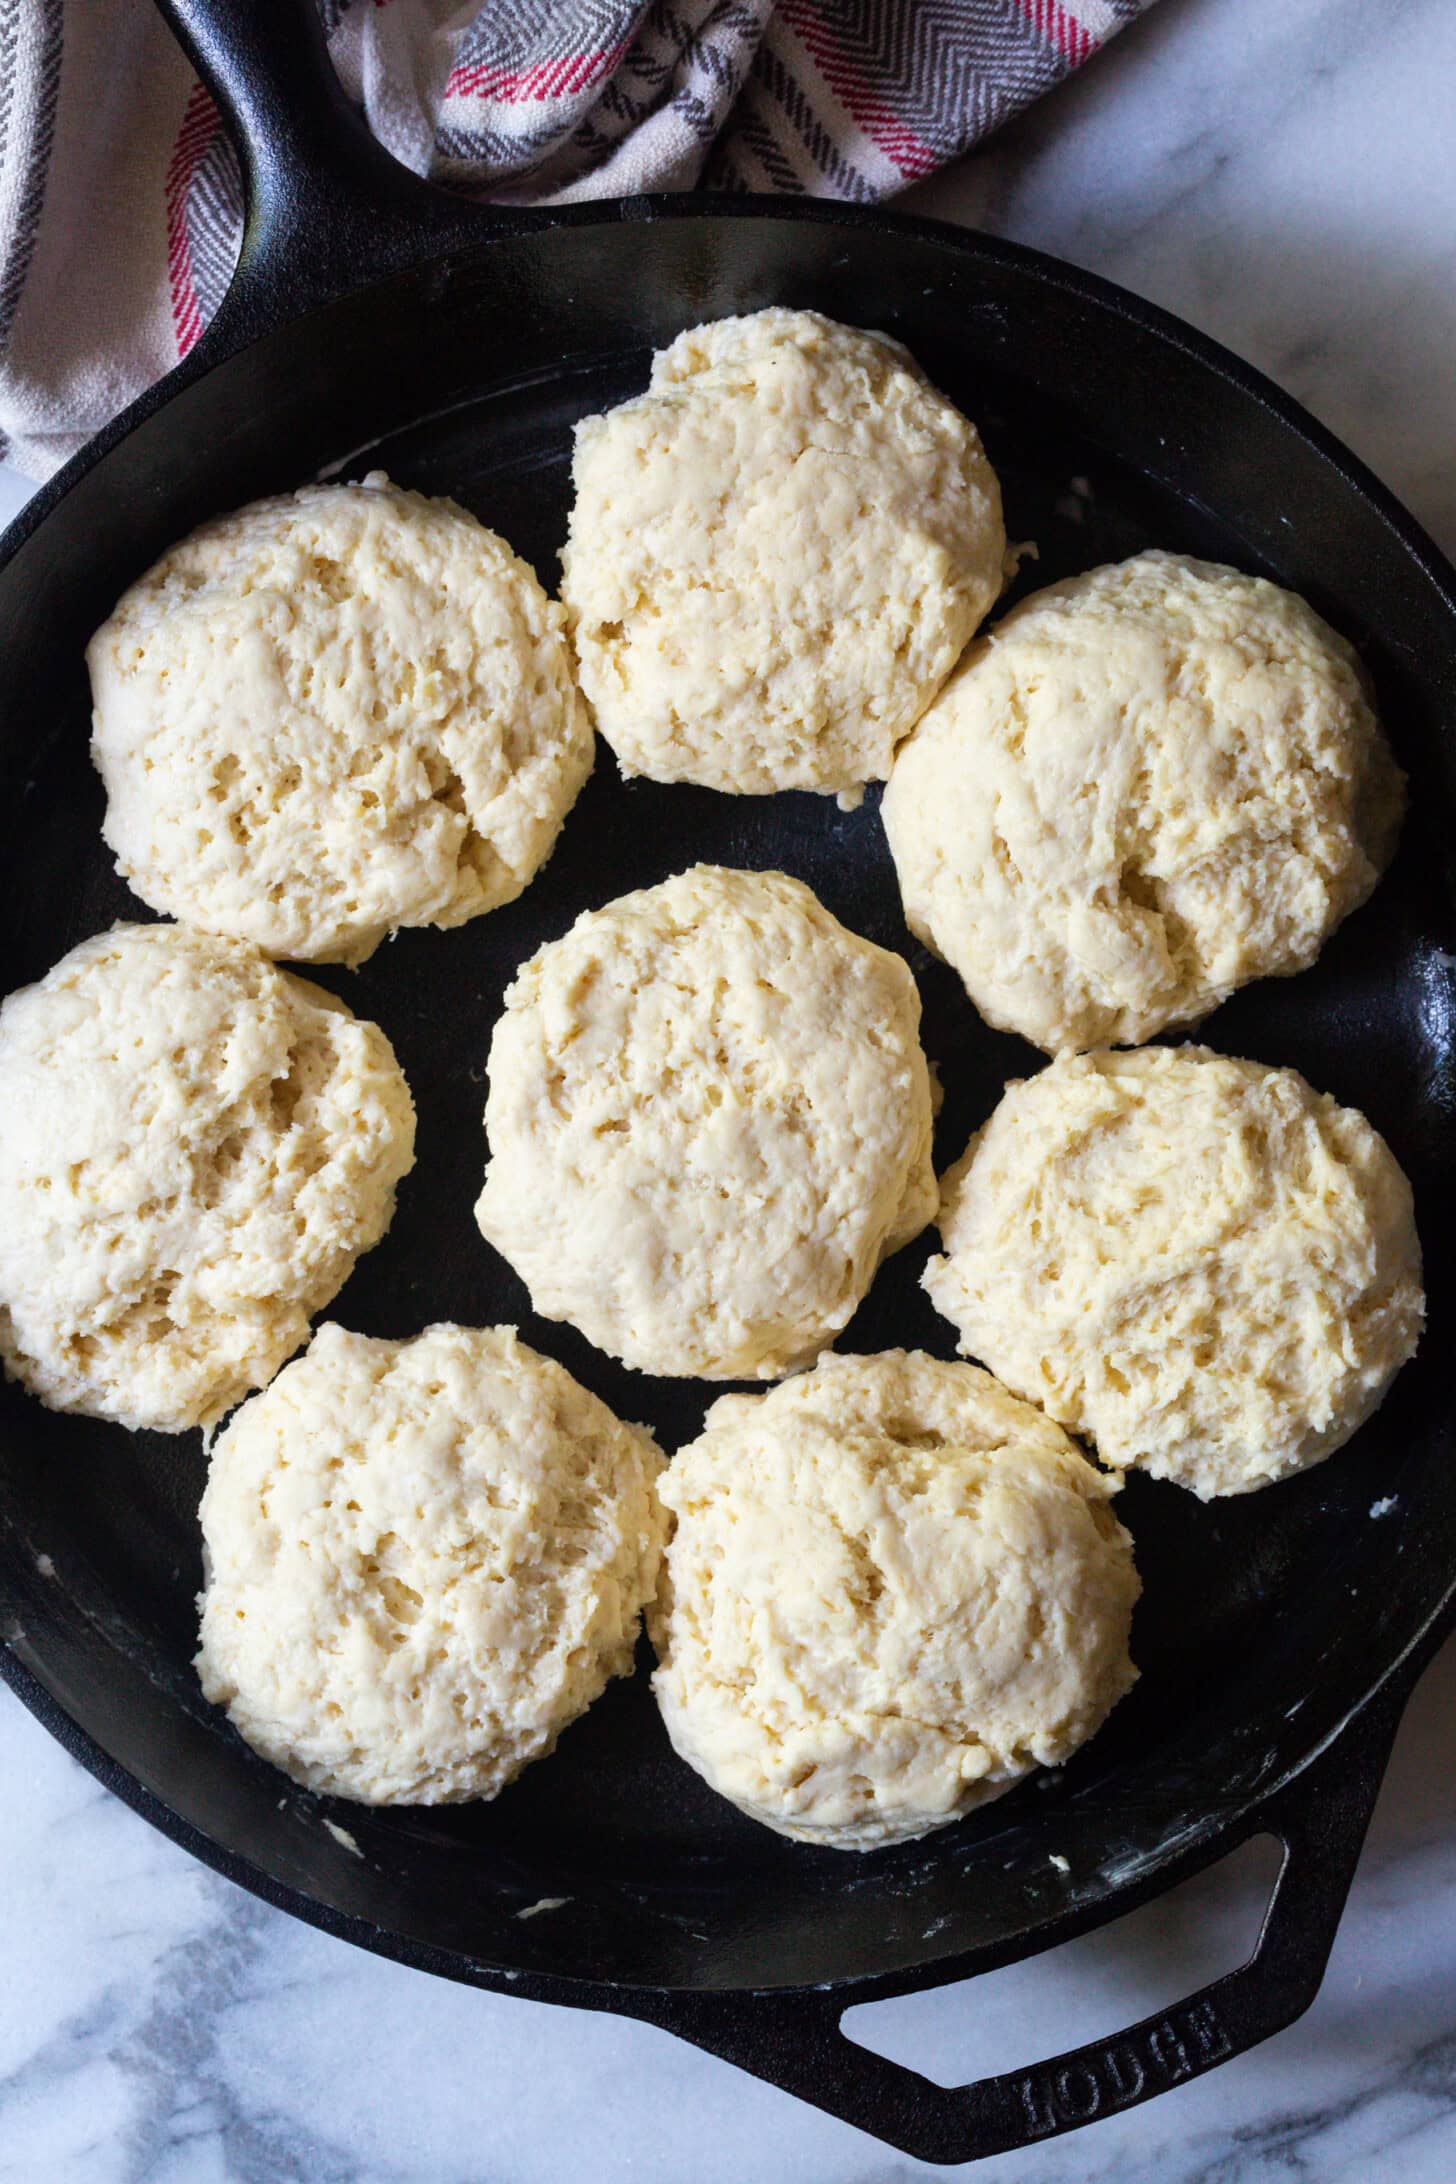
Into the skillet they go – Once the biscuits are shaped, I place them into the greased skillet and I brush the tops with melted butter so they form a golden crust when baked.
Bake – Let the biscuits bake for about 35 minutes until they’re golden brown. I know that they are ready when they have risen about an inch above the skillet.
Pull ’em apart – I use a spatula to break the biscuits apart before removing them from the skillet.

Expert Tips
Biscuits bake up with the best texture when:
- The flour is properly sifted
- The dough is not overmixed and/or overworked
- And the dough is cold going into the oven
Start with cold ingredients and work quickly to keep everything chilled. Be careful not to overmix the dough, whether you’re using a food processor or cutting it by hand. For the most tender biscuits, I try to cut them all out at once without reworking the scraps. If needed, I shape the biscuits and pop them in the refrigerator for a quick chill before I bake them, to make sure the dough stays nice and cold.
Recipe Variations
- Cheddar – Make a cheesy version of this biscuit by folding in some shredded cheddar.
- Bacon – I love to mix in crumbled bacon, especially in combination with cheddar. This makes the ultimate savory biscuit.
- Honey – Sweeten up the base of this biscuit recipe by stirring a drizzle of honey or extra sugar into the dough.
- Herbs – If you want to serve these biscuits with soup, add some fresh herbs like rosemary or chives to the dough before baking.

Serving Suggestions
There are so many ways to serve these biscuits that you will be making them ALL the time! You can eat them on their own with butter and honey, or your favorite jam. Here are some of my favorite ways to enjoy these:
- Paired with sausage gravy for amazing biscuits and gravy
- As a side to parmesan kale soup, chicken tortellini soup, or beef stew
- Or as a side with fried chicken or chicken fried steak, and cheesy grits
Frequently Asked Questions
Baking this recipe in a deep skillet serves two purposes. First, the sides of the skillet offer support so that the biscuits rise to ethereal heights. Second, the biscuits edges on the outside of the pan turn crispy, while the center edges are soft and feathery. That way you get a little crunch and a whole lot of tender goodness.
Biscuits will rise higher if you bake them in a fairly hot oven, at least 425 degrees. That way the butter melts and evaporates quickly, creating tall, flaky biscuits. It also helps to bake biscuits in a deep-dish cast-iron skillet because the sides will support the biscuits and encourage them to rise instead of spreading out!
You can make a double batch in a 9×13 or 10×15-inch baking dish and refrigerate it overnight if needed. Just make sure to cover them well with plastic while in the refrigerator!
Storing
Store any leftover biscuits in an airtight container at room temperature for up to 4 days! Reheat them in the microwave or pop them in a warm oven.
Looking for More Biscuit Recipes?


Help Me Spread the Word about this Fabulous Free Recipe! Sharing this recipe link on Pinterest and Facebook is super impactful, and I greatly appreciate it! Find the share buttons below the recipe form.
Cathead Biscuit Recipe
Video
Ingredients
- 4 1/2 cups all-purpose flour, well-sifted
- 1/4 cup granulated sugar
- 2 tablespoons baking powder
- 2 1/2 teaspoons sea salt
- 1 teaspoon baking soda
- 1/2 cup butter, divided (half cold, half melted)
- 1/3 cup butter-flavored vegetable shortening, cold
- 2 cups buttermilk, cold
Instructions
- Preheat the oven to 450 degrees F. Grease a 12-inch deep dish cast iron skillet and set aside.
- Sift the flour, then scoop and level. Place the flour, sugar, baking powder, baking soda, and salt in a food processor. Pulse to mix.
- Next, add the cold shortening and 1/4 cup cold butter. Pulse again until the fat is mixed into the flour creating a pebble texture. Continue pulsing as you add in the cold buttermilk.
- Once the dough is thoroughly mixed, stop pulsing. The dough should look wet, but even.
- Dump the dough out onto a floured work surface. Press it flat with your hands until it is smooth, in an even 2-inch thick disk. Use a drinking glass, or 3-inch cutter, to cut out 8 biscuits. If needed, cut out 7, then gather the dough and cut out the last biscuit.
- Place the biscuits in the skillet. Then brush the tops with the melted butter, and place in the oven immediately.
- Bake in the center of the oven until the tops are golden and the biscuits have risen at least 1 inch above the top of the skillet. Around 30-35 minutes. Make sure to move the oven racks, if need, to allow room for growth.
- Use a spatula or knife to separate the biscuits before lifting out of the pan.

I haven’t made these yet, but I can see already that this would be too much for my husband and myself. I could certainly give half away, but is it also possible to freeze them?
Do you heat your skillet in the oven to get the grease hot before putting the biscuits in to cook?
Hi Stephanie!
No, use a cold pan. You want the biscuit dough to be as cold as possible when it goes in the oven to make them flaky. :)
So my question is… is it 4 1/2 cups flour before sifting? Or 4 1/2 cups sifted flour?
Hi Mary,
Sift first, then measure and level the measuring cups. Happy Baking!
I have made these a few times now. I put my buttermilk in the freezer for about half an hour then return to the fridge. I keep my lard in the back of the fridge. I know! Lard, ugh! But these biscuits were likely made originally with lard, and once I tried it I was convinced. I used the wrong size cast iron skillet first, & it was for sure a jumble LOL! I think the CIS is very important, but it is heavy, & sometimes you have to do something else. 😊 Sides touching is important. If you want a sweeter biscuit, eliminate 1/2 tsp of salt & they almost taste like scones. SO GOOD no matter how you fix them!
These biscuits are SO awesome! My husband even prefers them over canned biscuits & Jiffy mix biscuits— and that’s a super big deal LOL
Best recipe yet, I just use a pastry cutter to add in butter and shortening and watch the time, less than 15 minutes when making 1/2 a batch and less than 30 doing a full. My go to for biscuits now
Followed the recipe to the letter. First time I made them, I didn’t use the dough blade in the food processor. Dough was too soggy to shape. Second time, I used the dough blade and the consistency of the dough was perfect. Since I didn’t have a large skillet, I placed them on a silicone baking mat in a 450 degree oven for 30 minutes. The biscuits were beautiful going in, but like hockey pucks coming out. Thirty minutes was about 15 minutes too long. Next time I make them, I’ll cook for only 15 minutes which is the time suggested in other recipes.
I’m not giving up because I can see (and taste) that, if I do it right, these will be amazing biscuits.
Hi Karen,
The reason they bake so long in the skillet is because they are all touching sides. It’s almost like baking one giant biscuit that can break apart into smaller biscuits. When they are separated the heat surrounds each biscuit and bakes them much faster. However, because this is a delicate biscuit dough (for fluffy biscuits) they sort of NEED to be touching to support each other as they rise. If you added flour to create firmer consistency, that might be why they were tough. Hope this helps!
This is a great if not the best biscuit recipe. I didn’t have shortning so just used shift buttet ;)
WOW! Just made them. Way to many for the two of us. Lol, hubby said taste like a pancake, fluffy! Just called a friend to come and get some. A keeper for company. Will cut in half next time.
P.S. I had homemade strawberry, blackberry and peach jam.
These biscuits were crazy good and your sausage gravy recipe was amazing and quite easy! I must add that I very nearly burned up my 11 cup Cuisinart food processor, when cutting in the butter and shortening and never really achieved the “pebble-like consistency” but I could tell my processor was getting hot, so I began adding the buttermilk and just as I was finishing, my processor overheated and shut down! I will make these again but might do that part in two waves. I will also cut the biscuits with a 2 or 2 and a half inch diameter because these are so HUGE! I know that’s why they call them cat head, but I could easily get a dozen great biscuits out of this recipe. Thank you – it was the best biscuits and gravy breakfast I have had in a long time! (and had the leftovers the next morning)
DO YOU USE SALTED OR UNSALTED BUTTER?
I followed the recipe exactly- including the sifting of the flour. I know it says dough will be wet, but mine was SO wet it was completely unworkable. Just a pile of wet grossness. I had to add so much flour just to get them to a workable texture to even make “biscuits”
:( :( I have no idea where it went wrong but boy that was a f*^!ing mess!! Lol!
Update!! Even after having to add a tonnn of flour and my biscuits just being a gross mess- I threw them in the oven anyway and prayed they’d not be like hockey pucks…
They came out amazing! 🥳🤷♀️ By some miracle!