French Silk Pie Recipe

When my chocolate cravings kick, this decadent and nostalgic French silk pie hits that sweet tooth spot. Every bite is filled with super silky and light chocolate flavors that pair perfectly with that airy homemade whipped cream topping.

French silk pie has been my favorite dessert since childhood. Listen, I always thought my mom was the best cook in the entire world, but when it came to pies, no one made them quite like our neighborhood Tulsa cafe, Tippin’s. And this place makes a chocolate pie that tastes just like French hot chocolate. Every holiday season, I would obsess over the drool-worthy French silk pies they displayed in their window, and I would sneakily try to come up with excuses as to why we should order our pies from Tippin’s instead of making them at home. Ever since then, I’ve had a lifelong love affair with chocolate pie, and whenever I see it on a menu, I must order a slice to see how it compares. Over the years, I’ve tried several classic recipes at home. Honestly, they’ve all been good, but none could stand up to my first love. Until now.


Sommer’s Recipe Highlights
A Nostalgic Favorite – This creamy dessert is rich, velvety, and unapologetically chocolatey. More importantly, with every bite, I’m instantly transported back to my childhood favorite, Tippin’s.
Easy to Make – Even though this pie looks decadent — and trust me, it is — it’s surprisingly simple to make. All you have to do is mix, cool, and ta-da…the BEST chocolate pie is ready!
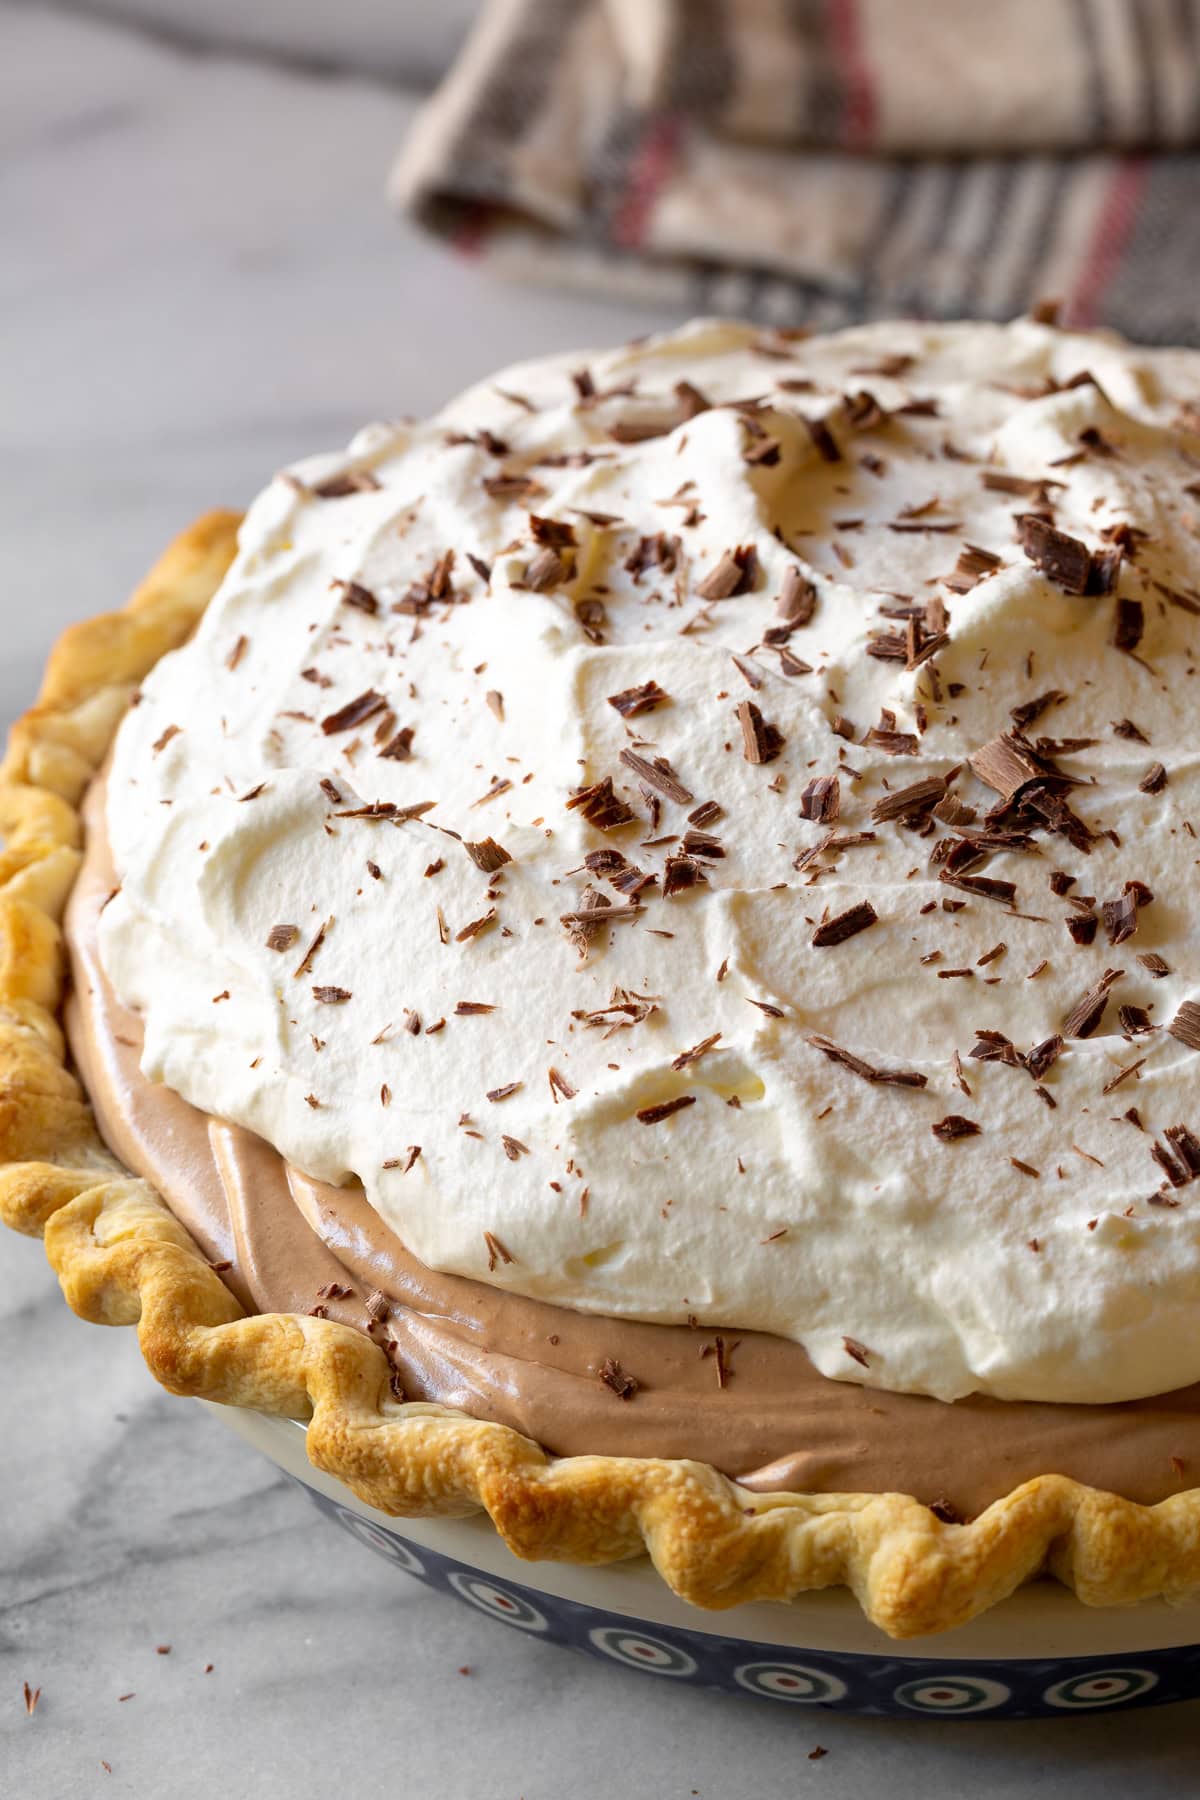
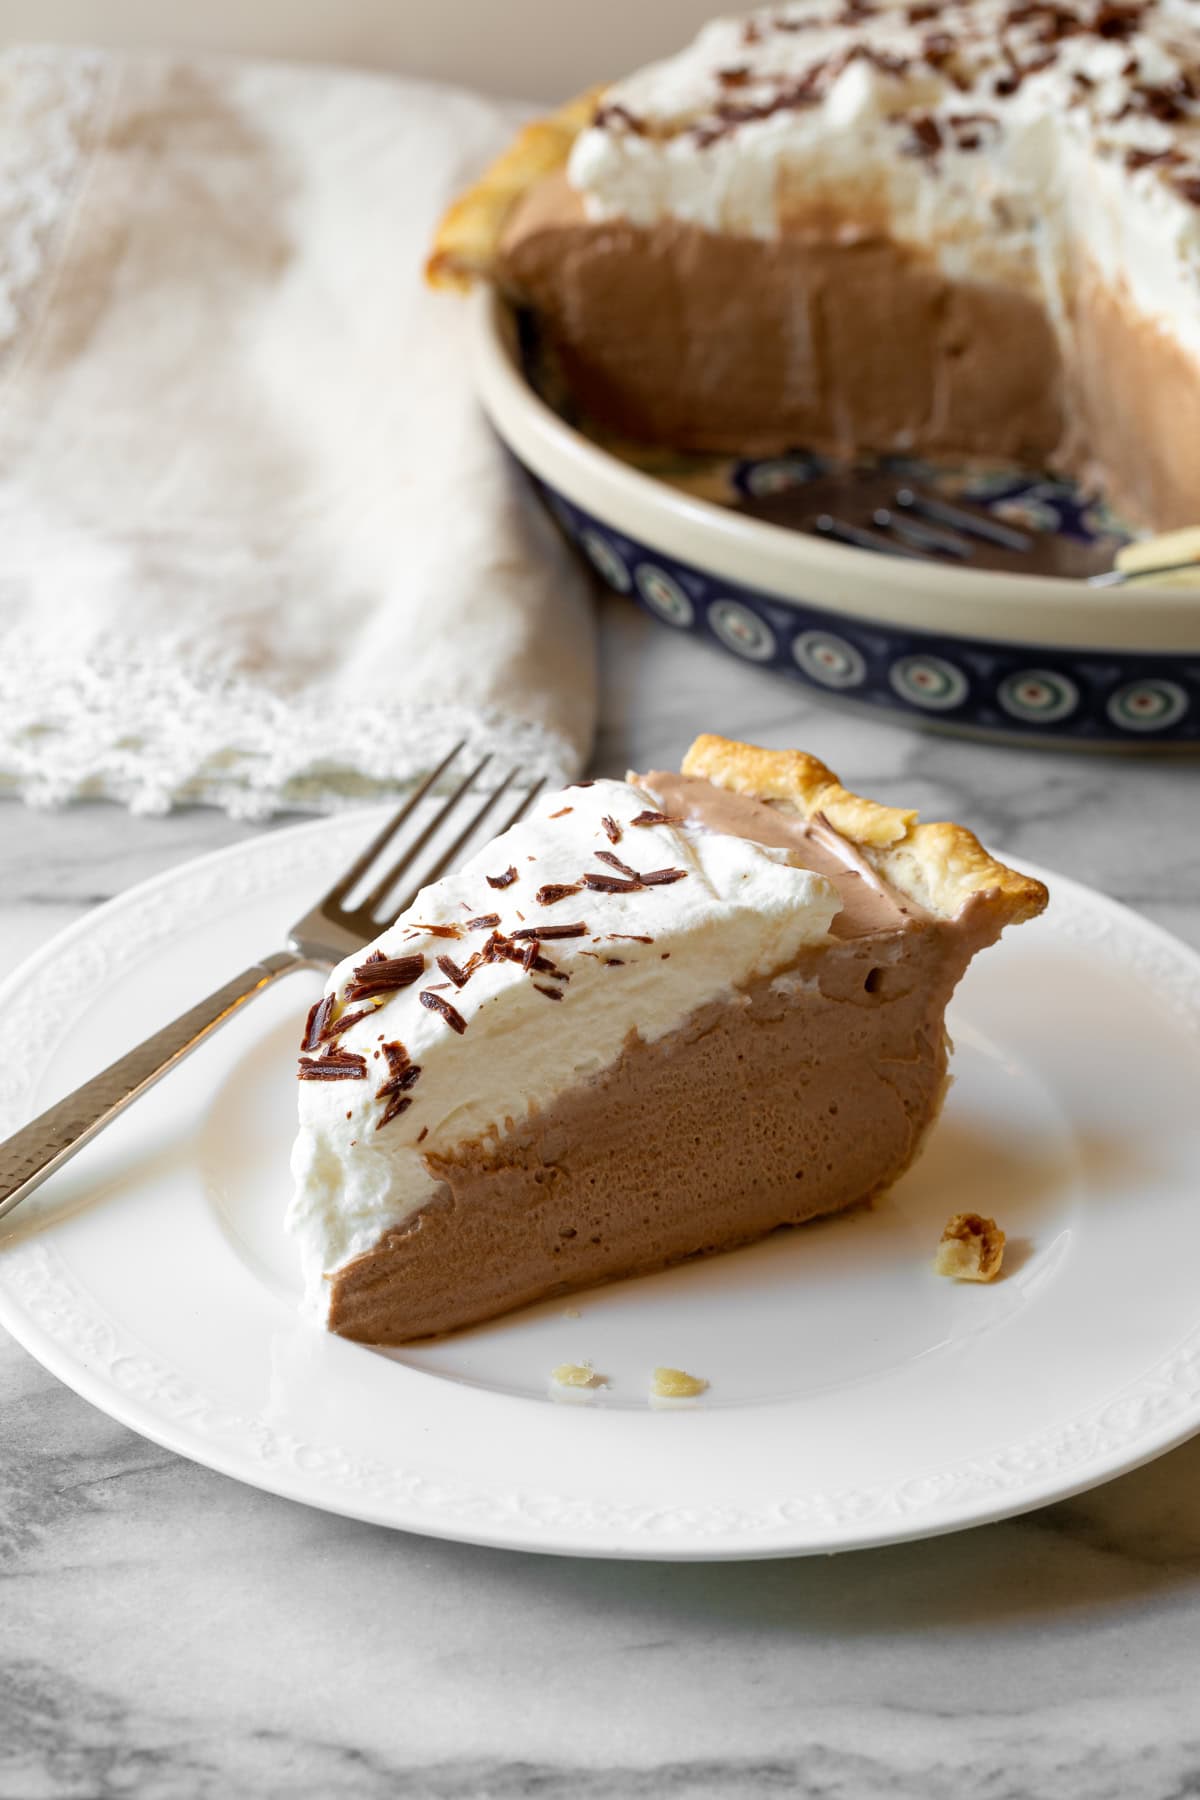
Luxurious Textures – Honestly, I’m pretty obsessed when it comes to how luxuriously creamy this dish is. You’ve got that crunchy crust topped with a silky smooth filling, which is then layered with an airy homemade whipped topping and garnished with crunchy chocolate shavings. YUM!
Make-Ahead Perfection – This show-stopping tart is perfect for parties, and it’s my go-to when I want to impress my guests. I make it the day before, and when I’m ready to serve, my knife slices beautifully through the chilled pie.

Key Ingredients and Tips
- Pie crust – I love to use my savory pie crust recipe, but of course, whenever I’m short on time, I go for a simple unbaked store-bought crust.
- Bittersweet chocolate – Meet the star of the show! I use a good-quality chocolate here, and whatever extras I have leftover, I use as shavings.
- Heavy cream – To get that signature fluffy texture, I use a full-fat heavy cream. I pour half of it into the chocolate filling, and I use the other half to make that rich whipped cream.
- Butter – There’s no way around this, ladies and gentlemen, because that softened, unsalted butter is the secret to getting this pie’s silky and rich texture, along with that sheen.
- Granulated sugar – Obviously, the chocolate is sweet, but to amp it up, you’re gonna need some old-school granulated white sugar.
How To Make
Find the full recipe with ingredient proportions, detailed instructions, and a video tutorial in the printable form at the bottom of the post.
Prep the Crust. I start by grabbing a 9-inch pie pan and topping it with the room temperature pie crust. After I crimp the edges, I weigh down the crust with whatever I have on hand — whether that’s dried beans or ceramic pie weights. And finally, I bake the crust until the edges are golden and beautiful!

Melt the Chocolate. Next, I melt the bittersweet chocolate in a double boiler – slow and steady wins the race! Seriously, though, don’t melt this on high because the chocolate will burn.
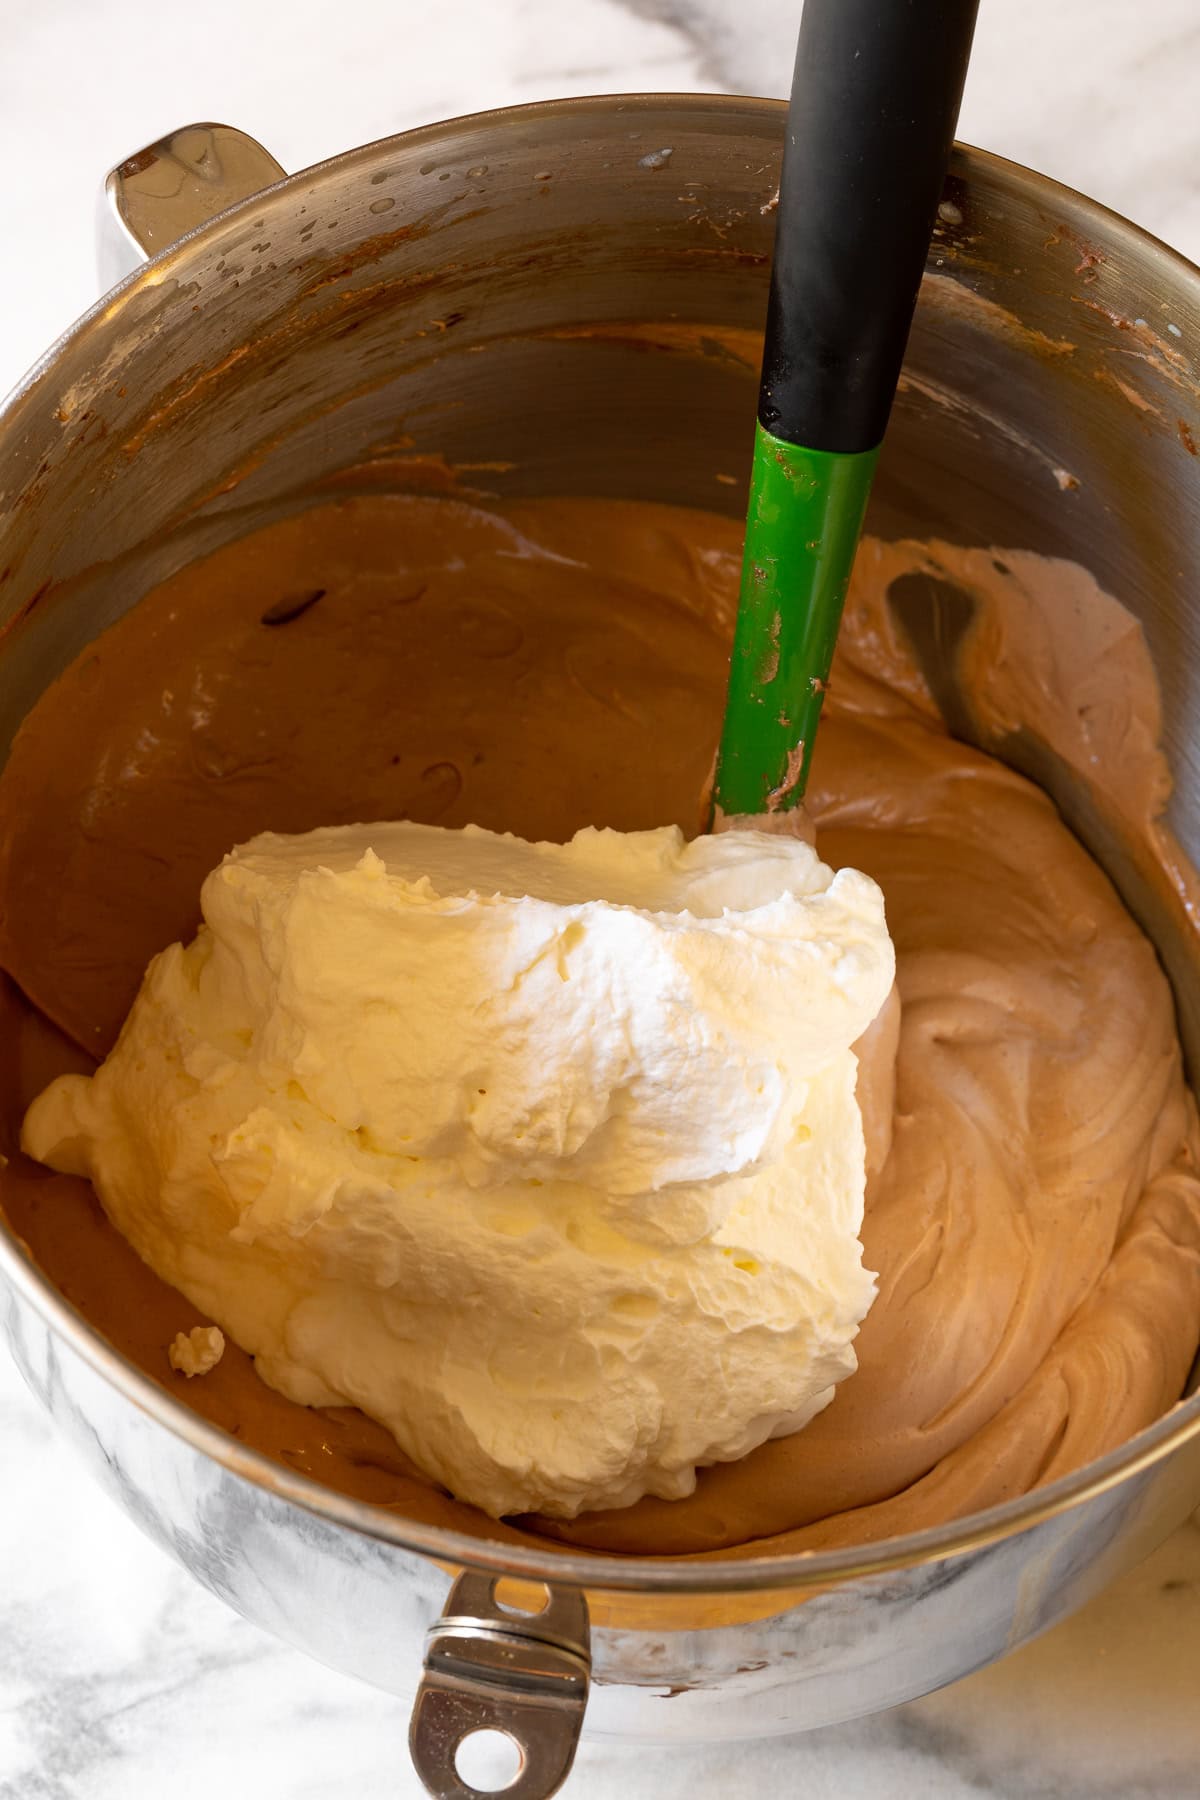
Make the Whipped Cream. The key to making this filling is using an electric mixer, because, let me tell you, it’s exhausting to whip this by hand! So, I pour in the heavy cream and the sugar, and mix on high speed until I start to see stiff peaks form. Then, I move the whipped cream into another bowl until I’m ready to use it.
Mix the Chocolate Filling. In that same mixing bowl, I beat the butter and remaining sugar on high until it is light and fluffy. I pour in the cooled melted chocolate and sloooowly, I mix on low, adding in the vanilla and salt. Once that’s ready, I add in one egg at a time and beat on high until everything is nice and silky! Then I fold in about a third of that prepped whipped cream using a spatula.
Pour the Filling. Usually, I can’t resist the filling — so by the time I reach this step, I’ve had a few spoonfuls of this magical chocolatey-ness. And then I pour the rest of it over the cooled pie crust, and top that off with a layer of whipped cream.
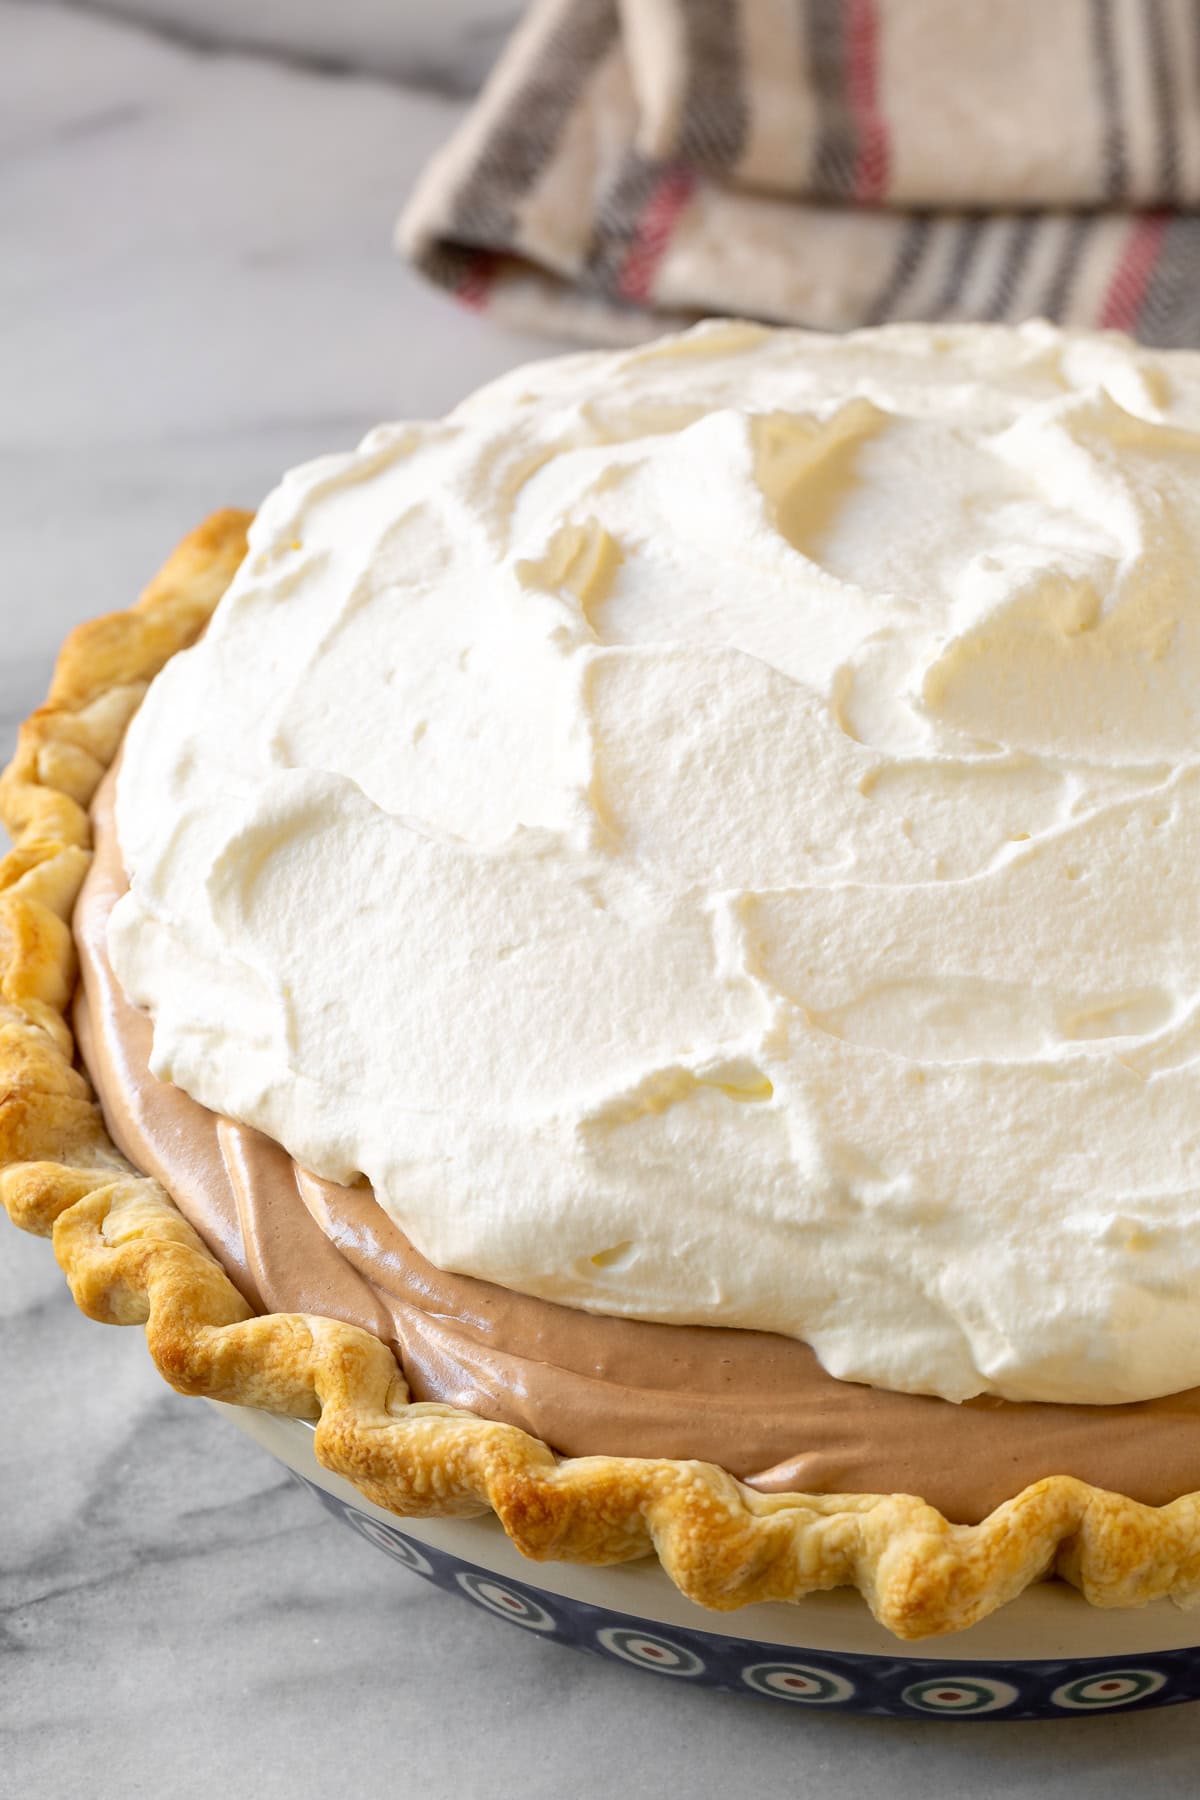
Chill. Before popping the pie into the refrigerator, I top it off with chocolate curls, and I chill it for about 3 hours until the pie is firm.
Expert Tips
If you’re having worries about the thickness of the filling make sure you beat the mixture a little longer or perhaps chill the pie a little longer than usual.
Confused about the amount of time to mix everything? It’s 3 minutes per egg X 4 eggs. So 12 minutes for the eggs, plus the 3 minutes for the butter. That’s 15 minutes total.
Recipe Variations
- Crust alternatives – Instead of a classic pie crust, use an Oreo crust or a graham cracker crust for an even sweeter version of this pie.
- Garnishes – I LOVE chocolate shavings, but you can seriously go wild with the toppings. Try mini chocolate chips, toasted coconut, or crumbled almonds.
- Flavored whipped cream – I definitely think that a classic whipped cream is the best option for this pie, but if you want to jujj it up, add a small amount of extracts like rum, coffee, or coconut to the whipped cream.

Serving Suggestions
I love to keep this creamy chocolate pie classic, but you can serve it with some of the following:
- Fresh berries
- Caramel macchiato
- Homemade vanilla ice cream
- Crushed candy canes for a holiday vibe

Frequently Asked Questions
Yes you can. Although, I do love to make fresh whipped cream, so that I know exactly what is in my recipe. This also makes the ingredients more cut-and-dry when serving desserts to friends with food allergies.
You can use any sugar alternative that is measured in a 1-to-1 ratio with sugar.
You can, but I would suggest sprinkling them on top rather than mixing them into the filling. This pie is famous for its smooth texture, so it would be a shame to change its defining quality.
Storing
Cover your pie loosely with plastic wrap or aluminum foil, and it can stay in your fridge for up to a week. Wrap your chocolate pie tightly in plastic wrap and freeze for up to 3 months. When ready to serve, let the pie thaw in the refrigerator for 24 hours.
Help Me Spread the Word about this Fabulous Free Recipe! Sharing this recipe link on Pinterest and Facebook is super impactful, and I greatly appreciate it! Find the share buttons below the recipe form.

More Pie Recipes to Try


French Silk Pie Recipe
Video
Ingredients
- 1 unbaked pie crust, store-bought or homemade
- 6 ounces bittersweet chocolate + extra for shavings
- 2 1/2 cups heavy cream
- 1 cup unsalted butter, softened (2 sticks)
- 1 cup granulated sugar, divided
- 1 1/2 teaspoons vanilla extract
- 1/2 teaspoon salt
- 4 large pasteurized eggs
Instructions
- Preheat the oven to 375 degrees F. Place the pie crust in a large 9-inch pie pan. Crimp the edges. Then place a piece of parchment paper over the pie crust and fill the parchment with dried beans or ceramic pie weights. Bake for 15-20 minutes until the edges are golden. Lift the parchment with the weights out of the pie crust, and allow the crust to cool completely.
- Meanwhile, melt 6 ounces of chocolate in a double boiler. The moment the chocolate is melted remove from heat and cool to room temperature.
- Place the heavy cream in the bowl of an electric mixer with 1/4 cup sugar. Using a whip attachment, whip on high until the cream is whipped into firm peaks. Move the whipped cream into another bowl and refrigerate until ready to use.
- Using the same mixing bowl and a paddle attachment, beat the butter and 3/4 cup sugar on high until light and fluffy, at least 3 minutes. Turn on low and slowly add the cooled chocolate to the butter mixture, followed by the vanilla and salt. Scrape the mixing bowl and beat again until smooth.
- Turn the mixer on high. One at a time, add an egg and let the mixer beat the egg for at least 3 minutes, before adding the next egg. This ensures a super silky texture. After 12 minutes of beating on high, turn the mixer off. Gently fold 1/3 of the whipped cream into the mixture using a spatula. Fold until smooth.
- Scoop the chocolate mixture into the cooled pie crust. Top with the remaining whipped cream. Then shave chocolate over the top with a veggie peeler. Chill for at least 3 hours, until the chocolate filling is firm.

Absolutely delicious! I will be making this again!
This has probably always been my favorite pie. Even above apple. I love that I can now make it a home. Thanks for the great recipe!
Here’s another idea: my mom always makes French Silk pie with a toasted coconut pie shell. Delicious, if you like coconut.
Looks delish!! Where do you buy pasteurized eggs? Thanks~
Hi Gail!
You can find them at any grocery store. :)
Made this for Thanksgiving. It was a hit and is now on the requested list! Thanks for such a fantastic recipe!
I am looking forward to making this for Thanksgiving. By the looks of the depth of this pie did you use a deep dish pie plate or regular pie plate? Thank you.
Hi Jennifer,
I always use deeper pie pans, so if you are using a regular pan you can either pile it up, or make two shallow pies.
I live in Broken Arrow. We loved Tippins in Tulsa!! French’s Silk was our favorite pie! I can’t wait to try this recipe. Tippin’s still sells some of their pies in Reasors’s grocery store!
Hi Pam,
I went to Broken Arrow high school. :)
I miss those pies so much!!
This pie recipe is amazing! My husband said restaurant quality good lol ! It was sooo yummy! I love your stories and thoughts and I really like how you explain or breakdown the ingredients of each recipe. I have been making all of your cream pies!! Your recipes give me a lot of confidence and they have made me feel like I can actually make something wonderful to serve to my little family!! thank you for that! :)
It really is the best pie!
I am going to make this for Christmas but will use chopped almond roca instead of the shaved chocolate. Thank you for the recipe!.
Are the eggs absolutely necessary? I don’t like using raw eggs. Or can I use a substitute?
Hi Eileen,
Yes, I’m sorry to say the eggs MAKE this recipe what it is. The silky texture comes directly from the eggs. However, you can make a “chocolate ganache” pie filling, by melting the chocolate, allowing it to cool to room temperature, then beating it into cold heavy cream. The filling will resemble the inside of a whipped chocolate truffle. I would go equal parts chocolate and cream… Maybe 8-10 ounces of each, depending on the depth of your pie pan.
Made this pie for Thanksgiving. It was a huge hit. Got rave reviews and request to make again for Christmas. So good and not really that tough to make. I definitely recommend making it a day ahead… ITV set up perfectly. Thanks for such a great recipe!