Baked French Fries
Most people think you need a deep fryer to make truly crispy french fries. I used to think so too, until I perfected my oven baked french fries recipe. My simple soaking-and-baking method creates fries that are golden and crisp outside, fluffy inside, and far less messy than traditional frying.
I’m very picky about my french fries. They absolutely must be crisp on the outside but not too crunchy, pillowy soft on the inside, and never oily. Which is one of the many reasons I prefer to make restaurant-quality fries at home, where I have total control over the textures and flavor. I believe there’s no reason to have boring ‘ol drive-thru fries with a ton of salt (and other questionable ingredients) when you can make a hot basket of wholesome homemade fries with any choice of spices you can imagine, like the best fry seasoning, or any combination of your favorite spices. Admittedly, making fries exactly like your favorite fast-casual restaurant does usually require deep frying in oil… Which isn’t ideal for including in your regular meal rotation. So if your family also loves homemade fries, but you hate to deep fry more than every-now-and-then, I’ve got a fabulous baked french fry recipe for you today. These oven fries are lower in fat with just as much crunch and flavor!
Table of Contents

Sommer’s Recipe Highlights
Completely Uncomplicated – The idea of making restaurant fries at home might seem a bit intimidating. I’m here to tell you to forget your fears and guide you through my simple and very easy instructions: Slice and soak the taters in cold water, drain them well, season, and bake. You’ve got this!
Lighter Fries – Oven baking doesn’t require a vat of high-calorie peanut oil, like making my delicious (but definitely unhealthy) deep fried french fry recipe. Instead, baked french fried potatoes are tossed with a little bit of olive oil before cooking. But again, while these fries have fewer calories, I promise they still have just as much flavor!
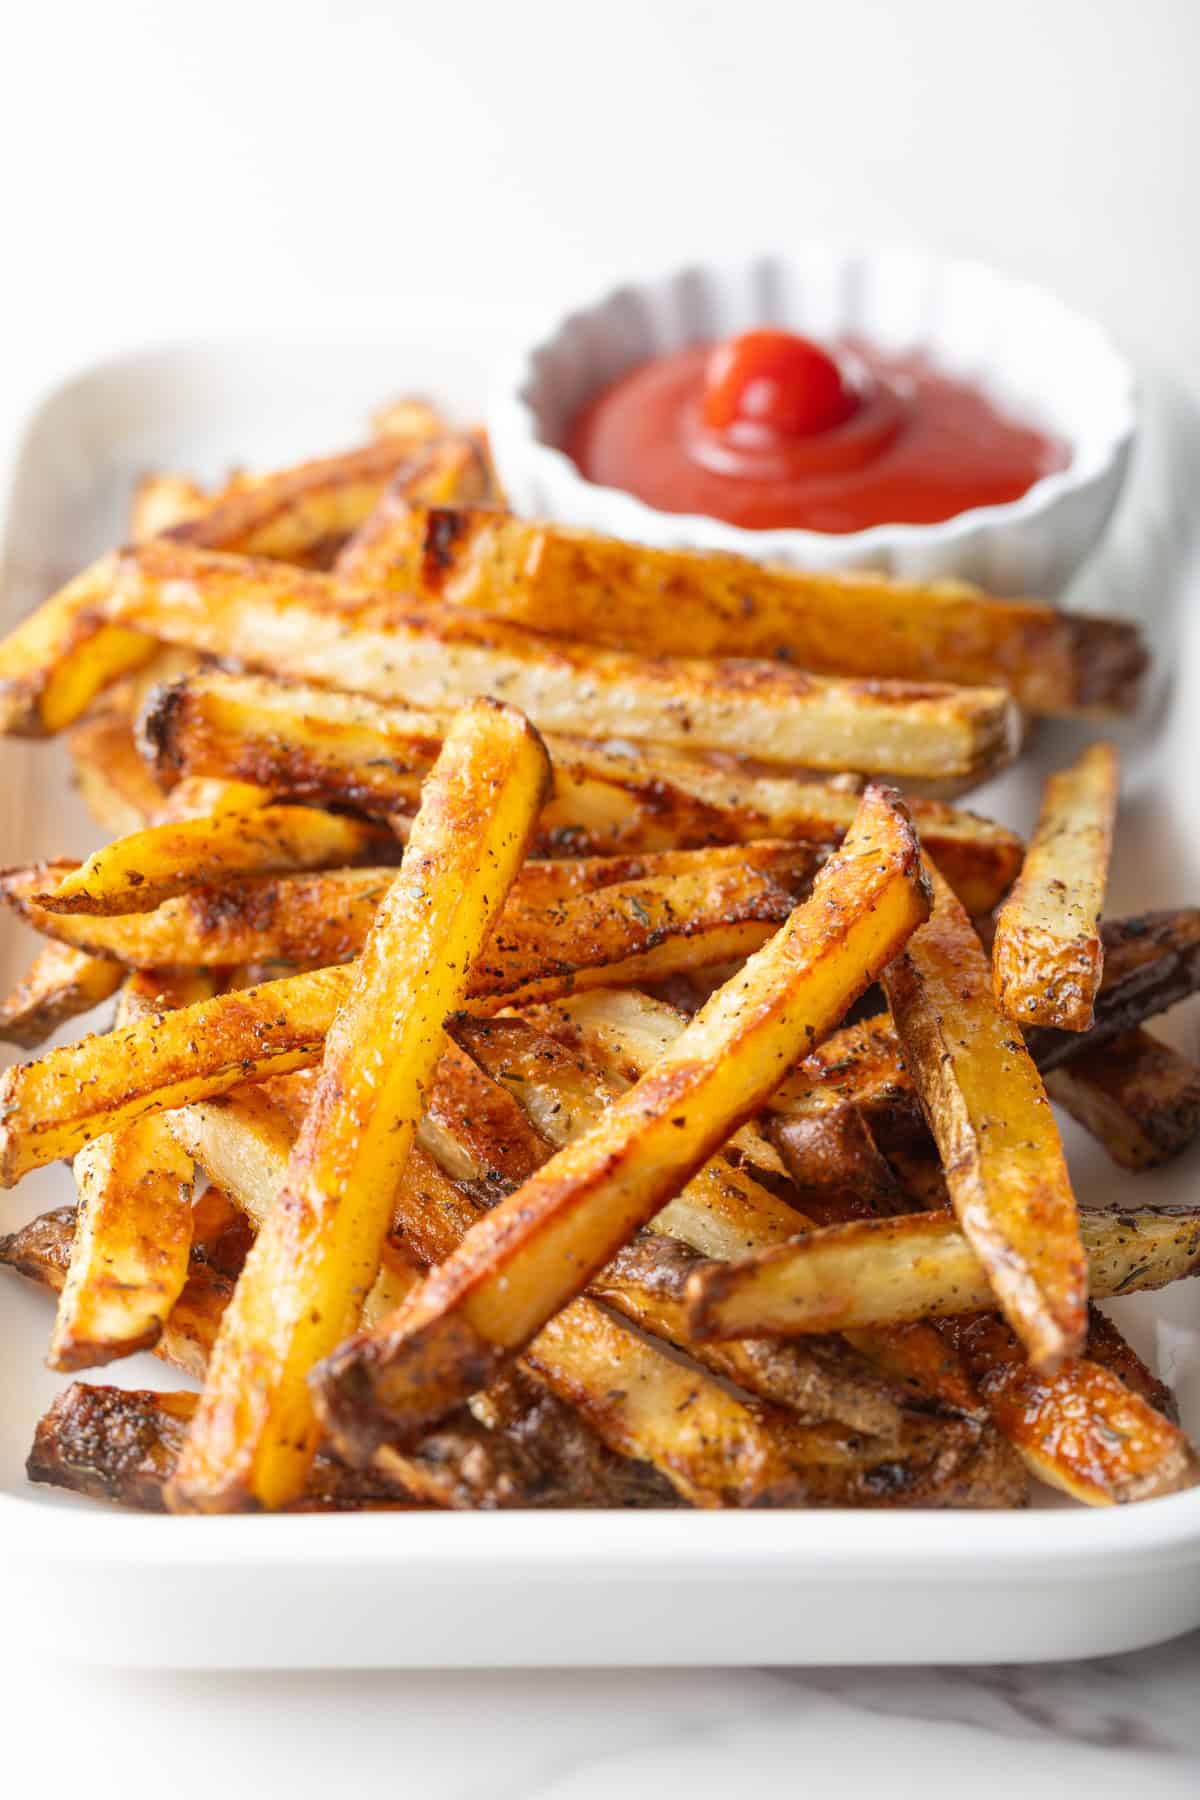
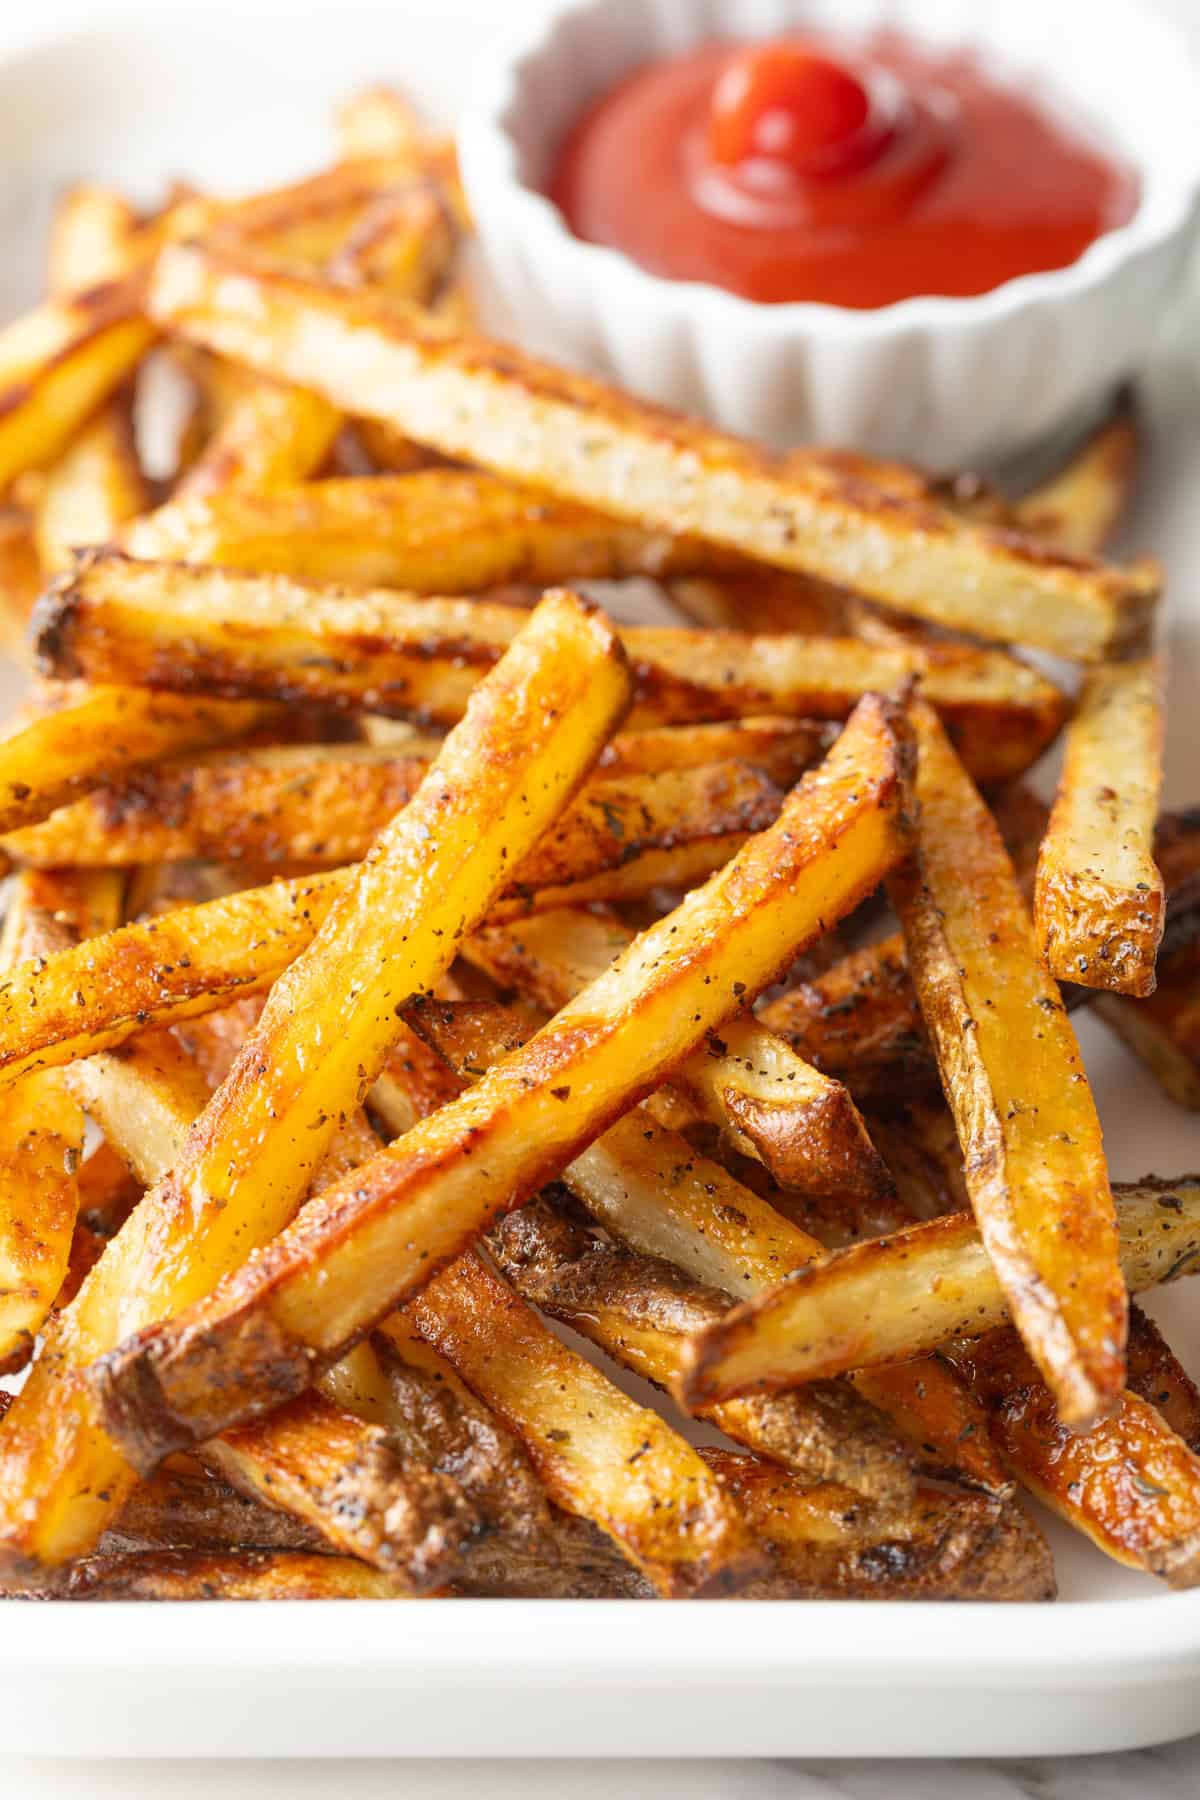
Restaurant Style, But Better – Not only are baked fries lighter(ish), they are the right balance of snappy and soft, without a trace of sogginess. My step-by-step recipe lets you have the consistent quality you want every time, but without a bunch of added preservatives and whatnot that make restaurant fries taste the same whenever and wherever you order them. AND you don’t have to pay more for any extra dipping sauces on the side.
Key Ingredients and Tips
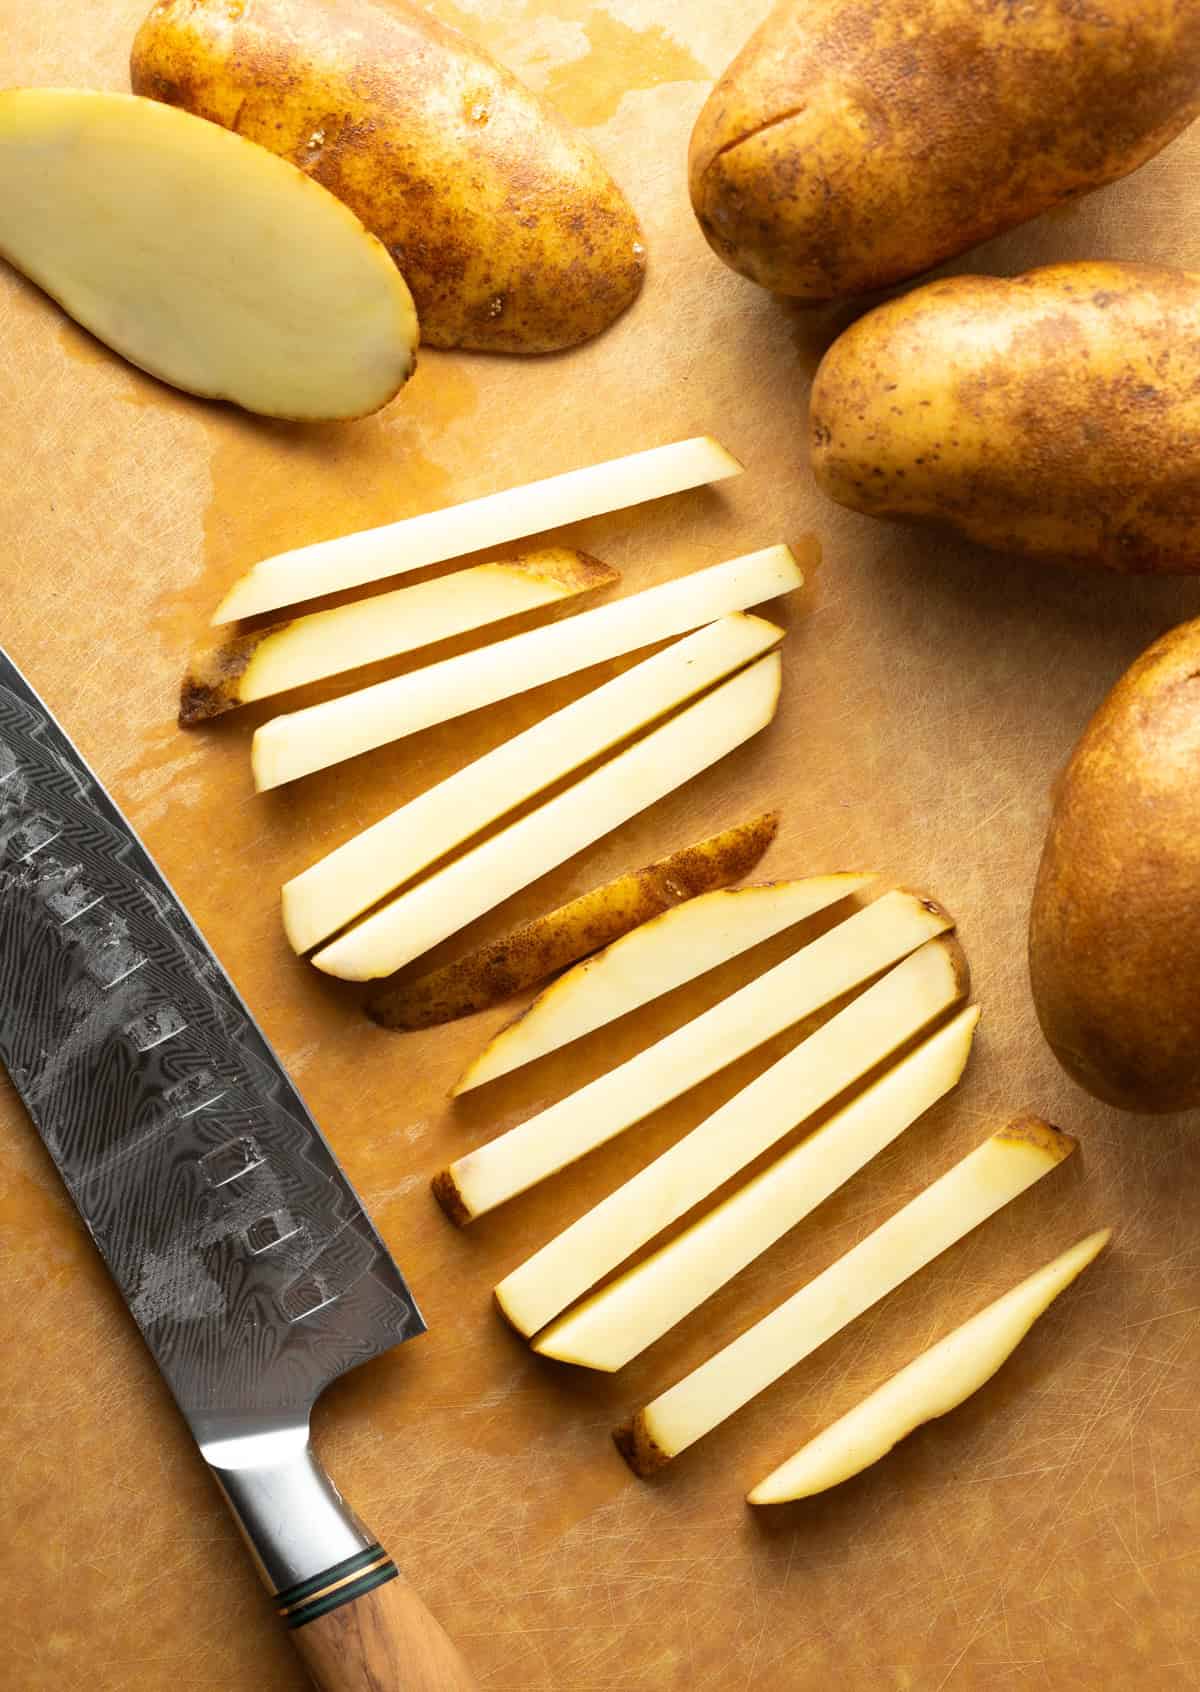
- Potatoes – Russet potatoes are the best for making fries. Why? They are large and easy to slice, have a mild taste that lets the seasoning shine, and stay sturdy even when cooked at a high heat. I like to leave the skins on for the flavor, and I love how they look more rustic. But you can peel the potatoes first, if you prefer!
- Olive oil – This is my favorite oil for baking. However, you can use another high-heat, neutral-flavored cooking oil you prefer. Canola oil, avocado oil, and vegetable oil are all good options.
- Seasonings – In this recipe, I’m using a combination of Italian seasoning (try my homemade Italian seasoning blend!), salt, pepper, and garlic powder. But again, I also am a huge fan of my homemade Cajun fries seasoning, which has a bit of a delightful spicy kick!
How to Make
Find the full ingredient proportions, detailed instructions, storage tips, and a video tutorial in the printable form at the bottom of the post.
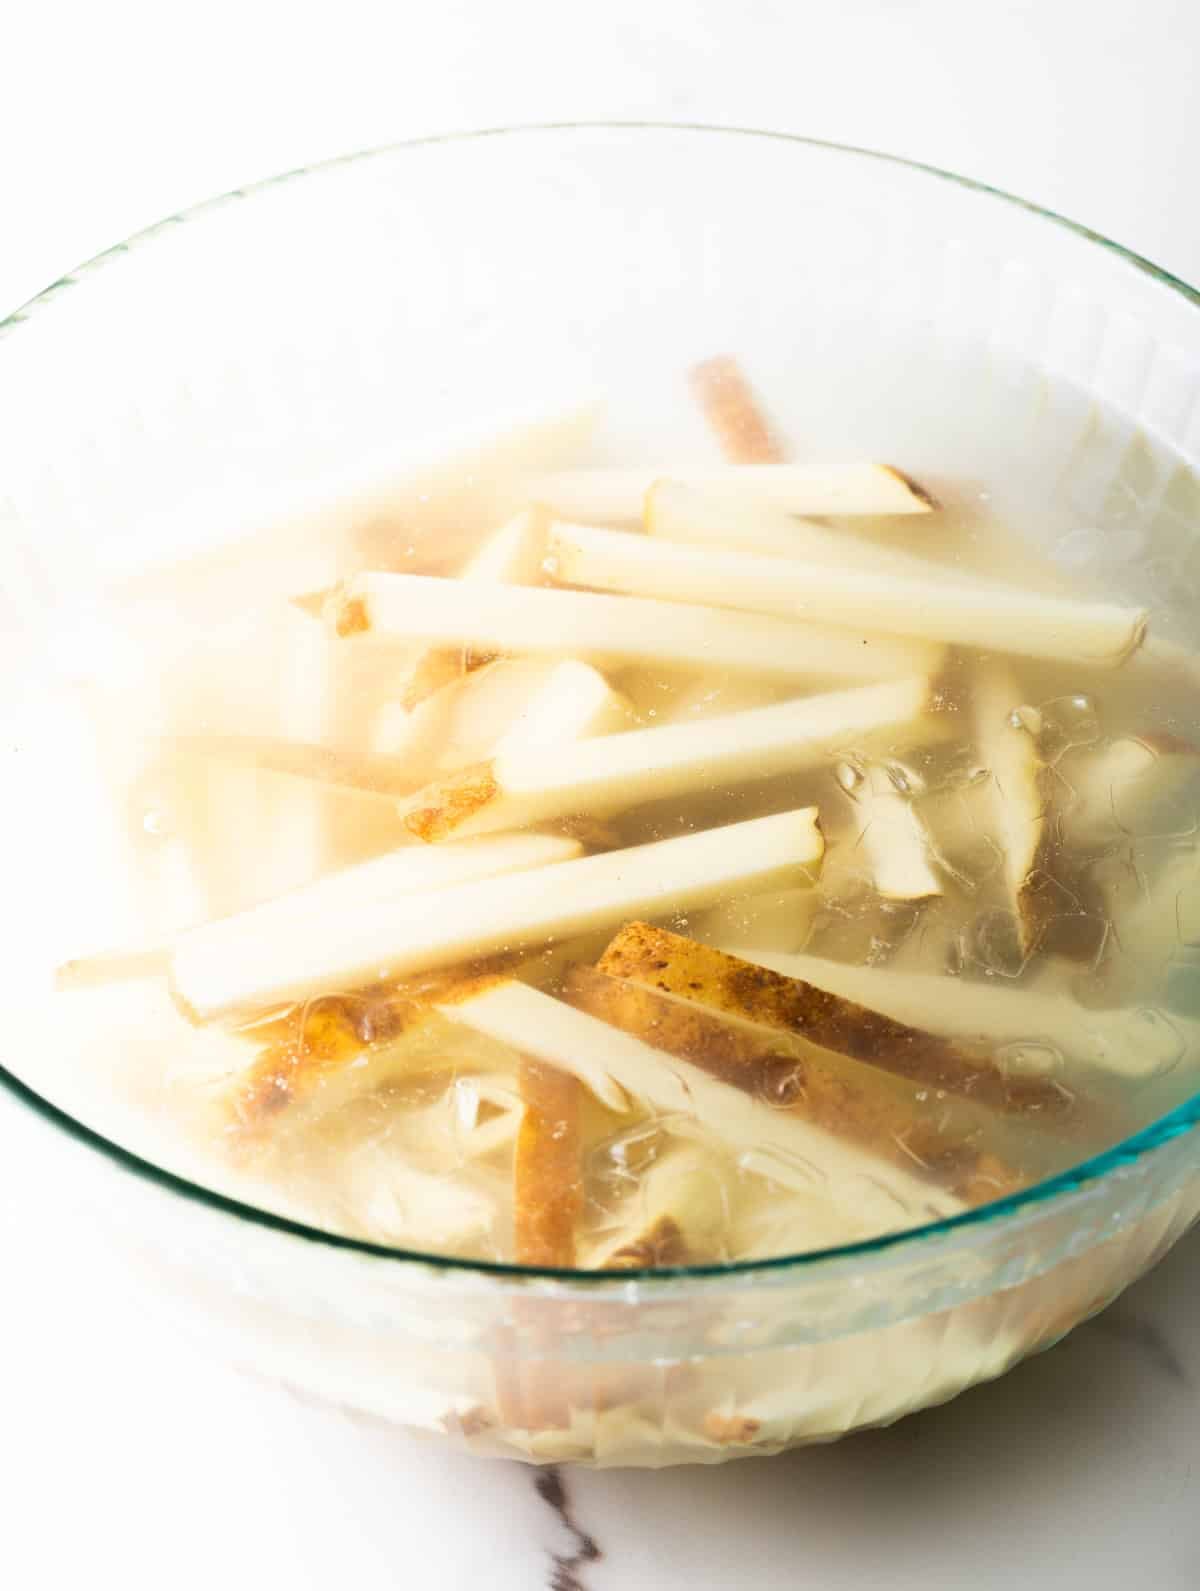
Prep – I start by filling a large bowl with ice and water, and set it aside. Then I scrub the russet potatoes, and use a sharp, sturdy knife to slice them lengthwise into thin-ish 1/3 to 1/2-inch strips. They’ll start to brown almost immediately, so drop the potato pieces in the ice water quickly as you slice. (I also do this with my oven baked potato wedges.)
Soak – Once all of the potato sticks are soaking in the ice bath, I set a timer for at least 30 minutes. But you can soak them for 2-3 hours if needed. No rush! This is the perfect time to read a chapter of that book or watch an episode or two from a series you’ve been binge-watching.
Then, when I’m ready to get baking, I preheat the oven to 400 degrees (or 375 if you’re using a convection oven).
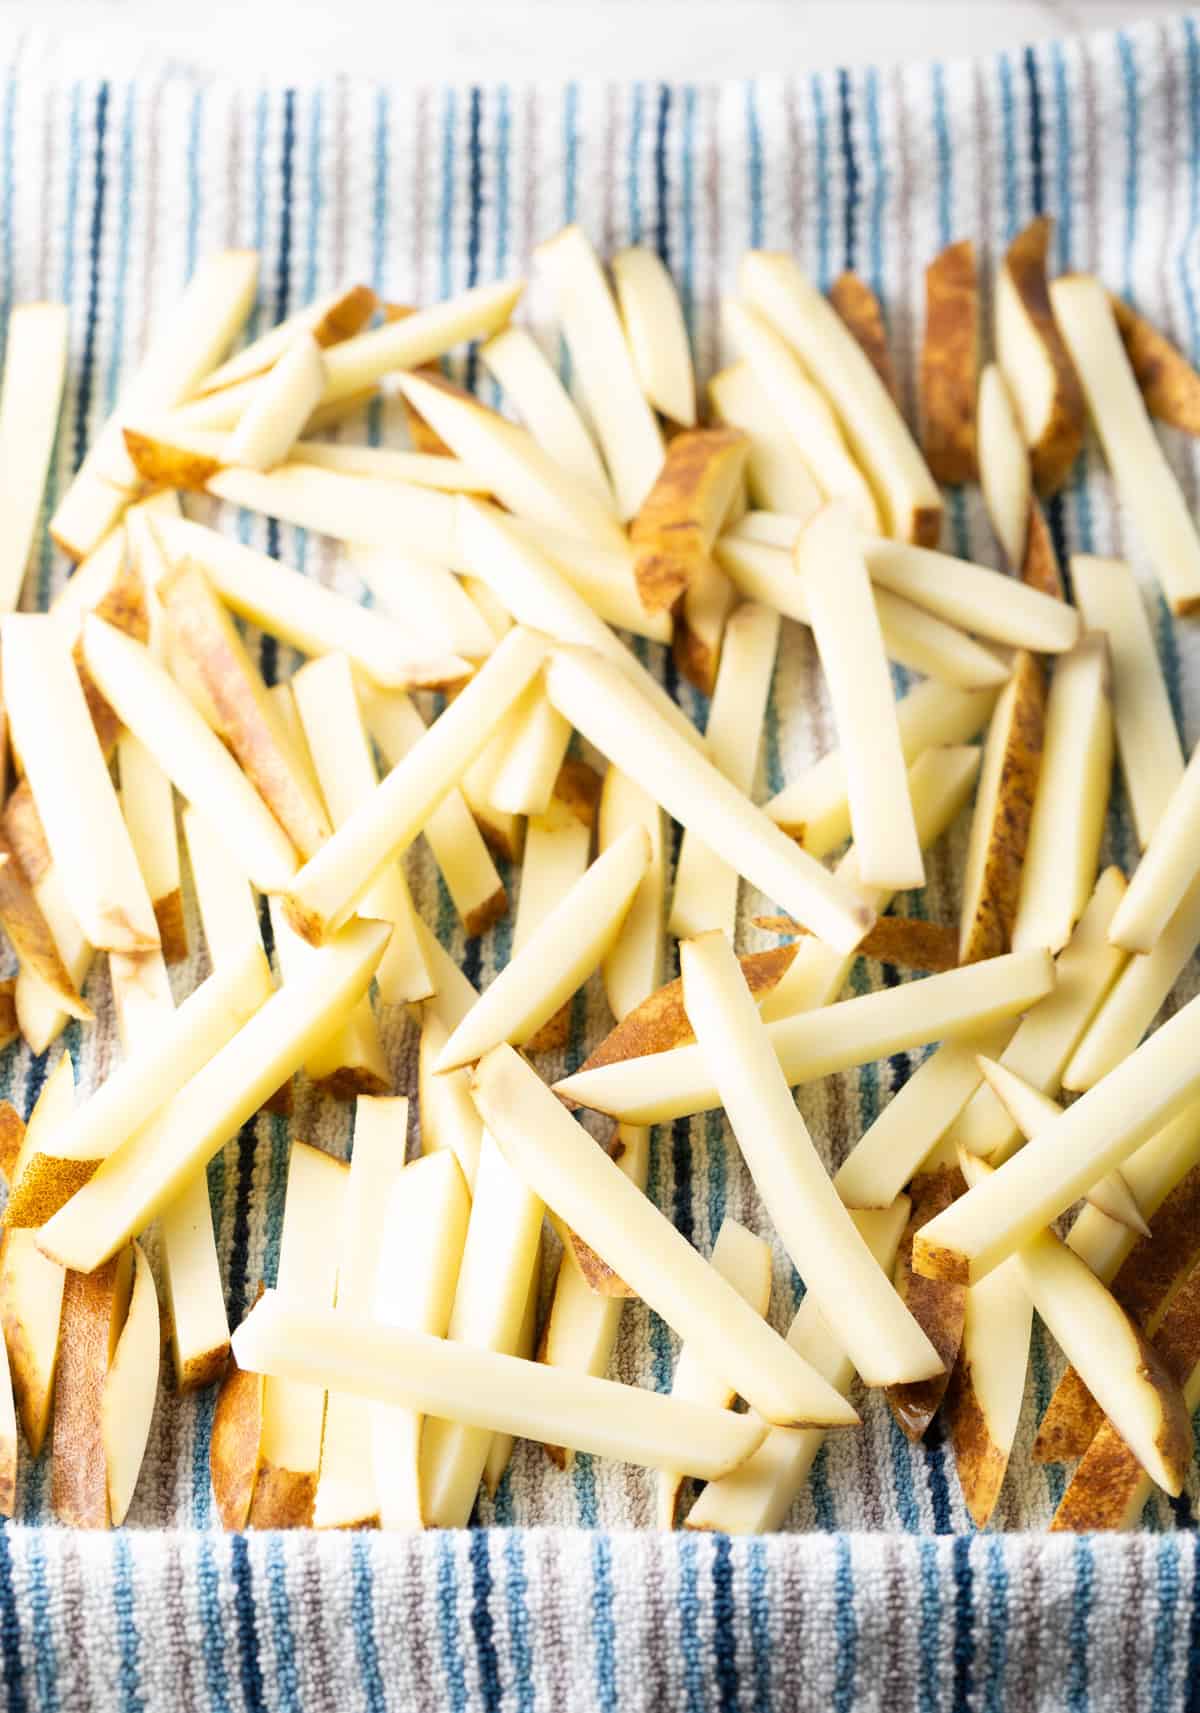
Drain – I wait until the oven has preheated before dumping the fries from the water and into a colander to drain. Then I place them on a clean, super-absorbent dishcloth, and roll and pat the potato slices with the clean kitchen towel. I want them to be as completely dry as possible, but don’t smoosh!
Season – Now I place the potatoes on a large rimmed baking sheet – with or without parchment paper, depending on your baking sheet. I drizzle the olive oil evenly over the fries, and use my clean hands to gently toss them around so the oil coats each slice of potato on all sides. Then I sprinkle the spices on top of the potatoes… I keep my hand hovering several inches above the fries while sprinkling the seasoning to help to distribute the spices evenly. Then, again, I use clean hands to toss them so the slices are well-coated with the seasoning blend.
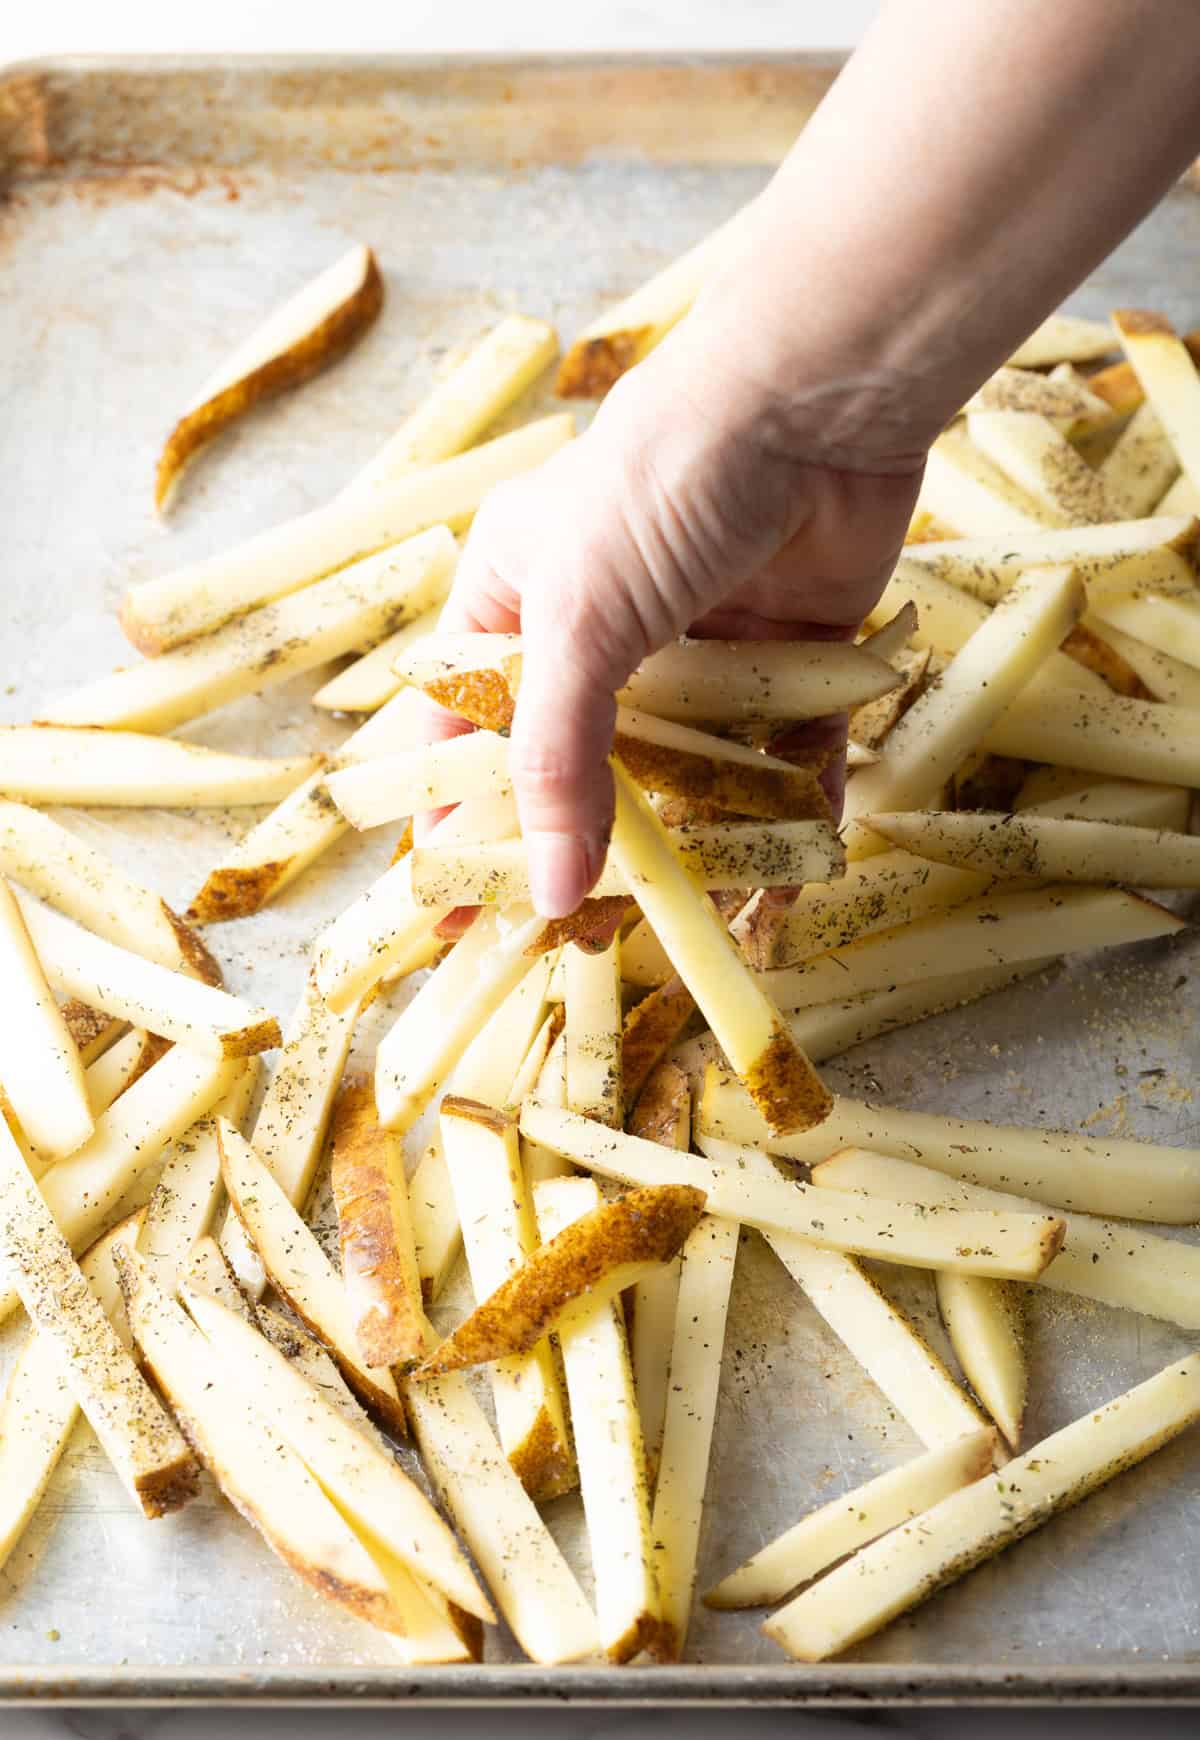
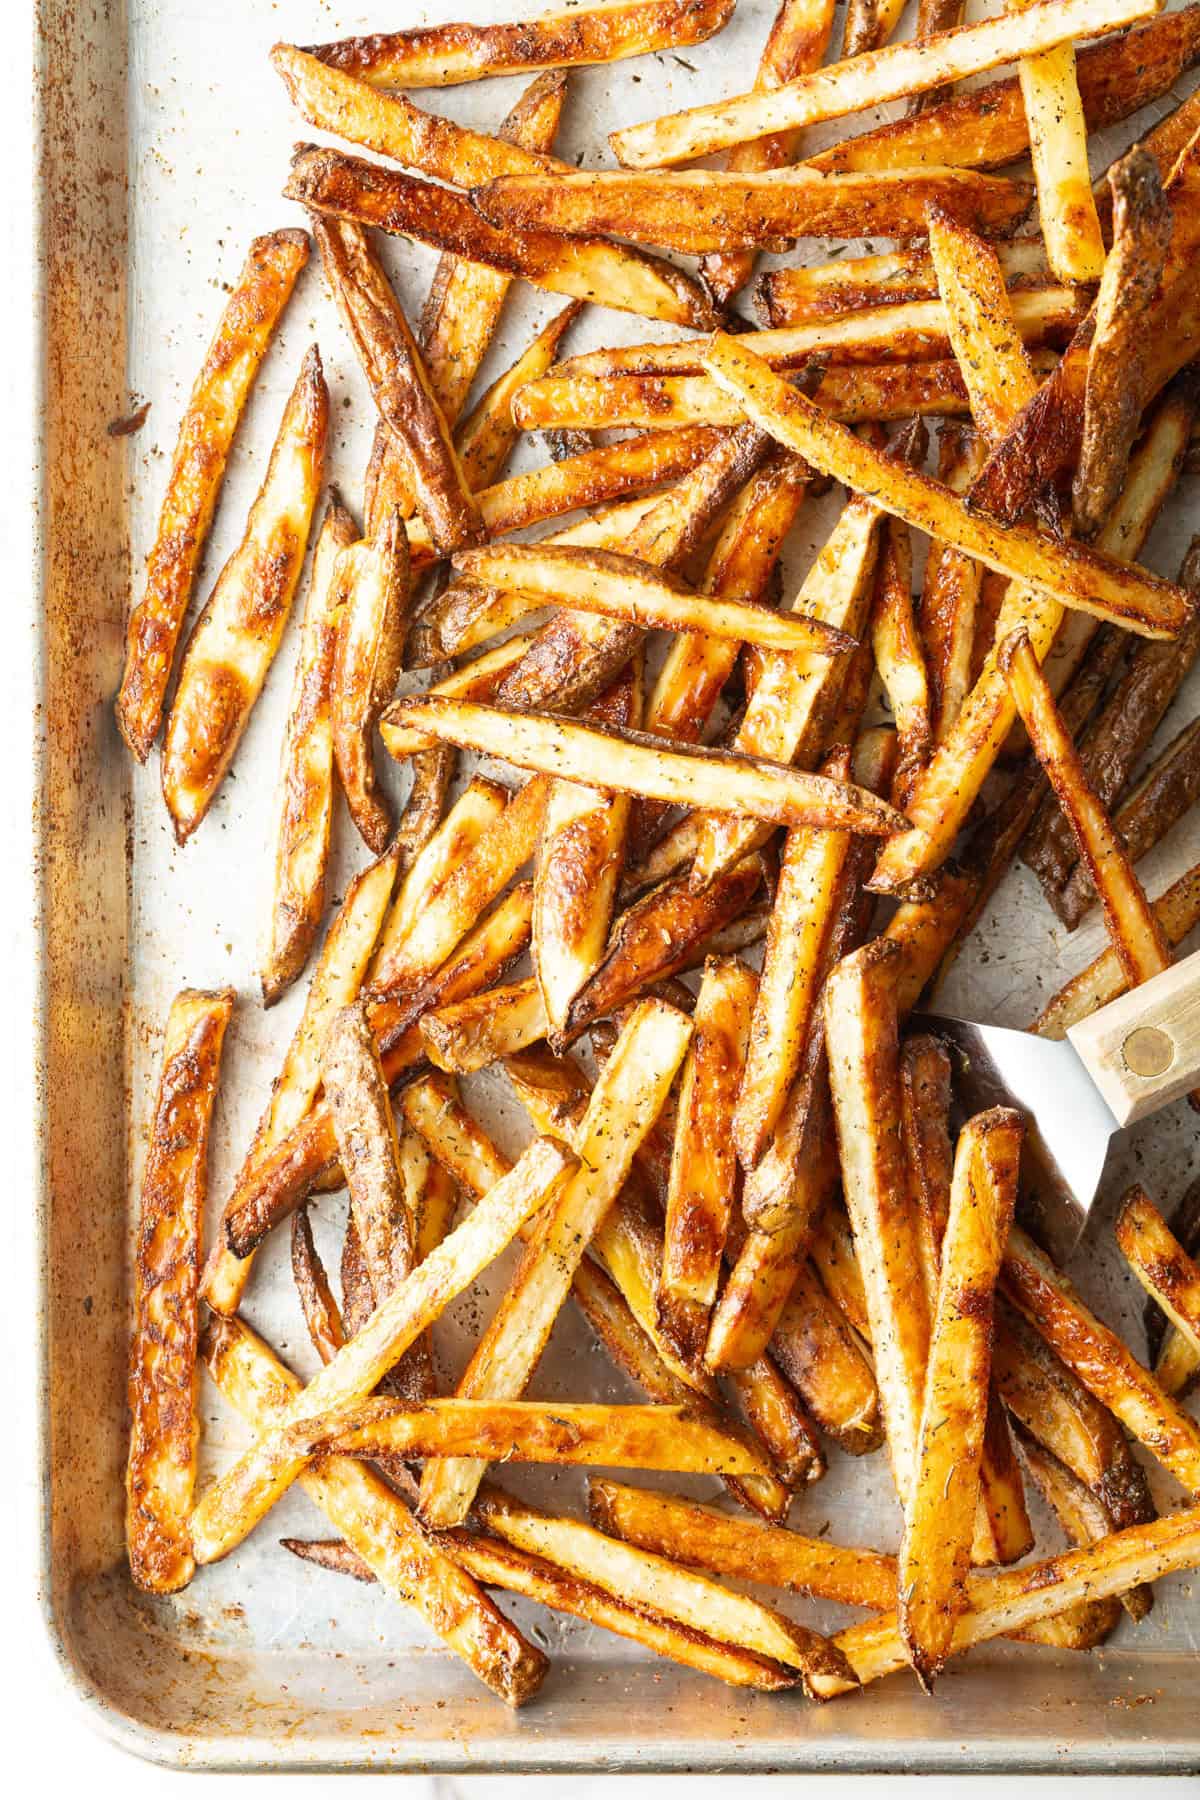
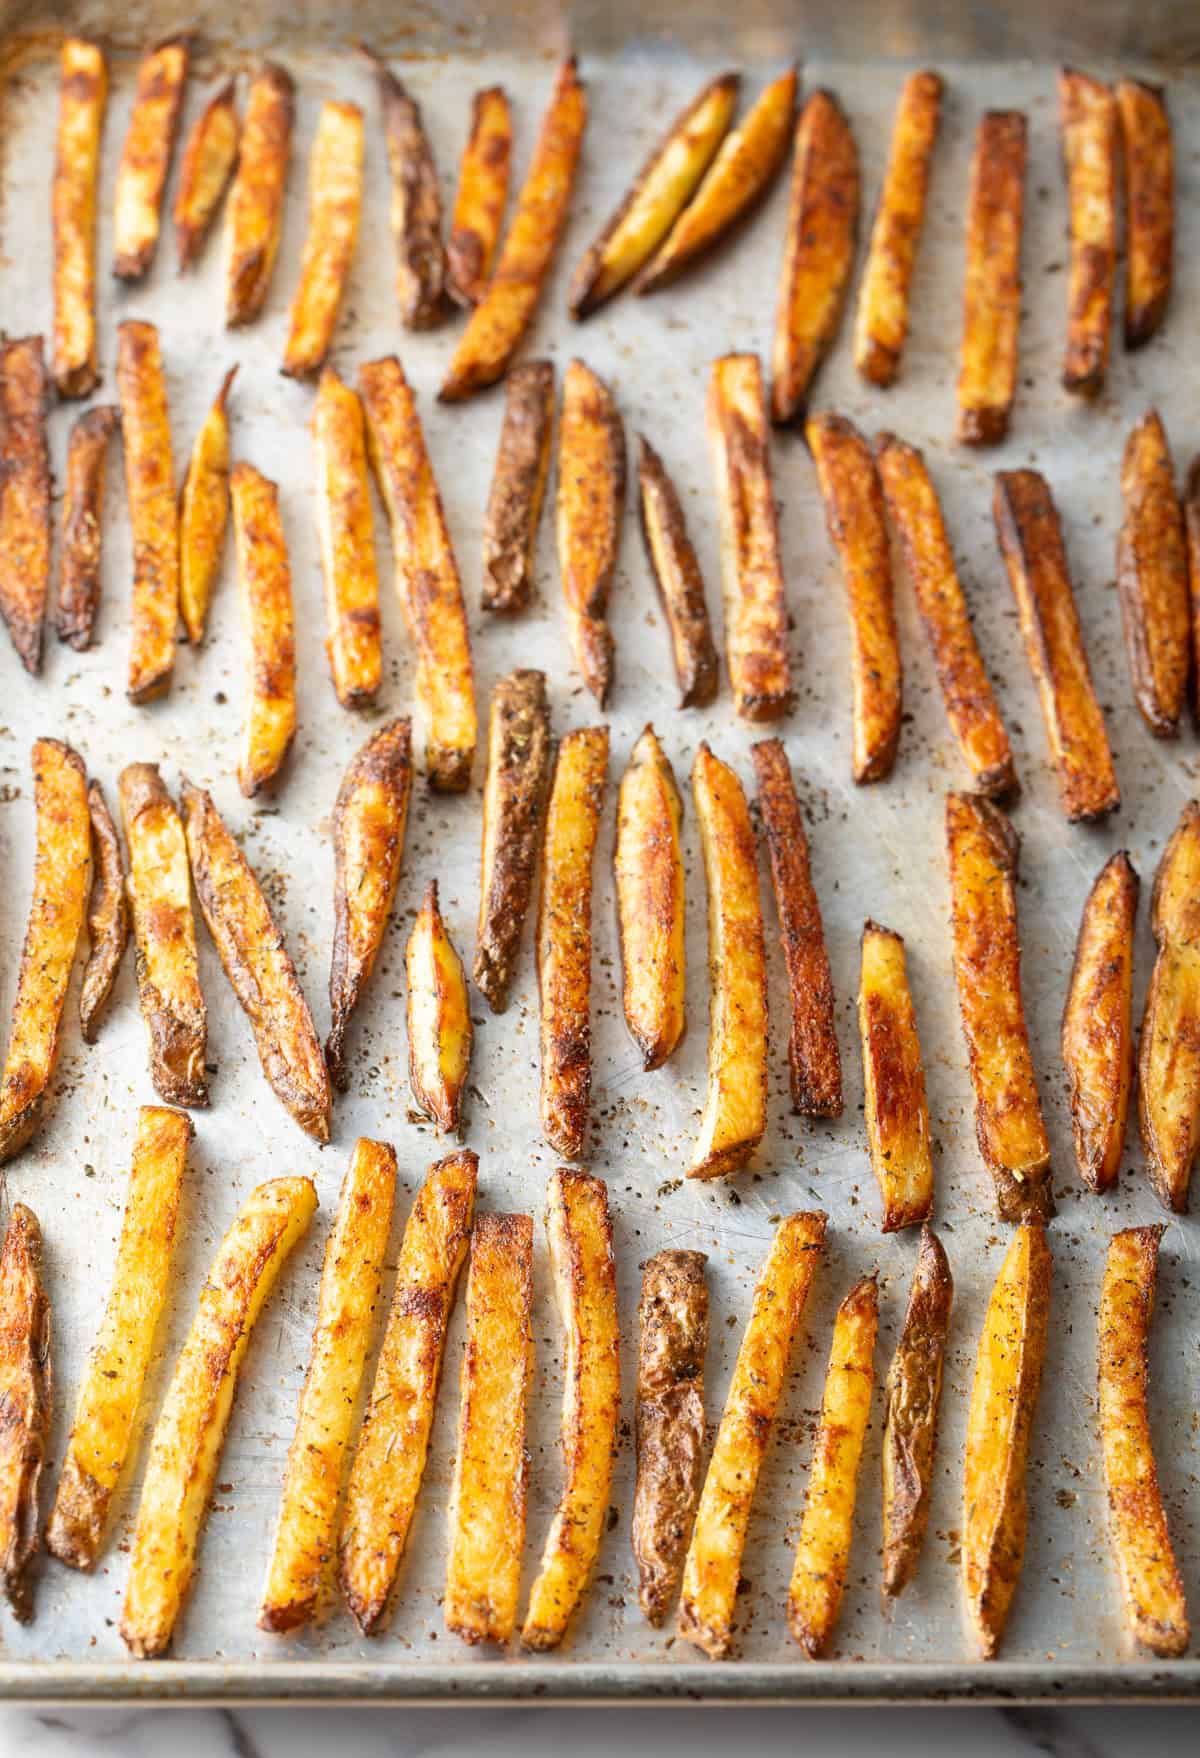
Arrange – Next, I spread the seasoned potato slices out evenly across the baking sheet. I want to make sure they don’t touch each other as much as possible. Every piece should have a bit of space to keep the moisture low and make the fries crisp on all sides. I know it might feel a bit tedious, but trust me, I’ve made this recipe dozens of times, and a bit of patience is SO worth it for perfectly crispy taters.
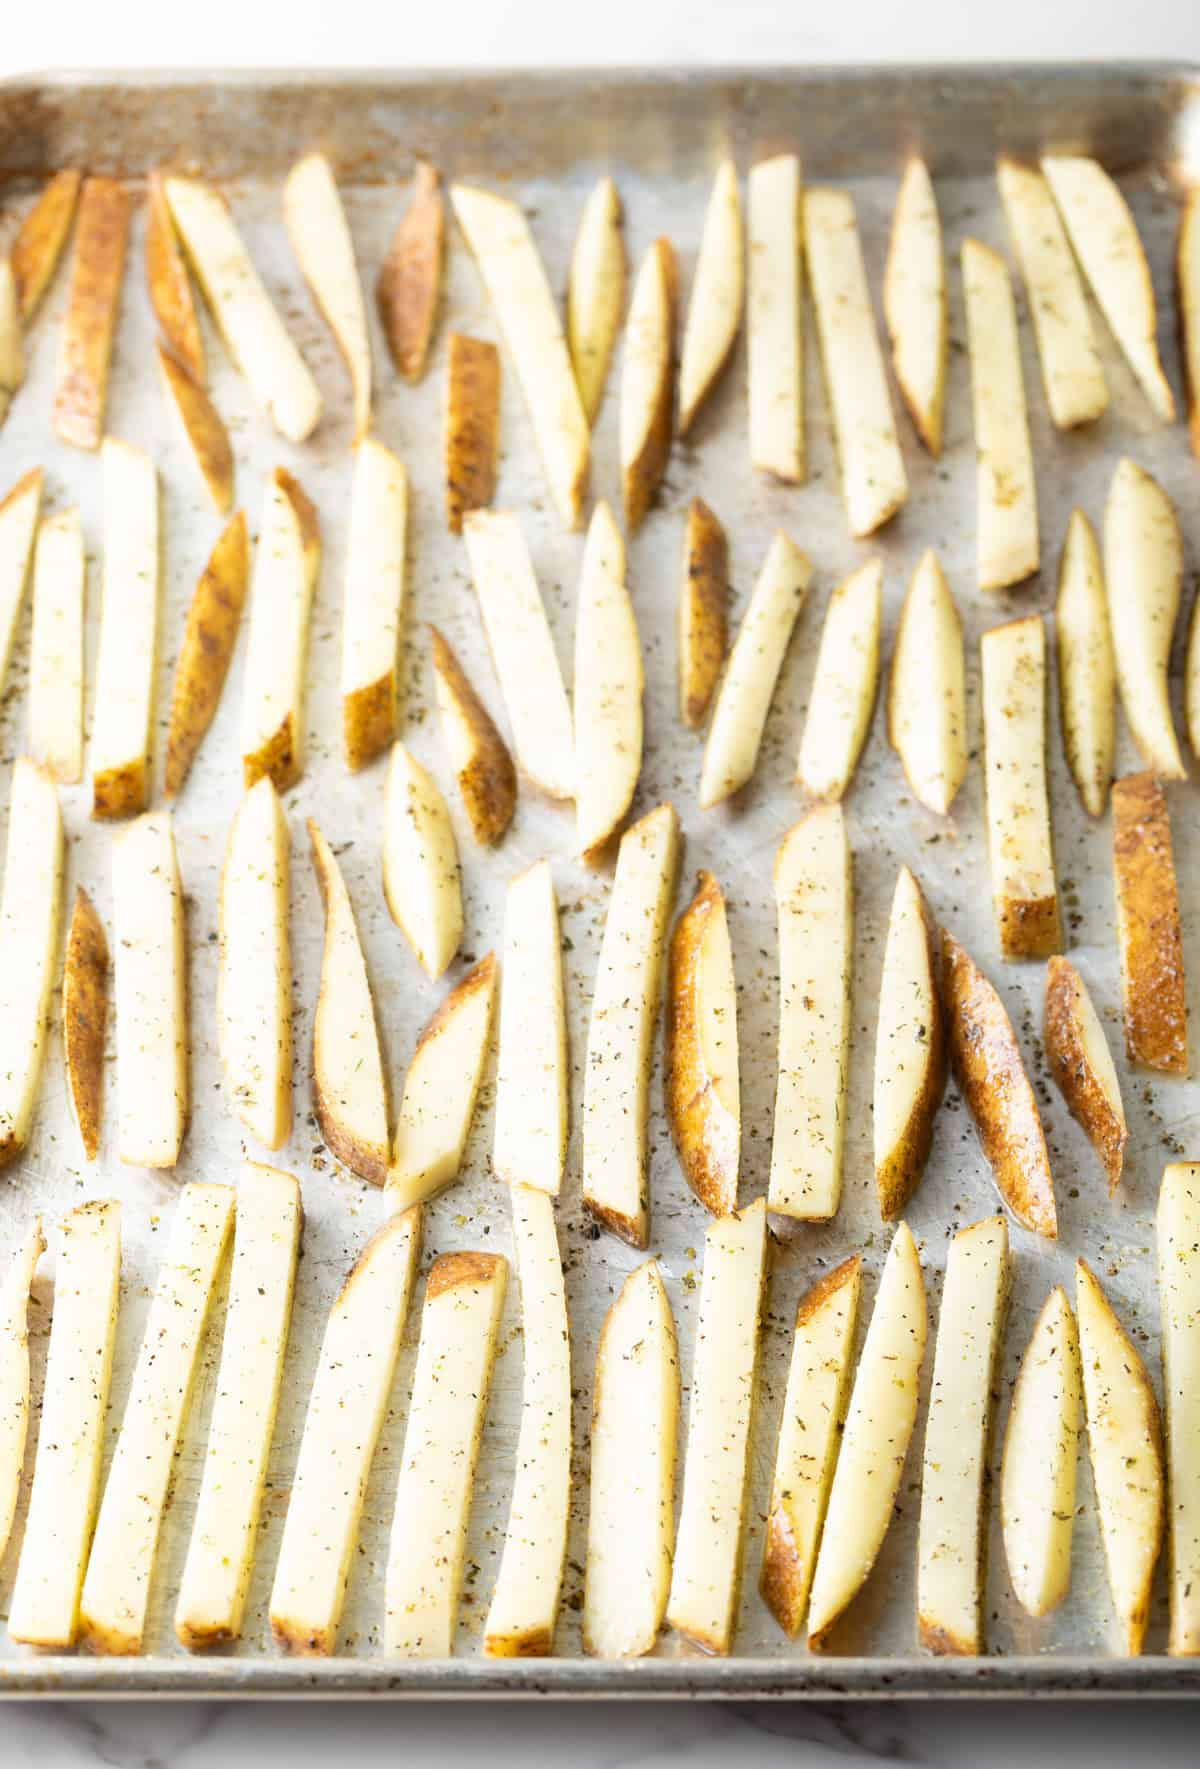
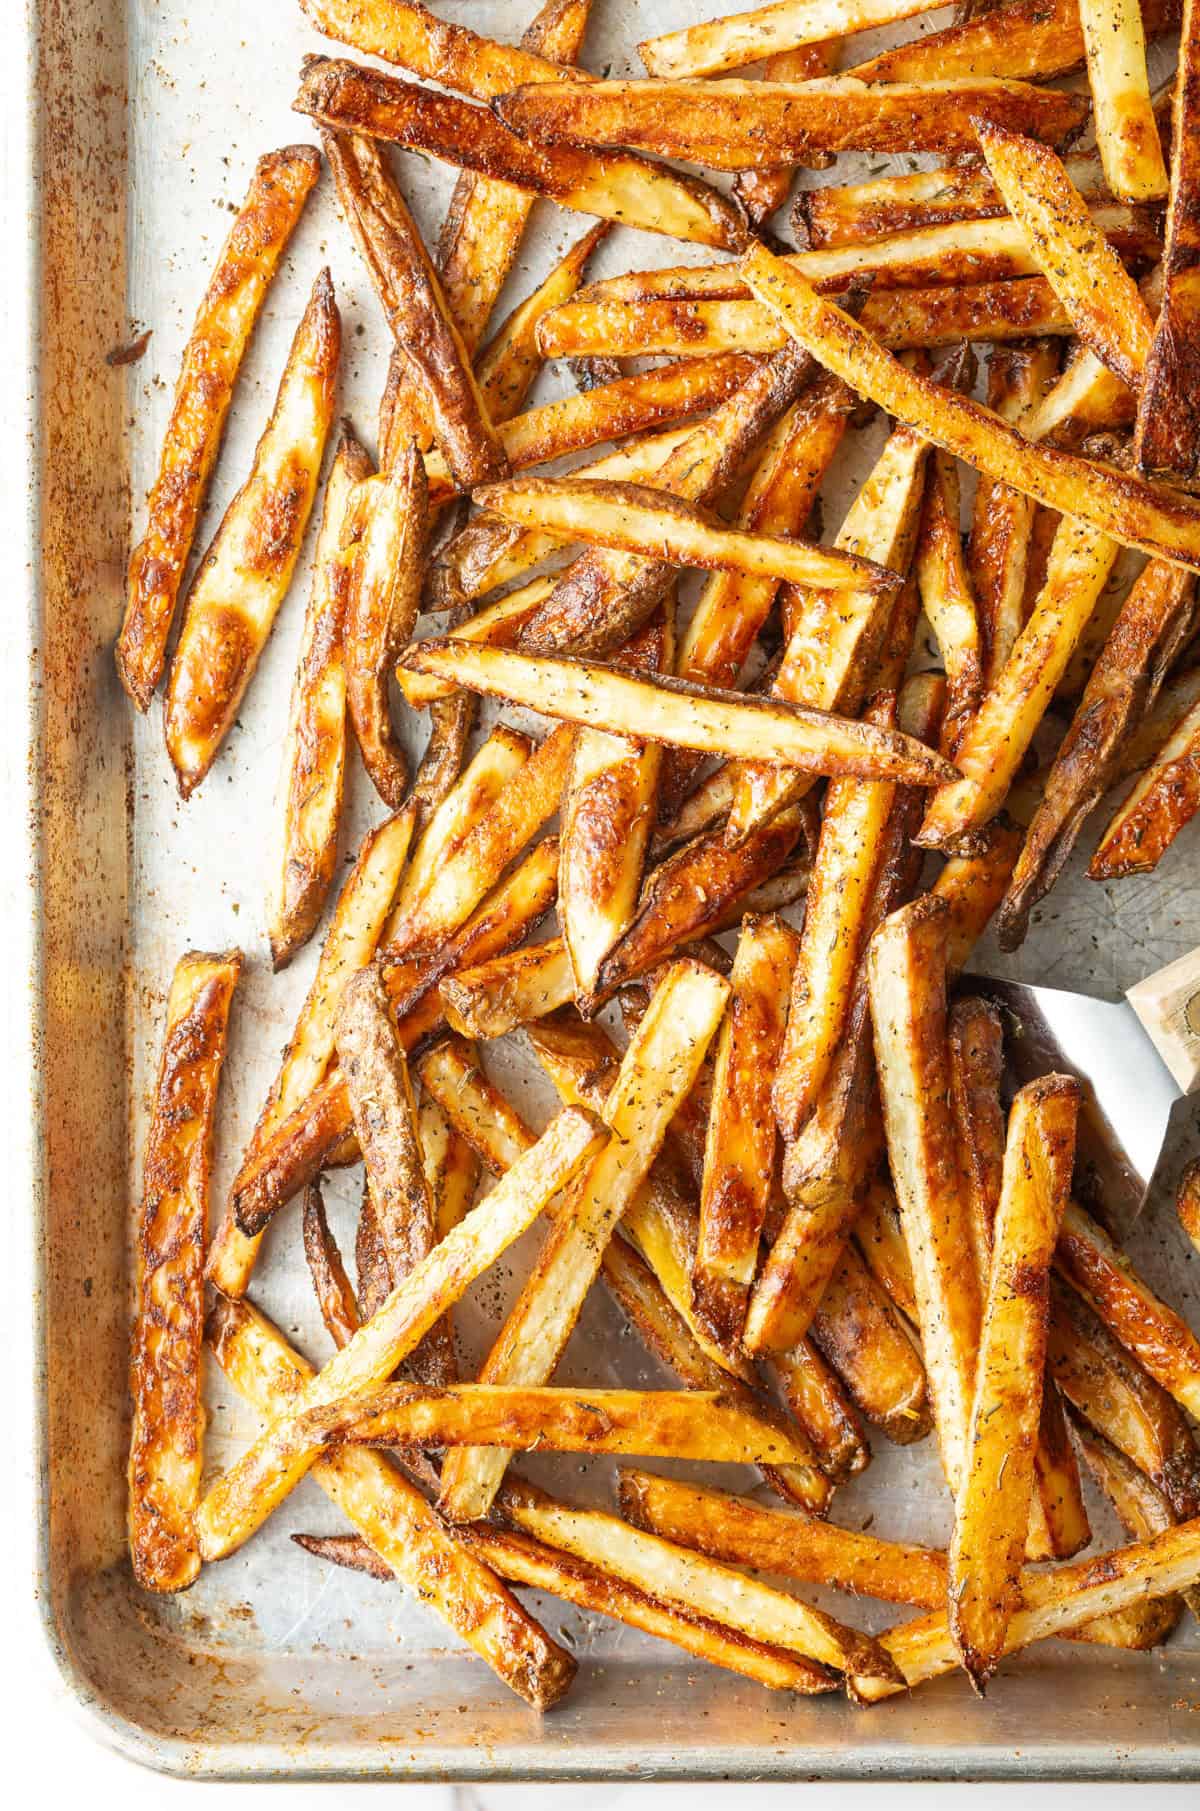
Bake! – Now I pop the frenchies in the 400 degree oven. Bake them for 20 minutes, then pull the baking sheet out of the oven and, very carefully, use a large metal spatula to flip them over. This gets them golden on every side and keeps them from burning. I take the time to spread the fries back out so they’re even and in one layer again across the baking sheet. Then back into the oven they go! Bake for another 10-20 minutes, depending on how crispy you want them. I usually pull them out of the oven at 10 minutes, so they are crisp but not crunchy. But you do you!
Expert Tips
The key to making really great fries is to cut them extremely evenly, so they bake evenly. Yes, you will have some smaller pieces cut from the shorter side of the potatoes… I just kind of expect those to be more crunchy than the majority of the batch. They’ll still get eaten!
Also, you absolutely must soak the cut potatoes in ice water for a minimum of 30 minutes before baking, but I usually keep them in there for at least an hour. Don’t skip this step! This keeps them from oxidizing (turning brown) and pulls excess starches out of the potatoes. Excess starch is likely to make the potatoes have a soggy texture.
Then you have to be sure to dry them very well before placing them in the oven. Like starch, any excess water will prevent the fries from getting crisp.
Serving Suggestions
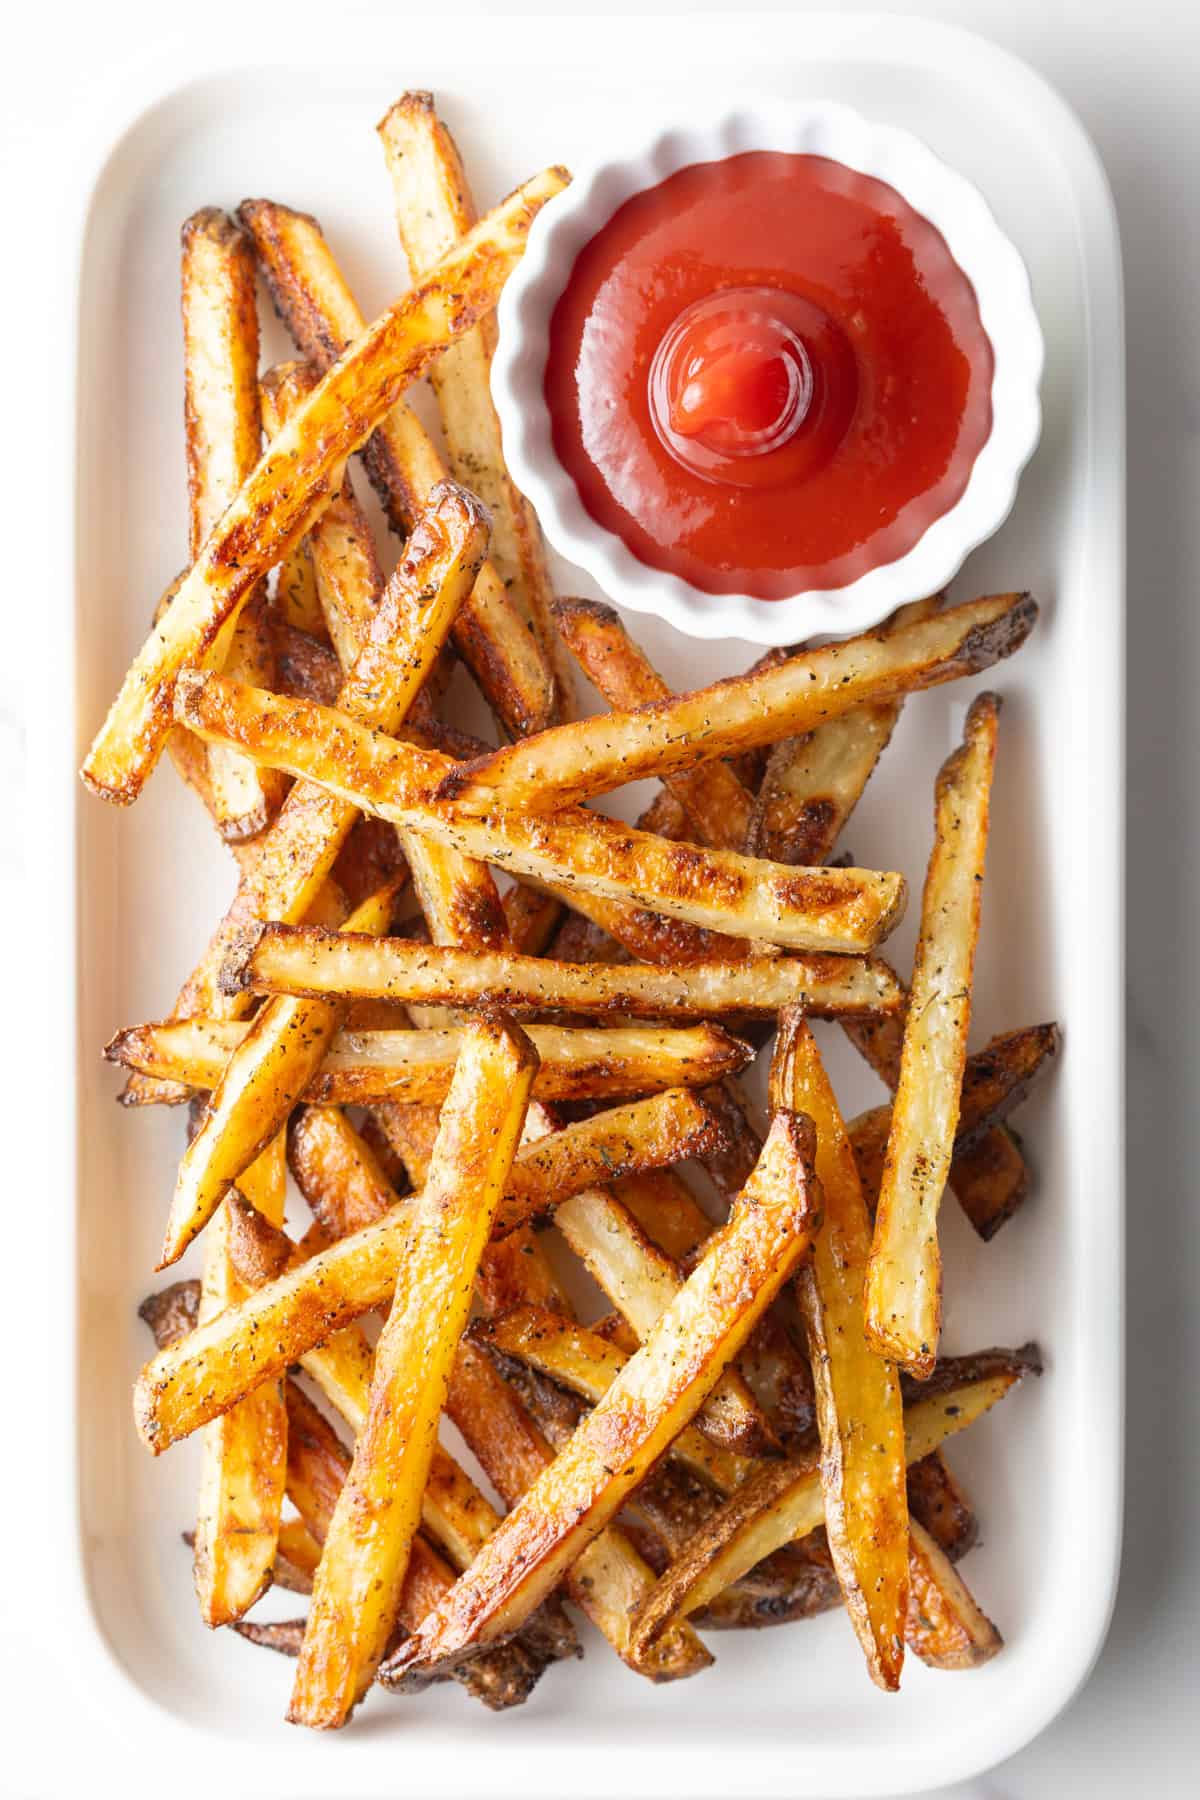
If you ask people in America what sauce is the most popular for french fries, I bet the first answer will almost always be ketchup. But once you get past that initial knee-jerk dip response, folks are sure to quickly start naming a slew of other dipping sauces… I think of my french fry dipping sauce and these other fabulous sauce options for dipping homemade taters hot from the oven –
- Comeback Sauce
- Remoulade – Pairs perfectly with Cajun seasoned fries!
- Garlic Parmesan Sauce
- Magic Aioli
- Chick-Fil-A Signature Sauce
- Honey Mustard Dressing
- Burger Sauce – Speaking of…
I’m also willing to bet that if I took a quick poll of what goes with fries, most people will immediately say burgers! I mean, you’ve been thinking about it this whole time… Am I right? :)
I’ve got several fantastic recipes for using my favorite homemade hamburger patties to make the juiciest, most delicious burgers. These are even quick and easy enough to prepare while the fries are baking in the oven –
- Air Fryer Burgers
- Zesty Italian Burgers or Pizza Burgers – Great options if you’re using the Italian seasoning blend on the frites!
- Spicy Cowboy Burger
- Smash Burgers
- Homemade Big Macs
Don’t stop there! Crispy frites are perfect for making chili cheese fries, or pair them with pieces of beer battered fried fish for a homemade fish and chips meal.
Storing and Reheating
Like all fries, whether they are from a restaurant or homemade and regardless of the cooking method, these oven baked potatoes are best to eat hot from the oven. They will keep well for up to 2-3 days in an airtight container in the fridge, but they’ll lose their snappiness and get softer by the day.
If you do have leftovers, I suggest reheating them in an air fryer at 350 degrees for 3-4 minutes or baking again in the oven for about 10 minutes at 350 degrees. But I cannot promise you that they’ll totally crisp back up nicely. You’ve been warned!
Frequently Asked Questions
Non-crispy (AKA soggy) fries could be the result of any number of issues… They might not have been soaked for long enough in the ice water. Or not dried well enough after draining. Or perhaps the baking sheet was overcrowded.
Sure! As-is, my recipe makes roughly 6 servings of homemade french fries in the oven. If you only want 2-3 servings, you can simply use half as many ingredients, but keep the baking time the same.
Help Me Spread the Word about this Fabulous Free Recipe! Sharing this recipe link on Pinterest and Facebook is super impactful, and I greatly appreciate it! Find the share buttons below the recipe form.
More Side Dish Recipes


Baked French Fries
Video
Ingredients
- 2 pounds russet potatoes or Yukon gold
- ¼ cup olive oil
- 1 teaspoon Italian seasoning
- 1 teaspoon salt
- ½ teaspoon ground black pepper
- ½ teaspoon garlic powder
Instructions
- Set a large bowl of ice water on the counter for the fries. Cut the potatoes lengthwise, into 1/3 to 1/2 inch strips. Take your time and cut them as evenly as possible. As soon as you finish each potato, drop the raw fries in the ice water to soak.
- Once all the fries are in the water continue to soak for at least another 30 minutes while you preheat the oven. You can let them soak for several hours if needed.
- Preheat the oven to 400°F (or 375°F convection) and set out one large or two medium rimmed baking sheets.
- Once the fries have had time to soak, lay a clean dish towel on the baking sheet. Drain the fries in a colander and dump them onto the towel. Gently wrap the towel around the fries and press them to remove all excess moisture. Then remove the towel, leaving the fries on the baking sheet.
- Drizzle the top of the fries with oil, followed by the Italian seasoning, salt, black pepper, or garlic powder. Or you can use our Cajun fries seasoning here!
- Toss the fries well to coat them evenly with oil and seasoning. Then lay them out on the baking sheet in a single layer, making sure the fries are not touching. This will ensure that get crispy in the oven. *If you take the time to lay them in rows, they are much easier to flip in large batches.
- Bake the fries for 20 minutes. Use a large flat metal spatula flip the fries over in batches and separate them again if they’re touching. Continue to bake for an additional 10-20 minutes to your desired color and crispiness.
- Serve hot with your favorite dipping sauce.

I made these for my kids and they didn’t even notice they weren’t deep fried – perfectly crispy on the outside, soft and fluffy on the inside, and seasoned absolutely perfectly!
I make these every week now alongside burgers and they are honestly just as satisfying as any restaurant fry I’ve ever had, but without all the grease and mess of deep frying!
I was convinced you couldn’t get truly crispy fries without deep frying, but this recipe completely changed my mind. The ice water soak made such a massive difference and they came out perfectly golden and crunchy without a single soggy spot!