Cheese Spread Recipe

My cheese spread recipe is my favorite way to use up extra cheese when I’m craving a rich, savory snack to enjoy with a glass of wine. I blend cheese with herbs and creamy ingredients into a smooth spread that’s packed with flavor and ready in minutes. It’s easy, indulgent, and perfect for crackers, bread, or veggies.

When I moved to Asheville, North Caroline, now a long time ago, I discovered that this quirky little mountain town had a serious passion for conservation… and cheese! I would buy so much local cheese, that I would end up with little nubs that needed to be used up before they started growing hair. That’s my inspiration behind using leftover cheese to make this creamy and rich spread recipe, which I love to snack on with some crackers and vegetables. My favorite part about this dip is how much better it tastes than any store-bought version. It’s smoother, and you can really taste the sharp, fresh flavors of the cheese and seasonings. Like my queso recipe, this is one of those spreads that I keep coming back to when I’m craving something savory, that’s also quick and easy, and when I’m looking to feed a crowd. You can even lather this cheese dip onto your favorite sandwich for a really delicious, tangy twist.
Lida – ⭐⭐⭐⭐⭐ I tried making homemade mozzarella but it didn’t quite turn out right. I thought it was going to be wasted, but I used it to make this cheese spread and it is amazing! I used about 1.5 cups of the homemade fresh cheese, 1/2 cup of leftover store-bought mozzarella, and fresh basil for the herbs. The garlic and white wine make it heavenly. Thank you for this recipe!
Table of Contents


Sommer’s Recipe Highlights
Versatile – Two of the reasons I absolutely love this cheese spread is because you can pretty much use any kind of soft to hard cheese, and you can eat it on anything. You can serve it as a dip with some crackers and sliced fresh vegetables, alongside your favorite glass of wine. Or, you can lather it onto some toasted pretzels or inside your favorite sandwich.
Nothing Goes to Waste – I love that you don’t need to buy additional cheese for this recipe, just clean out your refrigerator! I really love using leftovers and coming up with tasty recipes, and this cheese spread is the perfect way to use up any leftover chunks of cheese. It works even with leftover slices from charcuteries boards!
Delicious and Creamy – Like my whipped feta dip recipe, this creamy, herbaceous homemade cheese spread is a wonderful mix of flavors and smooth textures… and that’s why it’s almost impossible to stop snacking on this cheesy goodness!
Key Ingredients and Tips
- Cheese – Use any of your favorite leftover cheese. Just make sure that it’s at room temperature and that you’ve got about half a pound worth. I just close my eyes and throw it in, or sometimes I use specific combinations of cheese that I feel will work well together, like sharp cheddar and gruyere, or feta and pepper jack.
- White wine – I love to use a dry white wine to add extra flavor to this spread. It also helps balance the sharpness of the cheese.
- Butter – To make this creamy, you’ll need softened and unsalted butter. This is a great way to control the amount of sodium, because whatever cheese you’ll be using is guaranteed to have enough salt in it.
- Herbs – I always use fresh herbs like parsley, basil, thyme, or rosemary. These add a bold pop of color to this spread and a ton of fresh flavors.
- Garlic – For some depth, I throw in fresh minced garlic. It adds a lot more flavor than the powdered kind.
How to Make
Find the full recipe with ingredient proportions, detailed instructions, and a video tutorial in the printable form at the bottom of the post.
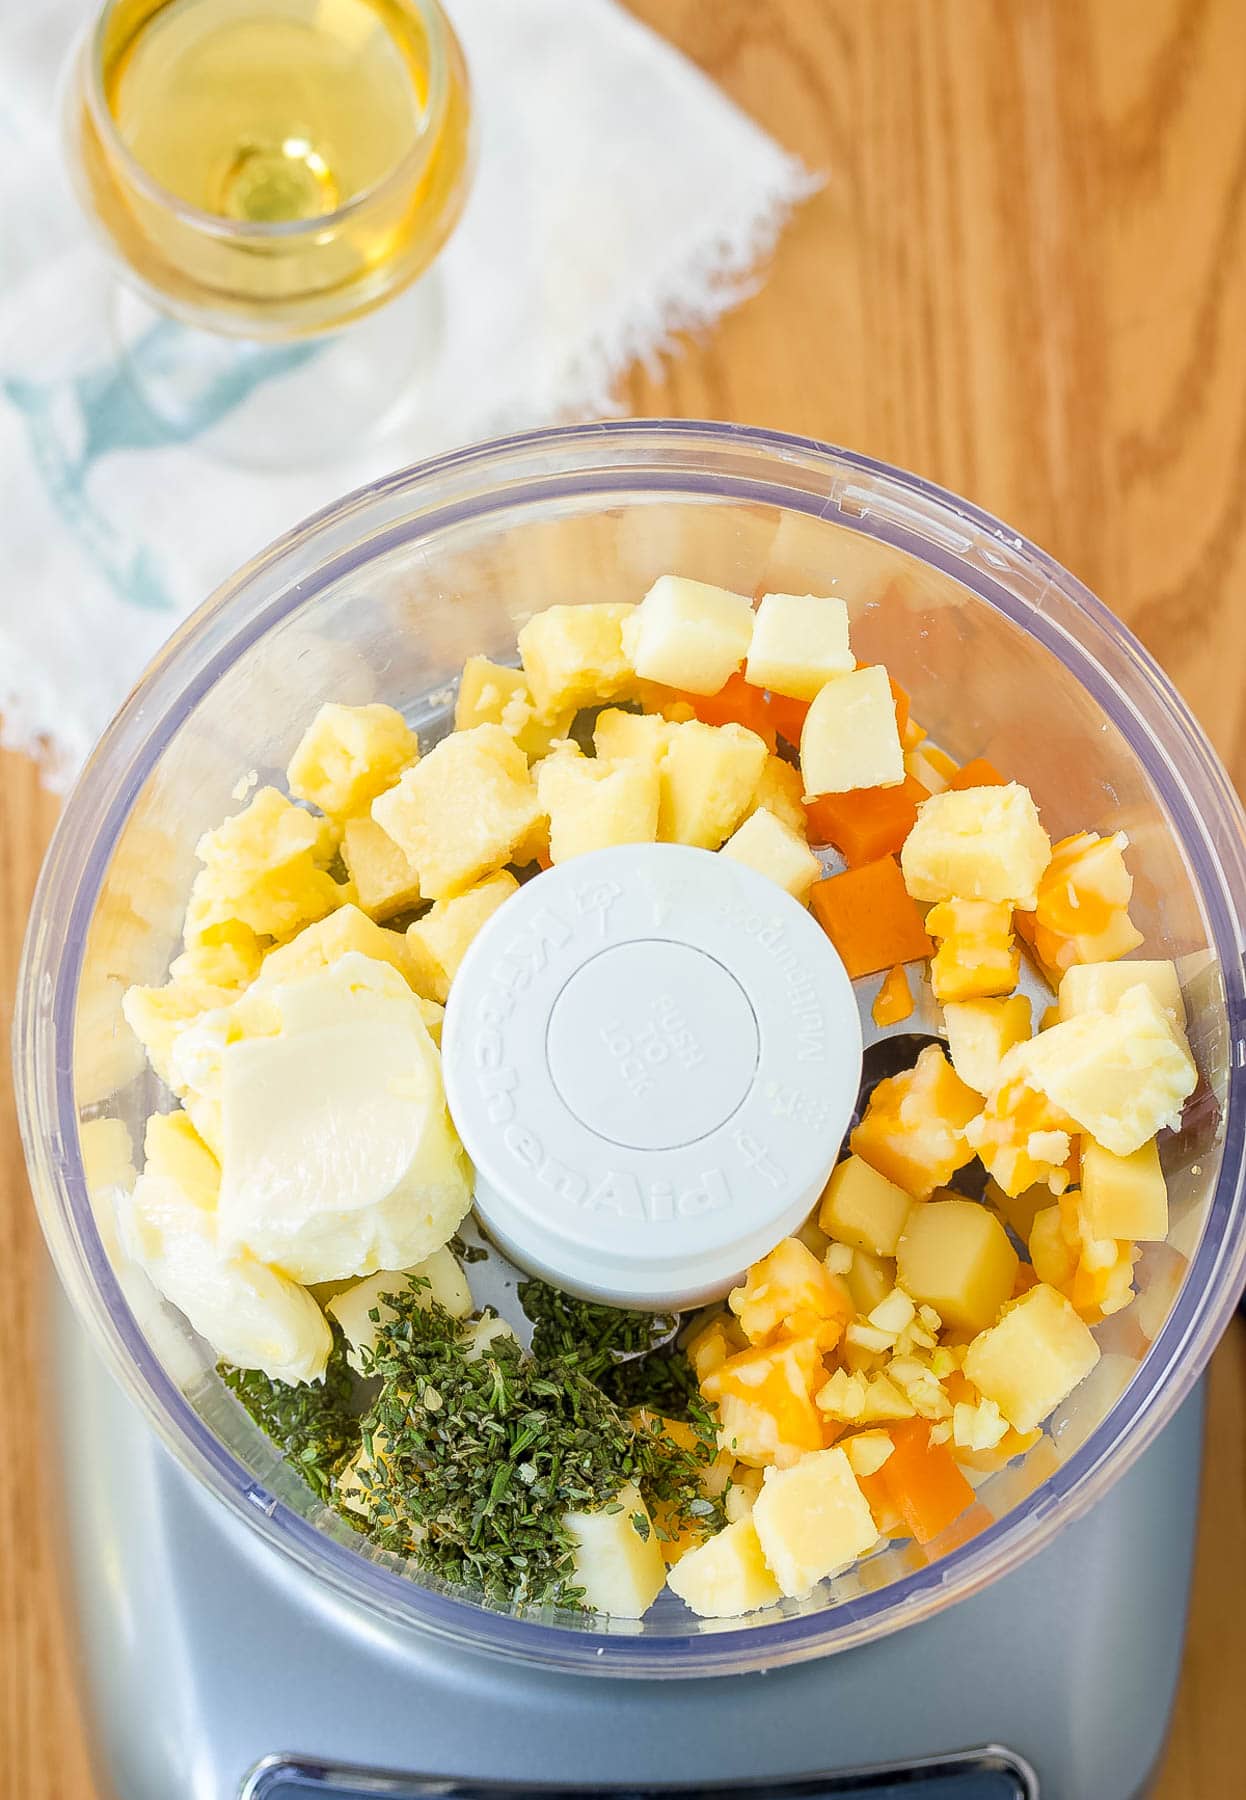
Chop the cheese – I start by prepping the cheese, and if I’m using harder cheeses, I always trim off the rinds first because they don’t blend well and can leave little chewy bits in the spread. Then I chop the cheese into small chunks so my blender doesn’t have to work overtime. Pro Tip: Let the cheese sit out at room temperature for 20 to 30 minutes before blending. It makes everything smoother, creamier, and way easier to mix.

Blend – Next, I toss the cheese into the blender with a splash of wine, butter, fresh herbs, and minced garlic. Then I pulse everything together until it turns into the dreamiest creamy spread. If the mixture seems a little too thick, I add another tiny splash of wine or even a spoonful of cream to loosen it up. And don’t forget to scrape down the sides of the blender a couple of times so every bite gets packed with flavor. I also love tasting as I go because different cheeses can vary in saltiness and sharpness.
Chill – You can absolutely serve this cheese spread right away, especially if you’re impatient like me when cheese is involved. But honestly? It gets so much better after chilling for at least an hour. The flavors settle together, the garlic mellows slightly, and the texture becomes perfectly rich and spreadable. I like making it ahead for parties because it tastes fancy, but secretly, it takes hardly any effort.
Recipe Variations
- Bacon – Sometimes I stir in crispy crumbled bacon for a smoky, savory upgrade that disappears ridiculously fast at parties.
- Spicy – When I want a little kick, I sprinkle in crushed red pepper flakes or even a tiny dash of hot sauce. A little goes a long way here!
- Nuts – Chopped walnuts, pecans, or hazelnuts add the best crunchy texture. I like to toast them first for extra flavor.
- Honey – A drizzle of honey balances the salty cheese beautifully, making the whole spread taste extra gourmet. This is especially amazing if you’re serving it with crackers or fruit.

Serving Suggestions
If you’re like me and you absolutely love cheese, this is the perfect bowl to snack on with a spoon or some crackers. But there are so many more exciting ways to serve this decadent cheese spread. Here are a few of my favorite suggestions:
- Pair it with some warm and toasted pretzels, unleavened bread, or Croatian lepinja bread.
- Spread it on your favorite sandwich with roast beef or sliced turkey.
- Enjoy it with some slices of fresh carrots, celery, radishes, cucumbers or red bell peppers.
- Add a dollop over roasted crispy potatoes.
- Serve it as a melty condiment with grilled steak, chicken, or pork chops.
Storing
I usually sneak a few bites of this cheese spread right away while it’s still soft and extra creamy. But if you can resist diving in immediately, pop it in the fridge for at least an hour so it firms up into the perfect spreadable texture. The chill time also helps all those rich, savory flavors blend together even better. I like storing leftovers in an airtight container in the fridge, where it stays delicious for up to a week. Just let it sit out for a few minutes before serving so it softens back up and becomes spreadable again!
Frequently Asked Questions
Yes! I actually love making this dip ahead of time because the flavors get even better as they hang out together in the fridge. You can easily prepare it a few hours before serving, which makes entertaining so much less stressful. Just be sure to pull it out of the refrigerator about 20 minutes before serving so it has time to soften up a bit. That little rest time before serving makes the texture extra creamy and much easier to scoop or spread.
If the dip turns out a little too thick, don’t panic! I usually just add an extra splash of wine to the food processor and blend again until it loosens up into the perfect creamy consistency. Start with a small amount though because it thins out quickly. And if you accidentally add too much, you can always toss in a little extra cheese to balance it back out. That’s the beauty of homemade dips… they’re super forgiving!
Looking for More Spread Recipes? Be Sure to Try:


Help Me Spread the Word about this Fabulous Free Recipe! Sharing this recipe link on Pinterest and Facebook is super impactful, and I greatly appreciate it! Find the share buttons below the recipe form.

Cheese Spread Recipe
Ingredients
- 1/2 pound leftover cheese, any variety, at room temperature
- 1/8 cup dry white wine
- 2 tablespoons unsalted butter, softened
- 1 tablespoon fresh parsley, basil, thyme, or rosemary
- 1/2 teaspoon minced garlic
Instructions
- Remove any rinds from hard cheeses. Cut cheeses into 1/2-inch cubes.
- Place cheese, wine, butter, herbs, and garlic in a food processor and blend until smooth, 2 minutes.
- Serve as-is or refrigerate for at least one hour for a firmer consistency. This can be stored in the refrigerator for up to one week.

I tried making homemade mozzarella but it didn’t quite turn out right. I thought it was going to be wasted, but I used it to make this cheese spread and it is amazing! I used about 1.5 cups of the homemade fresh cheese, 1/2 cup of leftover store-bought mozzarella, and fresh basil for the herbs. The garlic and white wine make it heavenly. Thank you for this recipe!
Has anyone who commented made this cheese spread?
Why is it only good for one week?
Can it be frozen?
Sounds tasty…. can we make this without using wine??
Hi Neha,
Yes, you can skip the wine, but you will need some liquid. Try adding 1 tablespoon of lemon juice and 1 tablespoon water. :)
Yum!
This sounds good and I’ll do it. I love cheese spread! But I have a question: what is leftover cheese? Never ran across it before :)
Hi Rick,
LOL! I hear ya! We don’t have a whole lot of leftover cheese around here either. But when we do….
Love this! I wanted to make cheese dip this holiday season. Pinning this for the first party!
So, got any alternative uses for the spread besides crackers? I am trying to minimize my carbohydrate consumption. And I LOVE me some crackers – lol. II was thinking as a filling in chicken (pound the chicken flat, spread the cheese, roll back up, and cook), but beyond that, I am coming up blank.
you could use BUCKWHEATcrackers . Buckwheat is very low in carbo .
Try it like an old-fashioned relish tray. Cheese spread is great on celery sticks, carrots, green pepper strips. an I say no carbs!
It must taste amazing!
Looks delicious but I’m Not really a wine drinker so what would you suggest a dry wine to use for this recipe?
Hi Colleen, You could use chicken broth… Or chicken broth with a splash of champagne vinegar would be even better!
Thank You
Wow Sommer,
I love your cooking blog!
I have been looking for a way to use left over bean soup. We love pinto beans cooked this way. Do you think this would work for them?
Thanks for sharing your expertiese with us!
Jana
Sommer, if you keep putting recipes like this on the blog, you may get mom and me to move to Asheville yet. Pops
Awesome Sommer,
Love the BLOG and all your amazing tricks of the trade…Watch out Julia & Julie…here comes Sommer!!!
Looking forward to all that's ahead for us to learn – you are the best!
-S