Homemade Vanilla Cake Recipe
I’ve been making this all-purpose homemade vanilla cake for years, and it’s hands-down the best birthday cake I’ve ever served. I use real vanilla extract and a simple, tried-and-true method to create a moist, fluffy crumb that bakes up beautifully every single time. This classic American celebration cake is incredibly easy to make from scratch with pantry staples, and it works perfectly for layered cakes, sheet cakes, or cupcakes. If you’ve ever wanted to learn how to make homemade cake the foolproof way, this is the recipe I trust for soft texture, rich flavor, and reliable results.
My Favorite Homemade Cake Recipe
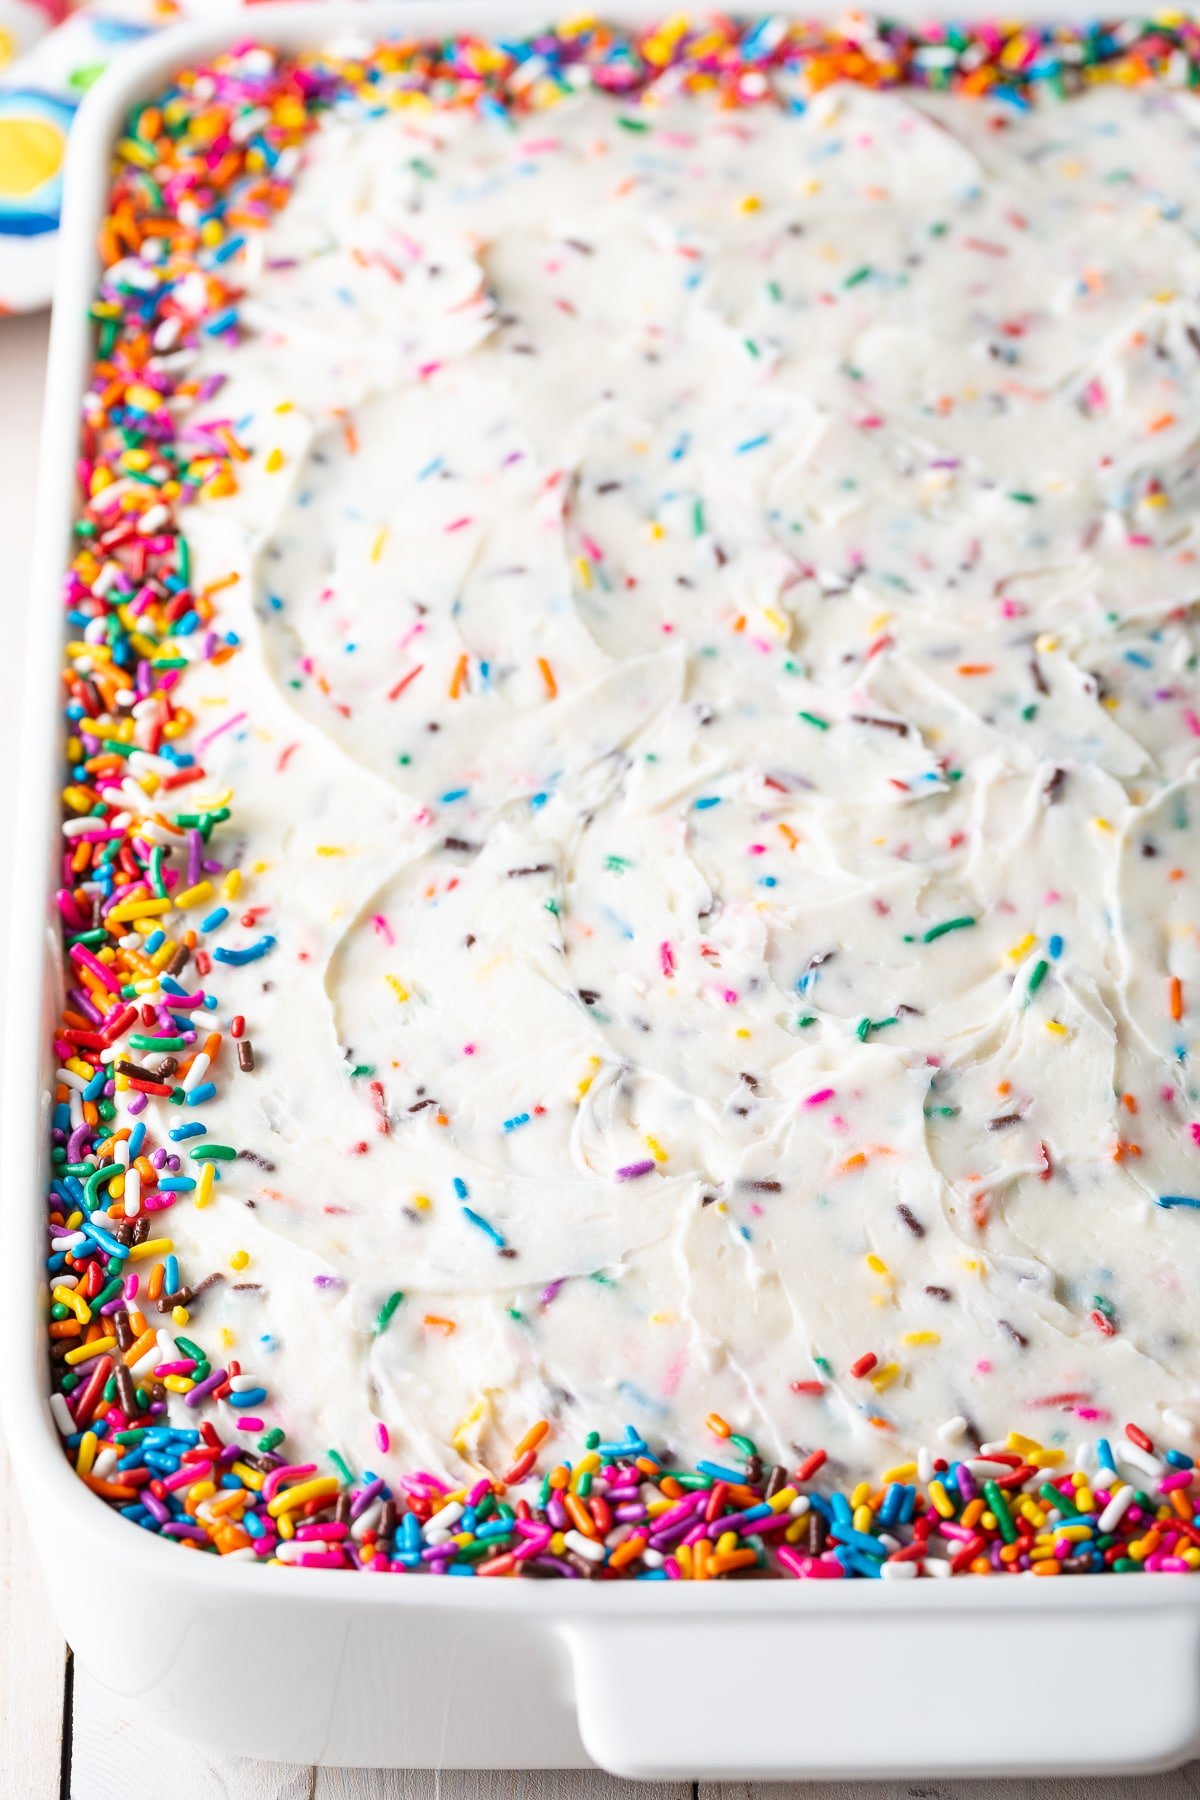
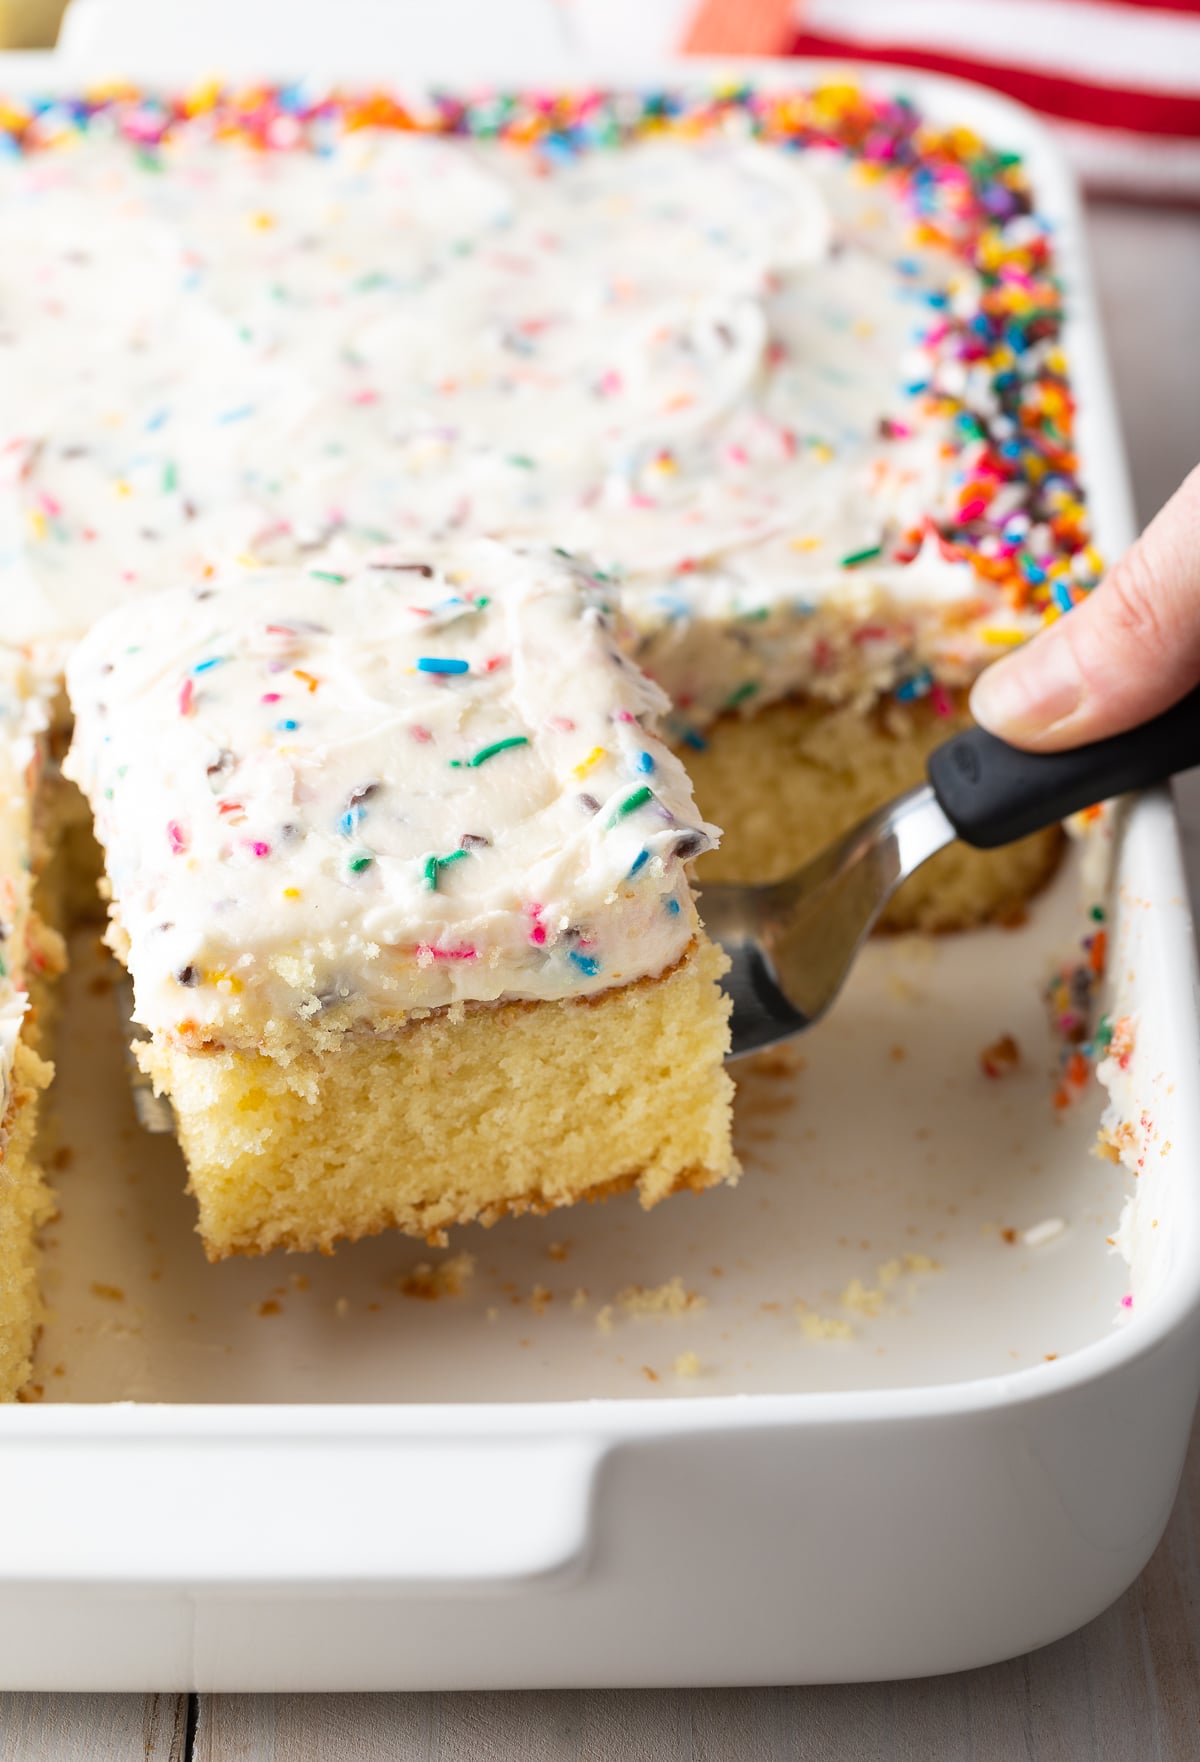
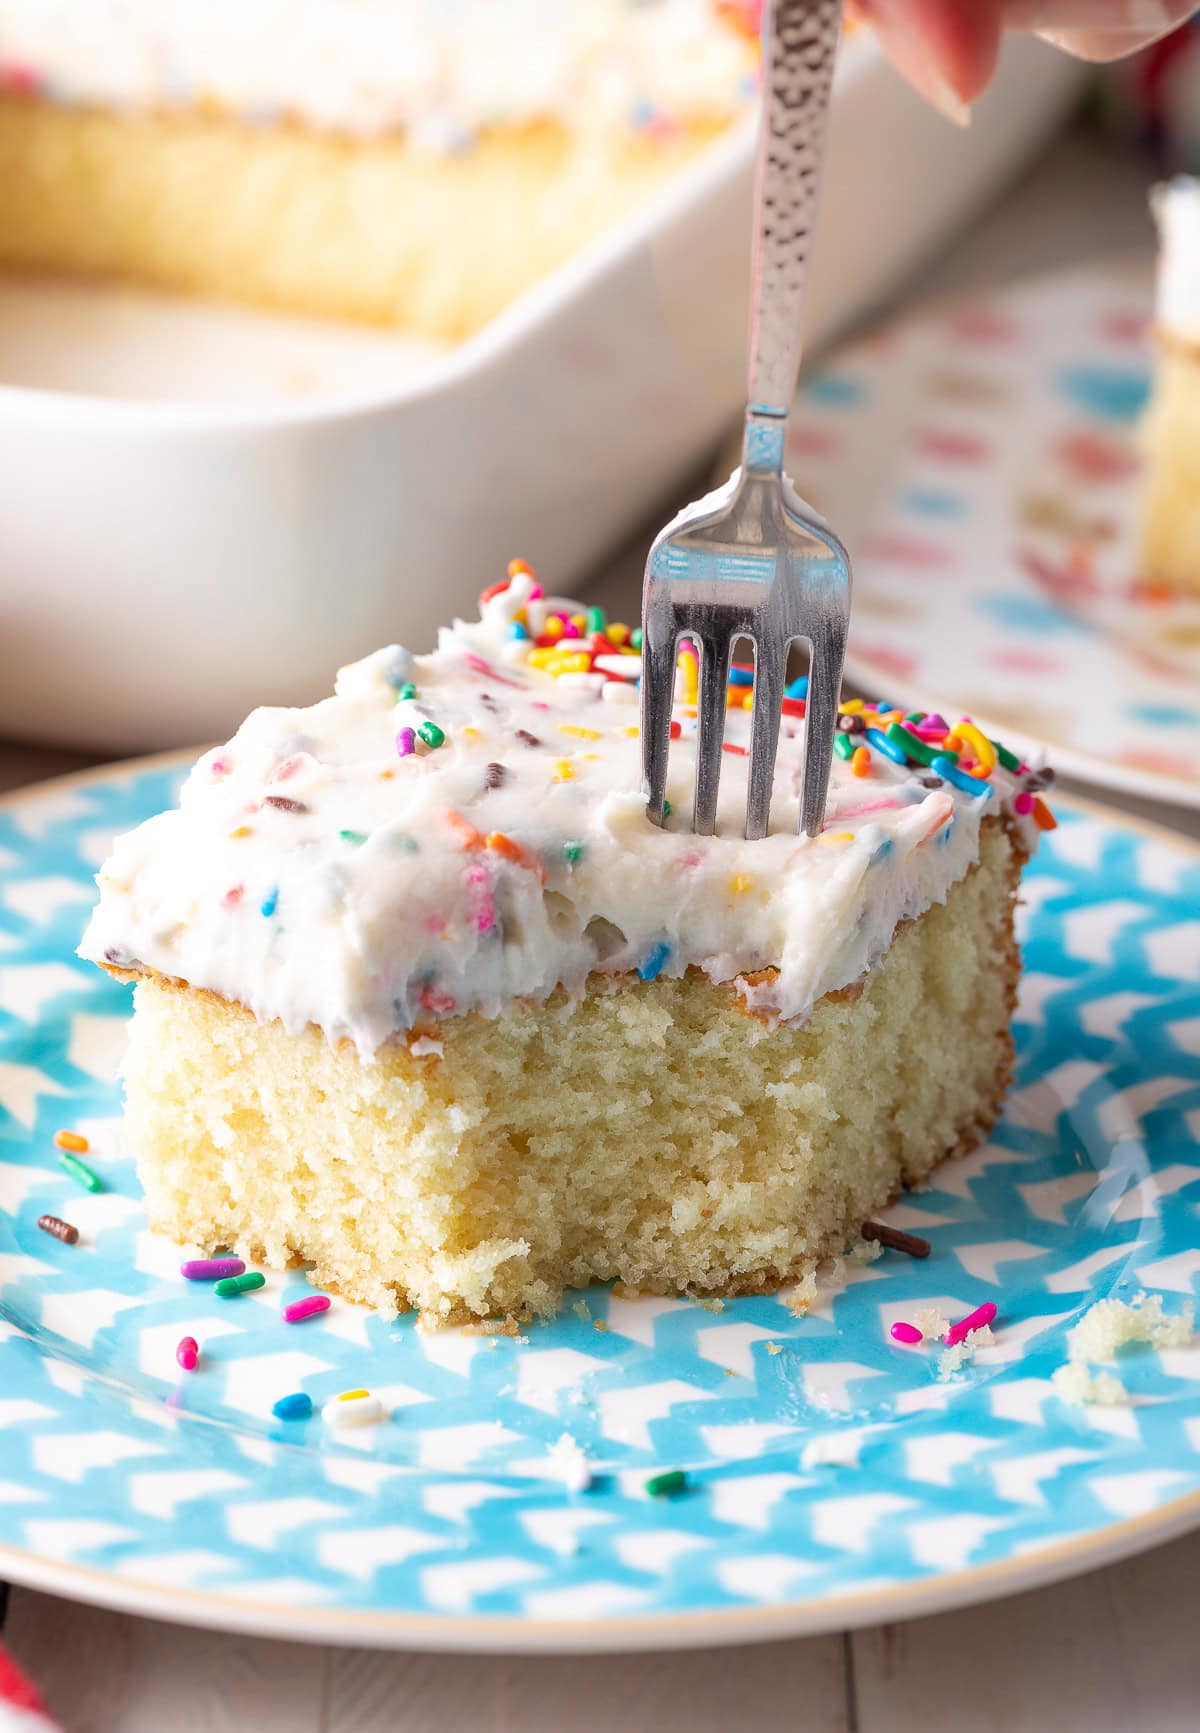
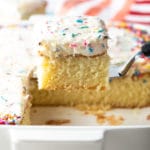
Even though I love cooking more than baking, I always keep a few tried-and-true desserts in my back pocket. This soft, fluffy vanilla cake is one I’ve made countless times as birthday cakes, for potlucks, and even work events. What I love most about this made-from-scratch dessert is its versatility. Here I’m showing it as a sheetcake, but it makes wonderful vanilla layer cakes with my glorious funfetti frosting, and tender cupcakes too! Although I’m partial to this sprinkle frosting, it pairs beautifully with any frosting, making it my go-to cake when I need something easy, reliable, and guaranteed to impress!
Sarah Calahasen — ⭐⭐⭐⭐⭐ Thank you so much for sharing your delicious recipe…my baby bear (my daughter) was very happy to have a homemade cake for her 8th birthday made by mama bear (me)! :D
Table of Contents

Sommer’s Recipe Highlights
The Perfect Birthday Cake – I’m sure this probably dates me, but in my mind, birthday cakes and weddingcakes are vanilla cakes, period. I’m not saying I won’t make a chocolate cake for somebody on occasion, but there’s an old school standard, and I’ve unapologetically perfected it here. If you’re looking for the absolutely perfect classic white cake that tastes like vanilla and has a light, delicate texture, this is it.
Irresistible Taste and Texture – The secret to this amazing homemade cake recipe is that I haven’t prioritized taste over texture, or vice versa. This cake has a bold vanilla flavor with an ever-so slight touch of tang. The tang comes from buttermilk, which is essential for giving it a soft, tender crumb.
An Adjustable Recipe for Your Own Creations – If you struggle to follow a recipe as-is, I see you. This is a fabulous base-cake for you to create your own variations. Mind you, I wouldn’t mess with the chemistry of the recipe… As in the proportions of dry and wet ingredients. However, you can change the extract to anything you like, add chips, nuts, dried fruit, food coloring, or even fresh zest, like with my lemon buttermilk cake. Have fun exploring flavors!
Key Ingredients and Tips
- Cake Flour – I use this lighter flour to create the ultra-airy texture. You can substitute all-purpose flour + a little cornstarch if needed. (Proportions in the recipe form below.)
- Baking Powder and Baking Soda – These are the leavening agents needed for the most fluffy and tender texture. I suggest buying these two ingredients twice a year… They are most often the culprit when baked goods don’t rise.
- Unsalted Butter – For quality control, I always use unsalted butter. It’s fresher than salted butter, because it has to be. (Salt is a preservative.)
- Granulated Sugar – I use traditional white sugar. Unbleached is fine.
- Eggs – 2 large eggs + 1 egg white, at room temperature. This combination softens the texture while creating extra lift.
- Buttermilk – Buy it or learn how to make buttermilk quickly!
- Vanilla Extract – Since this is the key flavor, I always buy 100% pure vanilla extract, not imitation. You can also use vanilla bean paste, but it leaves little specks in the cake.

How To Make
Find the full recipe with ingredient proportions, detailed instructions, and a video tutorial in the printable form at the bottom of the post.
Prepwork – I preheat my oven to 350°F so it’s nice and ready when I am. Then I grab either two 9-inch cake pans or one 9×13-inch baking dish and give them a good grease-and-flour situation. If I’m planning to flip the cake out (which I usually am), I trace the bottoms of the pans onto parchment paper, cut them out, and line the bottoms before greasing. It’s a tiny extra step that saves major heartbreak later. No stuck cake allowed in my kitchen.
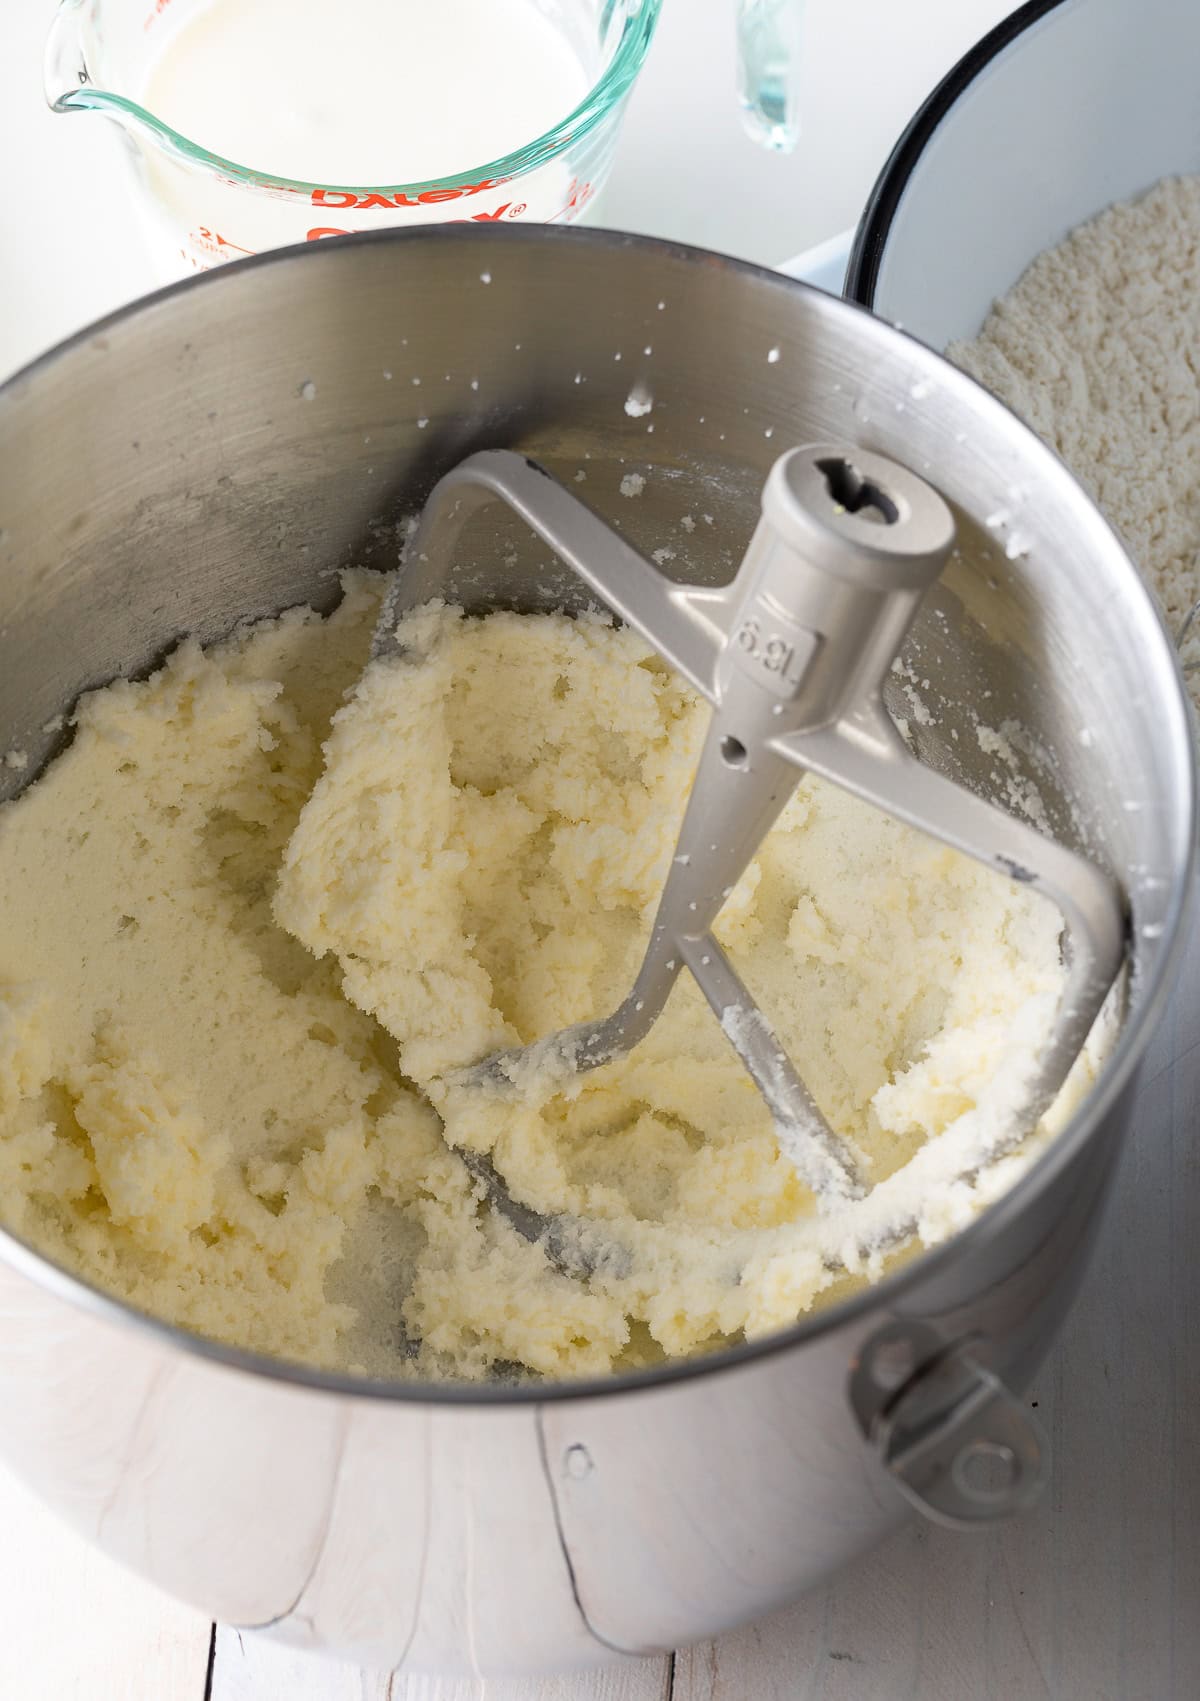
Cream the Butter – Next, I toss the butter and sugar into my stand mixer and beat them on high until they’re ultra light and fluffy — a full 3–5 minutes. I don’t rush this. This is where the magic texture happens. It should look pale and almost cloud-like. Then I scrape down the bowl (always scrape — hidden butter pockets are sneaky).
Dry Ingredients – In a separate bowl, I whisk together the cake flour, baking powder, baking soda, and salt. Quick tip: give it a good whisk to evenly distribute the leavening so you don’t get random air pockets.
Wet Ingredients – In a large measuring pitcher, I pour the buttermilk, then whisk in the eggs, extra egg white, and vanilla. I like using a pitcher because it makes pouring way easier and less messy.
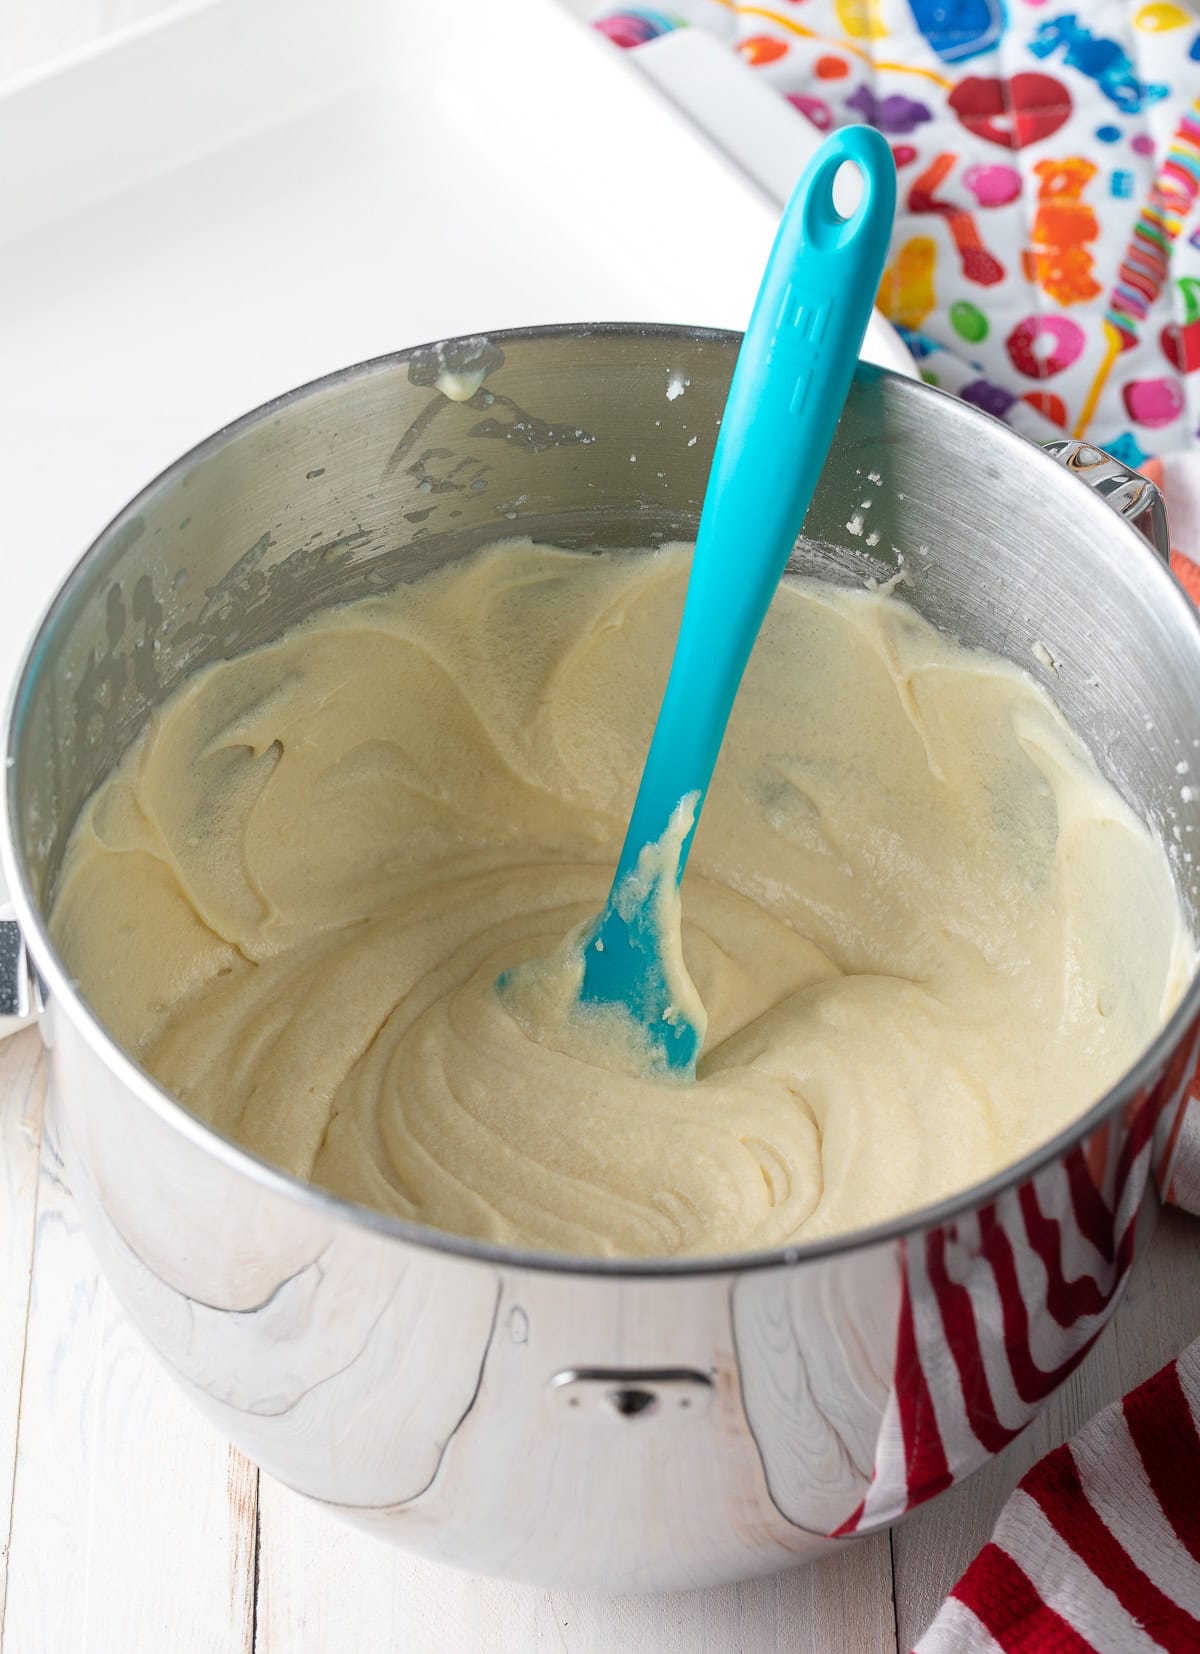
Beat All – Now I turn the mixer to low and alternate adding the dry ingredients and the buttermilk mixture. I go dry, wet, dry, wet, just until combined. Then I scrape the bowl again (yes, again, this matters). Finally, I beat it for just 15–30 seconds until smooth. And then I STOP. Over-mixing = tough cake, and I’m not about to tell that happen.
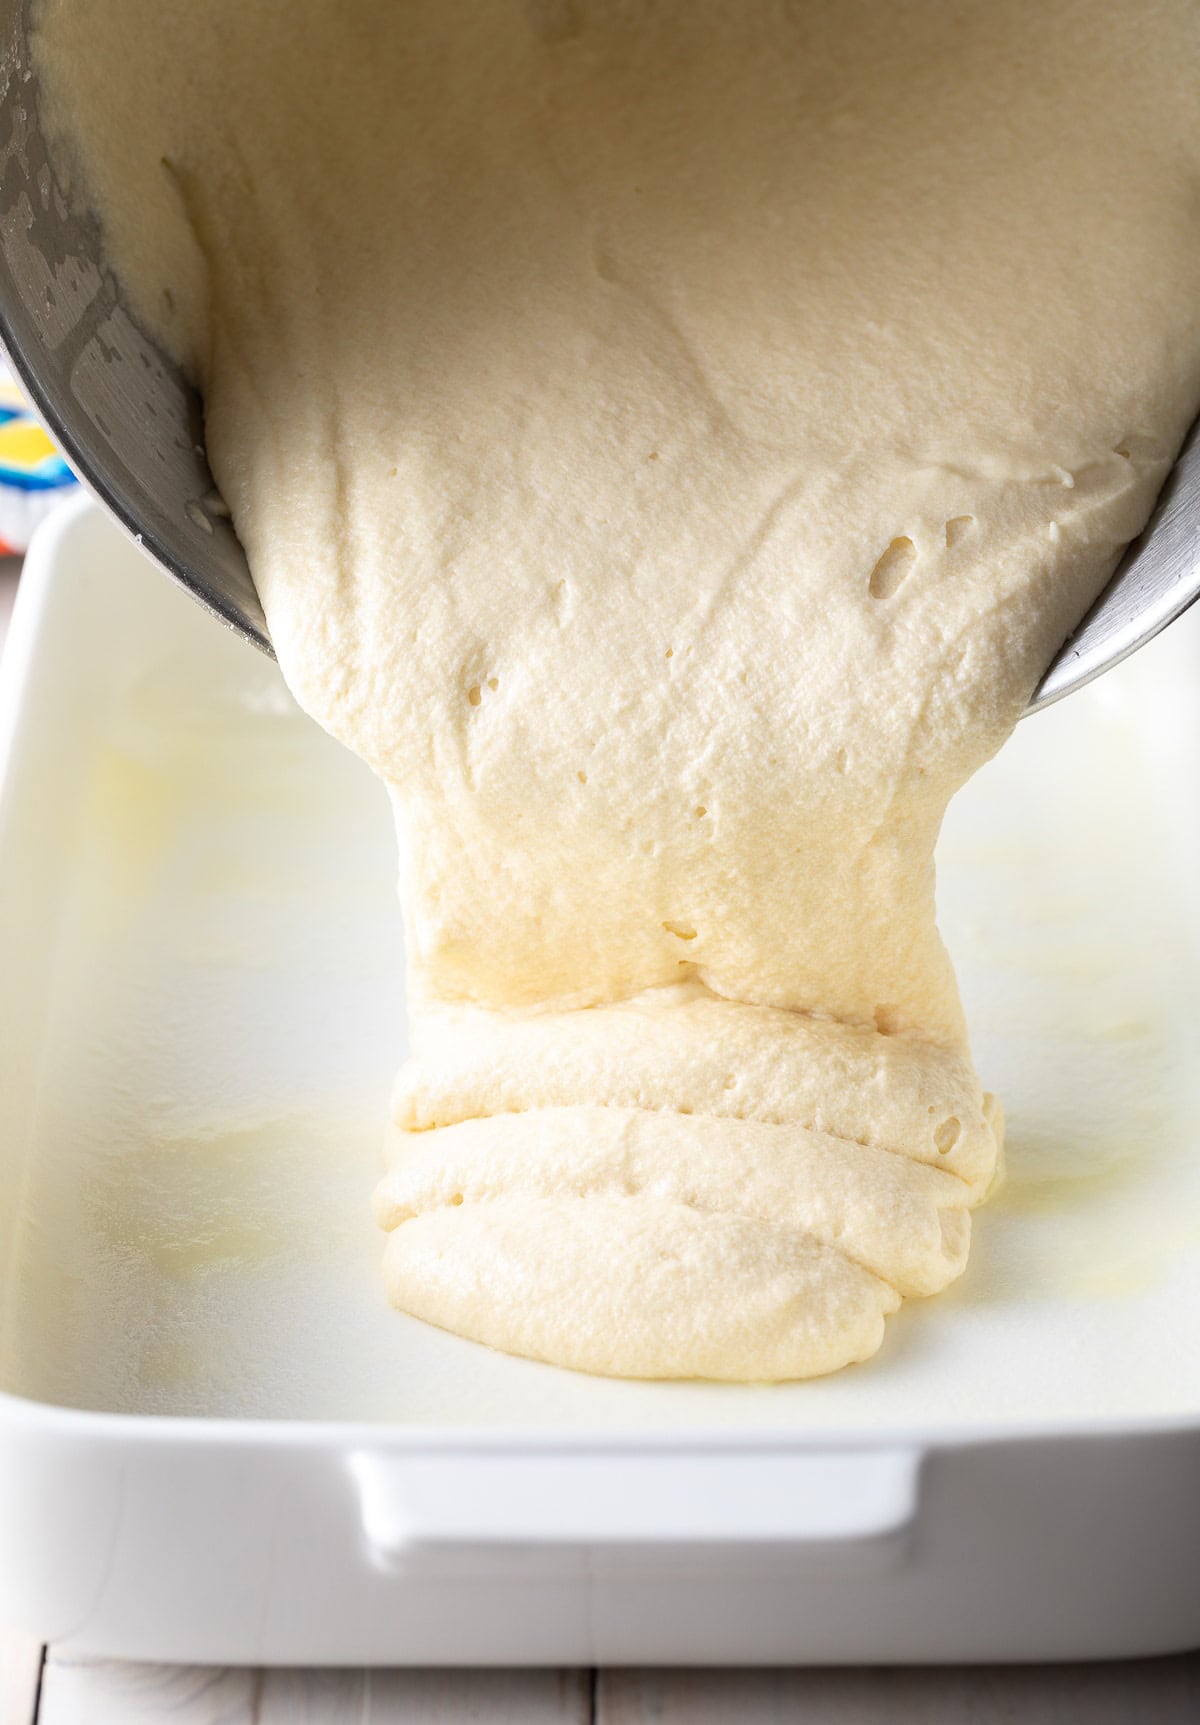
Bake – I pour the batter into my prepared pan(s) and pop them onto the center rack. The 9-inch pans bake for about 22–25 minutes, and the 9×13 takes 30–35 minutes. I start checking a couple of minutes early because ovens like to be dramatic. A toothpick inserted in the center should come out clean or with just a few soft crumbs.
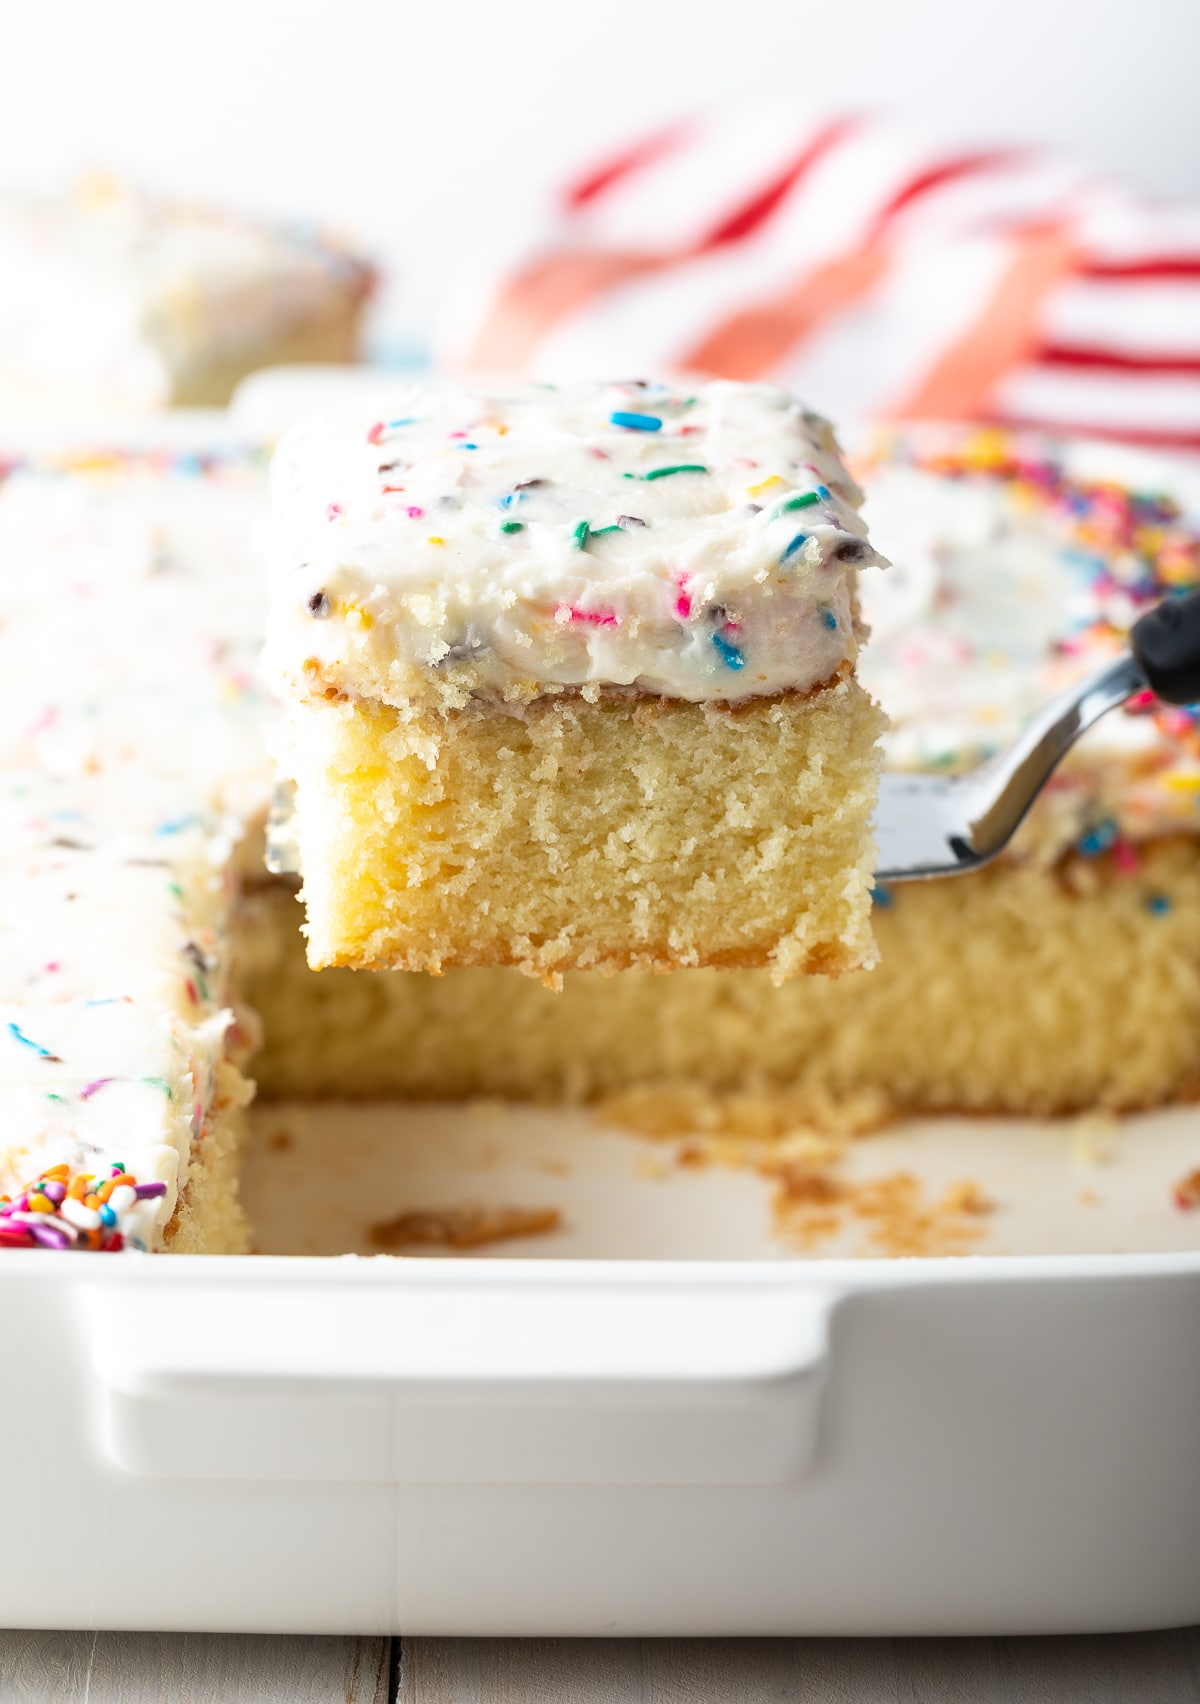
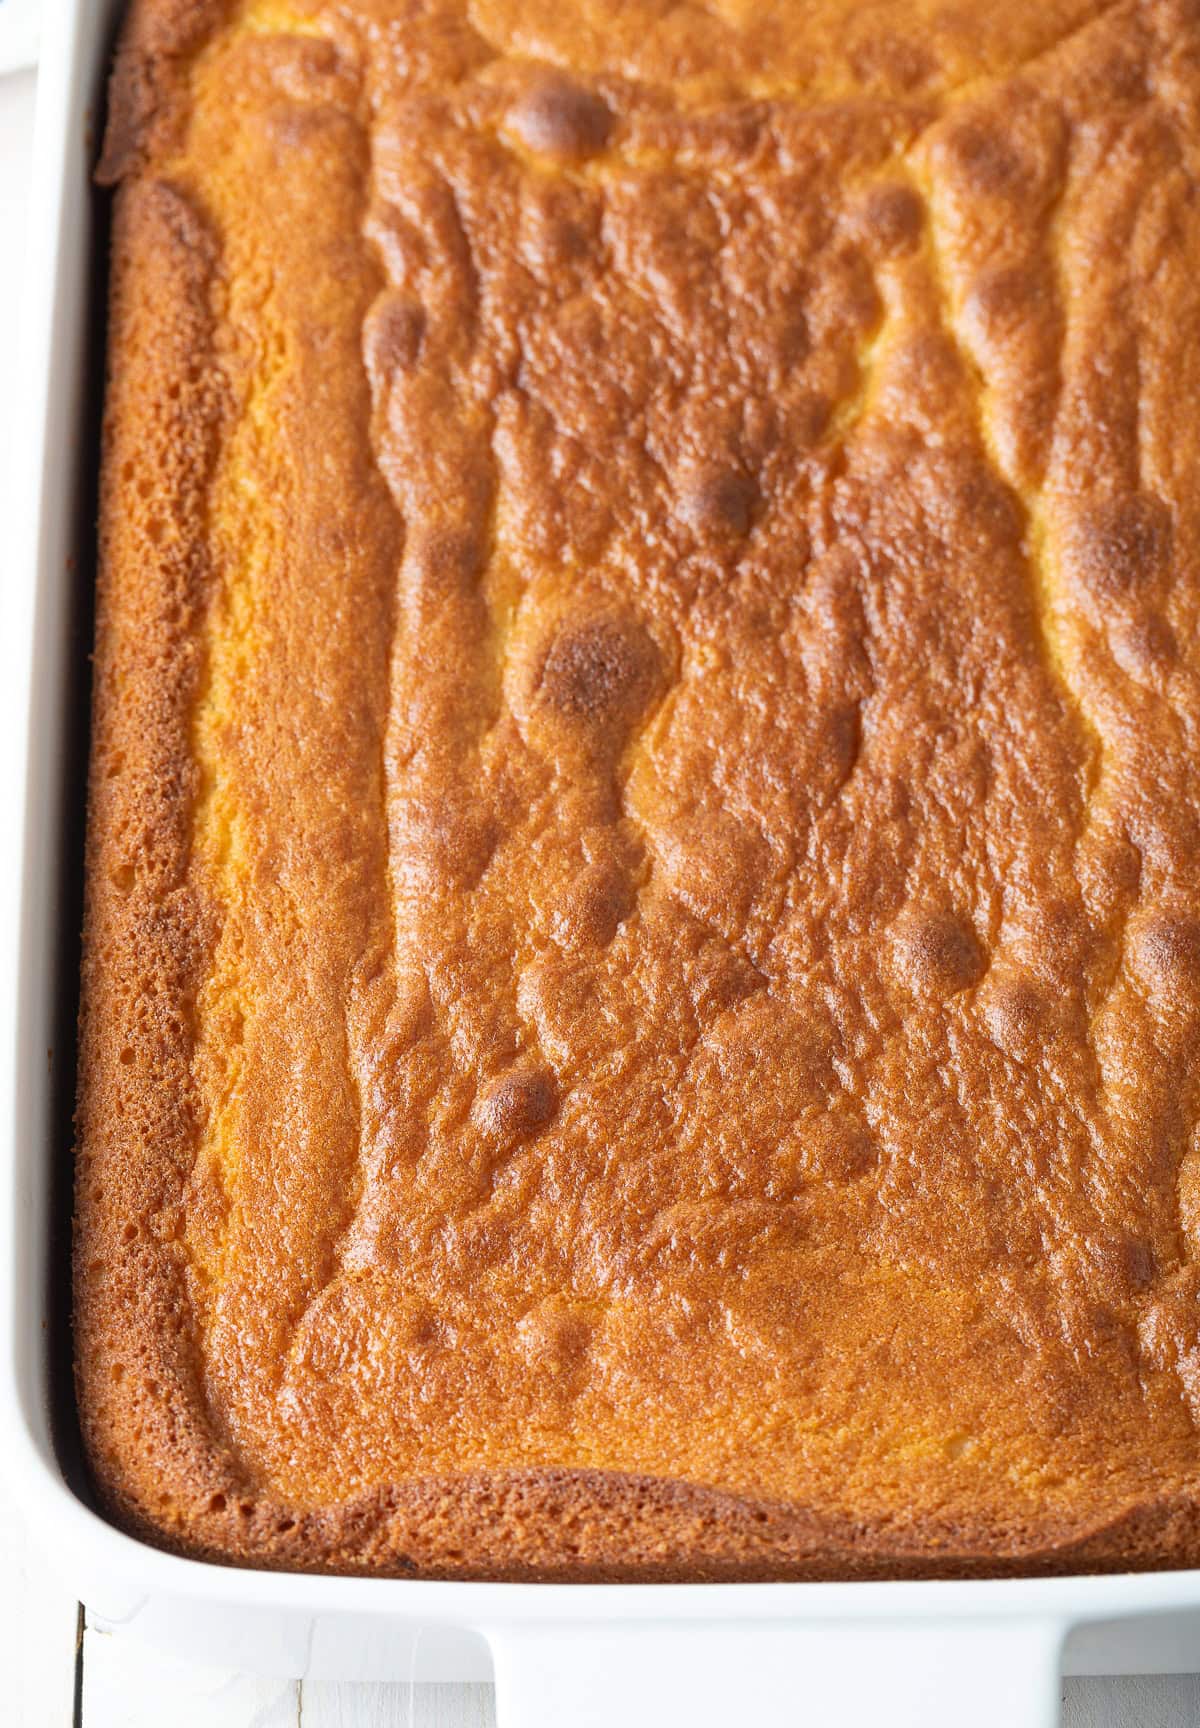
Cool – Once out of the oven, I let the cake cool in the pan for about 15 minutes. This helps it set so it doesn’t fall apart. Then I carefully flip it onto a cooling rack and let it cool completely. (Frosting a warm cake is a melty mess. Ask me how I know.)
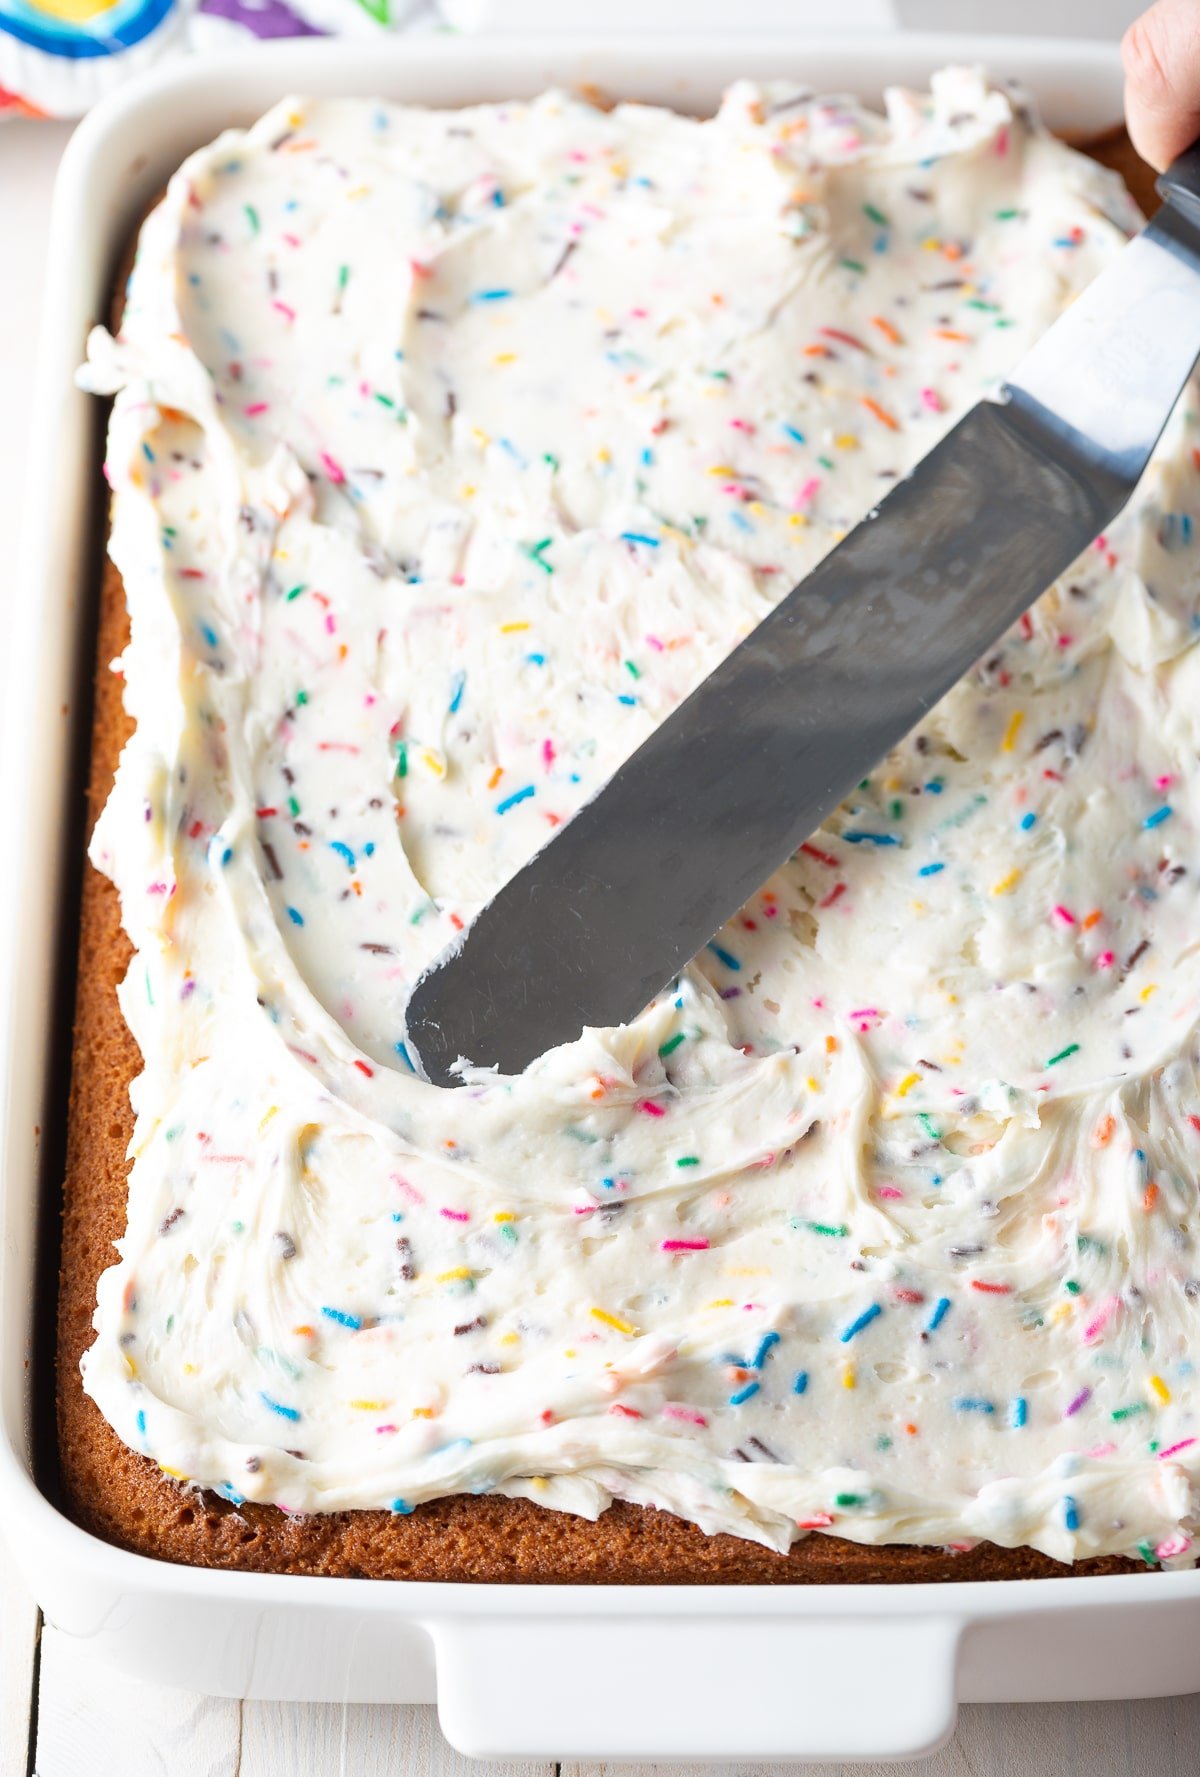
Frost – When it’s fully cooled, I slather on my homemade funfetti frosting, generously, because we’re not stingy here. Then slice and serve.
Expert Tips
Measure accurately. Especially the flour, people. To measure accurately, I fluff the flour in the bag, spoon it into the measuring cup until it is heaping, then I use the flat edge of a butter knife to knock off the top and level it out.
Make sure your oven thermostat is accurate. Buy an inexpensive oven thermometer to get an accurate read on your oven. Then adjust the temperature as needed.
Cake tastes (and feels) best at room temperature. Don’t believe me? Do a taste-test with a cold piece and a lukewarm piece. (Secretly, I’m just trying to ensure you get two pieces. *wink*) So if you refrigerate the cake, be sure to pull it out of the cold 30-60 minutes before serving.
For a layer cake, if you want perfectly even cake layers, weigh your batter as you divide it between pans. It makes stacking and frosting so much easier!
Speaking of layering, I often wrap the layers in plastic and flash-freeze them before stacking and frosting. This helps in two ways… It makes leveling the cake much easier because the layers are firm, and it helps keep the crumbs from working into the frosting as you smear it on.
Serving Suggestions
A birthday cake with funfetti icing is all you need to celebrate any special occasion! But sometimes I want to take things up a notch with ice cream or an extra sauce. Here are some of my personal favorites:
Frequently Asked Questions
You can make this recipe up to three days in advance. I recommend making the cakes, then wrap them well with plastic wrap and leave them at room temperature or pop them in the fridge. Make the frosting when you are ready to serve, and decorate the cake before serving!
After serving, cover the cake well. Then you can leave it out at room temperature for 4-5 days, or refrigerate it for up to a week.
Yes! Wrap it very well with plastic, and then with a layer of aluminium foil, and freeze for up to 3 months. Thaw at room temperature before serving.
Scoop the batter into 24 cupcake liners and bake for approximately 14-16 minutes.
Yes! This recipe converts to gluten-free very well. Use 1-to-1 gluten-free baking flour mix instead of wheat flour.
More Amazing Cake Recipes


Homemade Vanilla Cake Recipe
Video
Ingredients
- 2 1/2 cups cake flour (or 2 1/4 cups all-purpose flour + 1/4 cup cornstarch)
- 2 teaspoon baking powder
- 1/2 teaspoon baking soda
- 1 1/4 teaspoons salt
- 1 3/4 cups granulated sugar
- 3/4 cup unsalted butter, softened (1 1/2 sticks)
- 2 large eggs + 1 egg white
- 1 1/2 cups buttermilk
- 1 tablespoon vanilla extract
- Funfetti Frosting Recipe
Instructions
- Preheat the oven to 350 degrees F. Set out two 9-inch cake pans or one 9X13-inch baking dish. Grease and flour the pans. (If you plan to flip the cake out of the pan, line the bottom with parchment paper before greasing the pan. Trace the bottom of the pans onto parchment paper and cut the pieces out to fit exactly.)
- In the bowl of a stand mixer, cream the butter and sugar on high speed, until ultra light and fluffy. (about 3-5 minutes) Then scrape the bowl with a rubber spatula.
- In a separate bowl, mix the cake flour, baking powder, baking soda, and salt.
- Pour the buttermilk in a large measuring pitcher. Then whisk in the eggs, egg white, and vanilla extract.
- Turn the mixer on low and alternate adding in the flour mixture and the buttermilk, until all is combined. Scrape the bowl again. Then beat again for 15-30 seconds, just until the batter is smooth. Do not over-mix the batter.
- Pour the cake batter in the prepared pan(s) and place on the center rack in the oven. Bake 9-inch pans for 22-25 minutes, or a 9X13-inch pan for 30-35 minutes. Test the cake by inserting a toothpick into the center. If it comes out clean, remove from the oven.
- Cool the cake in the pan for 15 minutes, then carefully flip out onto a cooling rack. Cool completely. Once cooled, frost the cake with Homemade Funfetti Frosting. Then cut and serve!
Notes
- Flour Measuring – It’s very important to measure the flour properly. Stir the flour in the bag to lighten it up. Spoon the flour into measuring cups. Then level off the top.
- Learn how to make your own buttermilk here!
- What about cupcakes? Yes, you can scoop the batter into 24 cupcake liners. Bake for approximately 14-16 minutes.
- To Store: After serving, cover the cake well. Then you can leave it out at room temperature for 4-5 days, or refrigerate it for up to a week.
- To Freeze: Wrap the cake very well with plastic, and freeze for up to 3 months. Thaw at room temperature before serving.

This was fabulous! I can make a cake now!!! Thank you so much!
Hi Jeremiah,
YAY!!!! I’m so glad you liked it and felt successful! :)
Can you use this recipe in a layered cake? Like two 9″ cake pans?
Hi Ashley
Yes, you can! We offer cooking times for both a 9X13 inch pan and two 9 inch round pans in the recipe form. :)
Thanks, I’ll be using this recipe for a birthday cake again next weekend. What a perfect and versatile recipe!
So easy and fun to make. Thanks for such an amazing guide.
Love love love this!! My cake was moist and it turned out so good!! Thank you 💋
Fabulous cake. Easy recipe. D
I chose this recipe to make my mom’s birthday cake because I had all of the ingredients and it looked easy! I didn’t have my 2 pans to make it a layered cake; however, I ended up following the directions and using a bundt pan (cooked 350 for 45 minutes) and I stirred in chocolate chips at the end. The cake was a HUGE HIT!!!! XOXX
*I used a fudge glaze for the top!
i have try this recipe this is a awesome thanks!!
my mom like that Great recipe
Thanks for sharing the recipe. It was really delicious my mom also like.
Thanks for sharing! Really good
Great recipe! Thanks for share.