How to Test Meat Temperature
 Today’s “How To” has to do with meat temperature. Learn to use the finger test to check the internal temperatures for meat doneness. This simple meat test is nearly fail proof!
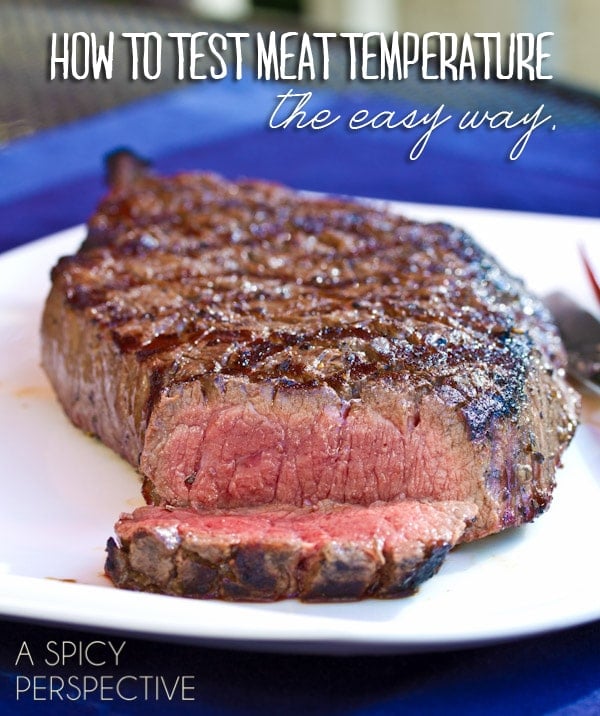
When I was newly married and just learning to cook on my own, without my mom standing over me to correct my mistakes, I would cut my meat down the center to check and see if the internal temperatures were safe to eat.
Has anyone ever done that?
If you’ve made the same blunder, you know exactly what happens. All the juices come pouring out, pooling on the platter and leaving a rather dry piece of meat in the center.
Next I moved to the meat thermometer. This tested the meat temperature with accuracy, but still, I was poking freshly cooked meat with a probe. So the juices, again, came running out.
More. Dry. Meat.
Finally I learned how to use the finger test to check my meat temperature. Like sheer magic, it worked (and still works) every time.
So for all of you who fear undercooked meat, or simply hate overcooking a good steak, let me show you this little trick.
First, it’s important to understand the USDA approved meat temperature of each variety of meat, so you know what to look for.
Here’s a safety breakdown….
For Beef and Most Red Meats, the internal temperatures to shoot for are:
- Rare – 120 to 125 degrees F
- Medium Rare – 130 to 135 degrees F
- Medium – 140 to 145 degrees F
- Medium Well – 150 to 155 degrees F
- Well Done – over 160 degrees F
For Pork:
- Medium – 145 to 150 degrees F (Yes, pork is safe to consume a little pink.)
- Medium Well – 155 to 160 degrees F
- Well Done – Don’t even go there.
For Poultry:
- Done – 165 to 170 degrees F
For Fish:
- Medium Well – 140 to 145 degrees F
- Well Done – 150+ (Usually dry.)
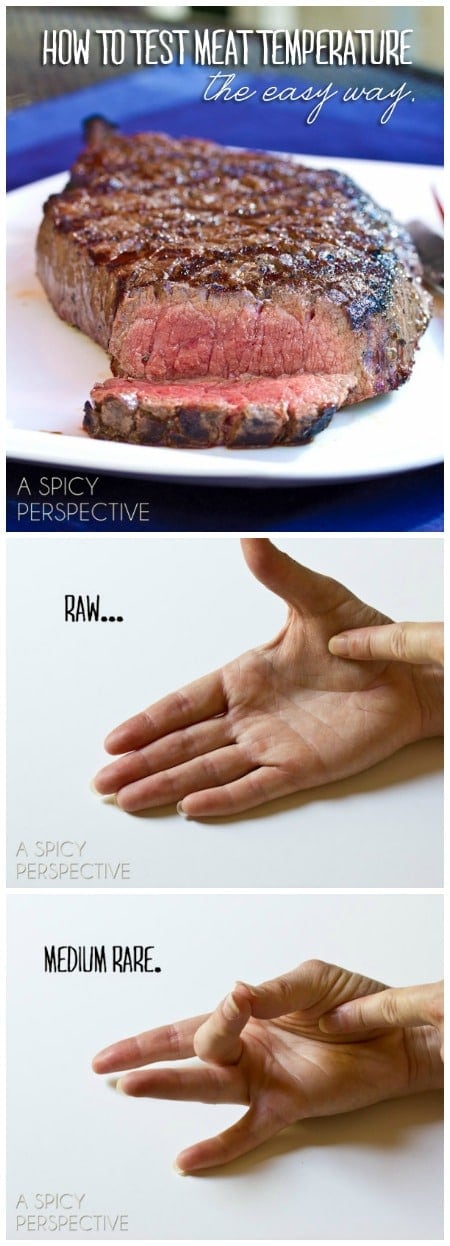
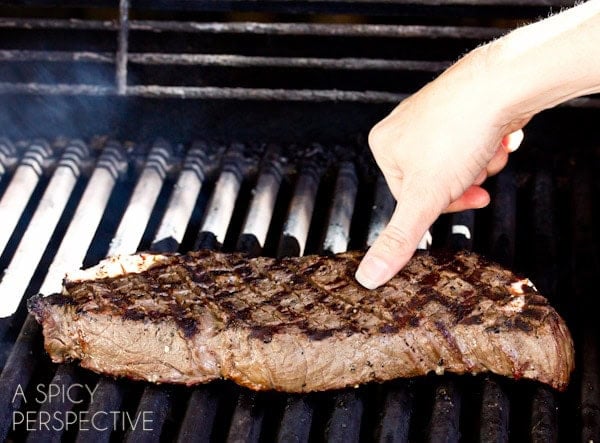
Now that we’ve got that out of the way, let’s talk about how to feel the internal temperature of meat with the finger test.
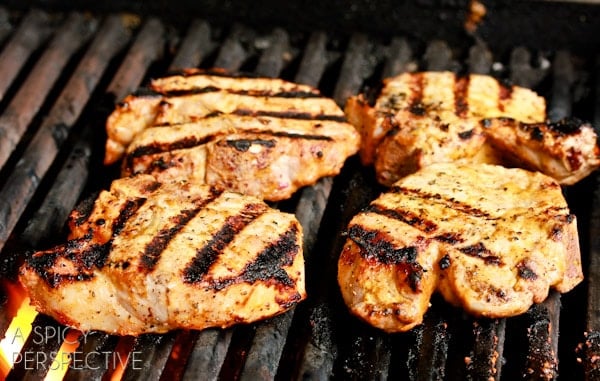
This is a great meat test for steak, pork chops, chicken breasts, even dense fish fillets like tuna and swordfish.
Here’s how it works…
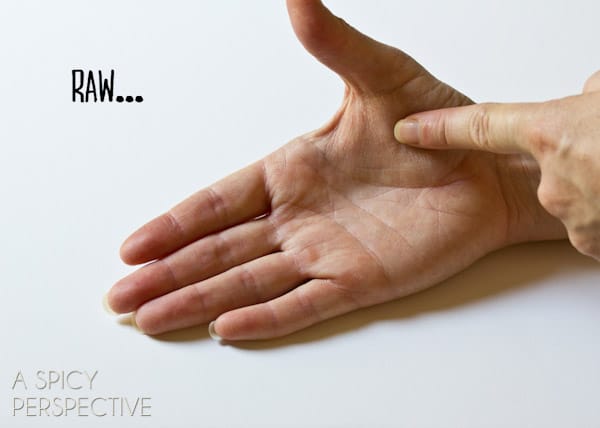
Feel the thickest fleshy area of your relaxed hand. This is how raw meat feels.
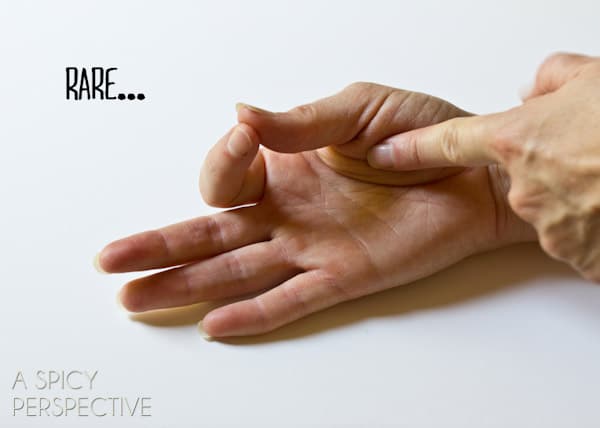
Now touch your index finger to your thumb and feel the same area of your palm. See how it firms up a little? This is how Rare meat feels.

Touch your middle finger to your thumb and press the fleshy part of your hand. This is how Medium Rare feels.
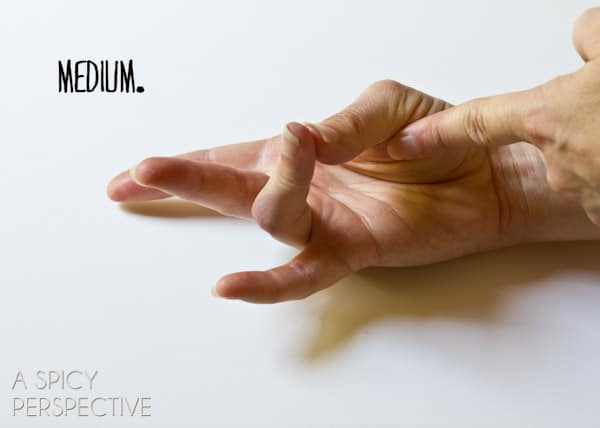
Touch your ring finger to your thumb and press the fleshy part of your palm again. Now you’ve got Medium.
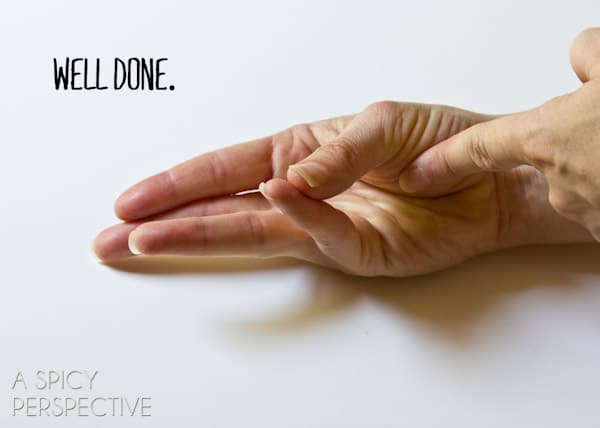
Finally touch your pinky to your thumb and feel the same area of your hand. Well Done. (Medium Well feels just slightly less firm than Well Done.)
Now… touch your piece of meat. What does it feel like in the center?
Try the finger test again to make sure you’ve determined the meat doneness. Then remove your meat from the heat source according to your desired internal temperature.
Always, always allow the meat to rest for 5 – 10 minutes before cutting into it, or you will surely lose all those lovely juices. Giving the meat a little rest, allows for the juices to redistribute and settle, so most of them stay put when you cut into it, providing a moist juicy bite.
I usually place a piece of foil loosely over the meat to keep it warm while it rests.
Allow a longer rest time for large pieces of meat like whole chickens and roasts.
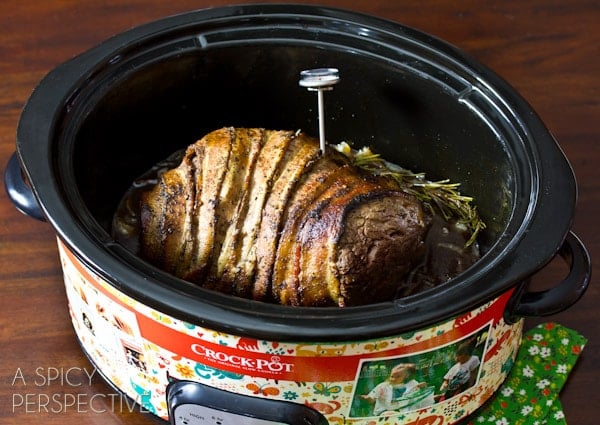
If you have a larger piece of meat and have to use a meat thermometer, I suggest using the kind you place in the meat prior to cooking and leave there. That way you don’t have to pull it out and release all the juices.
For thin fish fillets, it’s best to use a fork to test doneness. Prick the fish, if it flakes away and looks opaque in the center, it’s done. You can also press the center with your fingers to feel if it’s cooked through, but I usually rely on the flaky fish test.

Thanks for sharing your thoughts about meat. Regards
You have lovely hands. What a great visual tool.
Such a helpful post :) really great tips!