Mini Tamales

These easy “cheater” zesty Mini Tamales are perfect for sharing, and this recipe is a sure hit for all your game-day gatherings and holiday parties!


Sommer’s Recipe Notes
These cute little tamale bites are slightly spicy, hearty, and perfect for cool weather. Every time I take Mini Tamales to an event, they disappear in no time.
Add this Tamale Bites Recipe to your fall party or game-day menu this year. They will save you time, which you can spend on the people you love.
Why You’ll Love This Mini Tamales Recipe
- Huge time saver – Compared to traditional tamales, this recipe cuts the time in half! The prep work is much quicker, and so is the cooking time.
- Meal-prep greatness – Honestly, make sure to make A LOT of these mini tamales, because they’re amazing for planning ahead meals.
- Customizable – Fill these mini tamales with your favorite meat, whether it’s pork, chicken or beef.
These mini tamales are seriously the perfect party appetizer. So what are you waiting for?!

Ingredients and Tips
- Meat – For these mini tamales, you can use your preferred meat whether it’s shredded beef, pork or chicken.
- Vegetables – You’ll need chopped onion and garlic.
- Masa
- Spices and herbs – You will need ground cumin, fresh thyme leaves and a chopped chipotle pepper.
- Sour cream – Use a thick, regular sour cream.
- Masa – For both the filling and masa shell you will need masa aka corn flour.
- Queso fresco – For the garnish, use crumbled queso fresco.
Recipe Variations and Dietary Swaps
- Cheese – Swap the queso fresco with shredded cheddar, Monterey Jack or a spicy jalapeño cheese.
- Vegetarian – Make these vegetarian by replacing the meat with sauteed mushrooms or zuchinni.
- Other protein – Instead of the classic meats, use ground turkey or cooked crumbled chorizo.

How To Make Mini Tamales
Tip for Success – Let the baked tamale bites cool in the pan for several minutes before attempting to get them out. Messing with them while warm can cause the corn bottom to crumble.
Find the full Mini Tamales recipe with detailed instructions and storage tips in the printable form at the bottom of the post!


Storage Notes
- Storing Leftovers – Mini Tamales should be stored in an airtight container in the refrigerator. They will keep in the fridge for up to 5 days. They’re best enjoyed at room temperature.
- Freezing Leftovers – After baking, cool the mini tamales. Then wrap them well in plastic (or store them in an airtight container) and freeze for up to 3 months. When ready to use, thaw at room temperature, then reheat in the oven or air fryer.
- Reheating Leftovers – Reheat leftover mini tamales in the oven at a low temperature.
Serving Suggestions
Serve these delicious mini tamale bites with crumbled queso freso and a dash of freshly squeezed lime juice. You can also enjoy these with my Holy Guacamole Recipe, Roasted Tomato Salsa or a drizzle of simple crema.


Mini Tamales Recipe
Ingredients
For the Filling:
- 1 pound cooked, shredded beef or pork or chicken
- 1 tablespoon butter
- 1/3 cup chopped onion
- 1 clove garlic minced
- 2 teaspoons masa (corn flour)
- 1 tablespoon tomato paste
- 1 1/2 teaspoons ground cumin
- 1 tablespoon fresh thyme leaves + extra for garnish
- 1-2 canned chipotle pepper chopped
- 1/4 cup sour cream
- 1 tablespoon fresh lime juice
- Salt and pepper
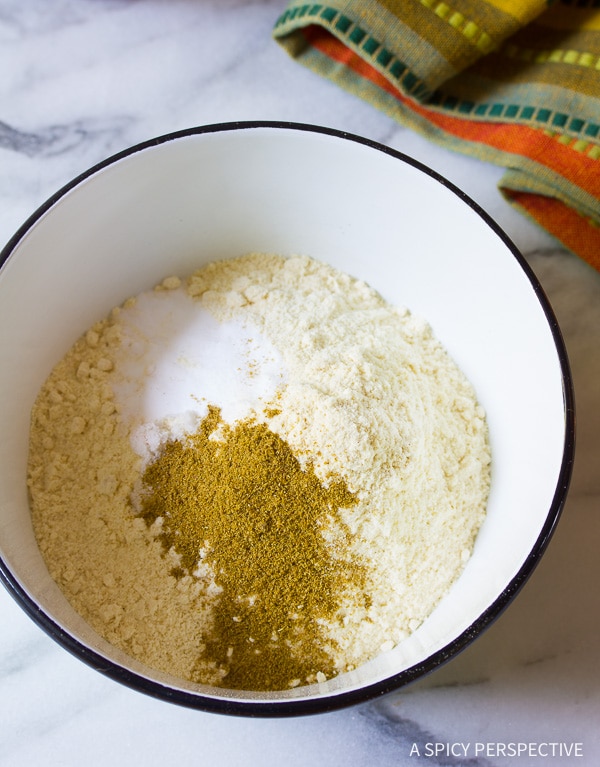
For the Masa Shell:
- 2 cups masa (corn flour)
- 1 teaspoon baking powder
- 1/2 teaspoon salt
- 1 teaspoon ground cumin
- 1 1/3 cups beef stock
- 2/3 cup vegetable shortening melted
- Crumbled Queso Fresco to garnish
Instructions
- Preheat the oven to 350 degrees F. Heat a large skillet over medium high heat. Saute the onion and garlic with 1 tablespoon butter for 2-4 minutes. Add the shredded meat, masa, tomato paste, cumin, thyme, and chopped chipotle peppers. Stir well and add 1 cup of water. Bring to a boil and lower the heat to simmer. Simmer until all the liquid in rendered out–approximately 10 minutes.
- Meanwhile, mix 2 cups of masa with the baking powder, salt, and cumin. Add the beef stock and mix to a crumbly consistency. Pour in the melted shortening and mix by hand until smooth.
- Spray mini muffin tins with nonstick cooking spray. Scoop the masa mixture into small 2 teaspoon balls using a small cookie scoop and place in the muffin tins. Use a round teaspoon (or pestel) to press a deep indention in the center of the masa balls. Once the beef mixture has rendered out the liquid, stir in the sour cream and lime juice. Salt and pepper to taste.
- Fill each masa shell with the meat mixture. Bake for 20 minutes. Allow the tamale bites to cool 5-10 minutes before extracting them from the muffin tins. Use a small sharp knife to loosen the tamale bites from the muffin tin. Then lift one side with the tip of the knife and gently lift each tamale bite out with your fingers. Garnish with crumbled queso fresco and thyme leaves. Serve warm.
Notes
Nutrition
Frequently Asked Questions
Yes! You can assemble these ahead of time and store in the refrigerator before baking.
Ah, that’s crucial. Make sure to grease the pan really, really well to avoid the masa shell from sticking.
Yep! You can find that in specialty Latin stores and it’s definitely a great time saver.


I am in the middle of making these and realize the recipe doesn’t say when to add the sour cream and lime juice to the filling mixture. After the added water is cooked out? Am doing a double batch with chicken and another double batch with beef for a big event tonight. Usually I test run a new recipe before the event day! This will teach me! :)
Never Mind! Now I see it! Perhaps I should have gotten a bit more sleep last night or have more coffee! Sorry!
This one’s my all time favorite!
I’ve never been a good Tamale maker but I love this “cheater” version!
these look addicting!! definitely a great game day snack
I wish I had more time with my family. I love far away so it’s sad how I just sorta get used to not seeing people. If we were able to all get together I think these little bites would be perfect. So simple and totally packed full of flavor.
Love this idea! Like an open face tamale!
Has anyone made these ahead of time? Can you make the tamale bites 2 days before and then bake them or should you bake them and then reheat?
Hi Laura, You can make them ahead and bake them when you need them. Just make sure to wrap them really well before refrigerating so they don’t dry out. :)
Wow, you have a ton of comments but I couldn’t find any from people who have actually made these!
I MADE THESE! Yesterday. And they were AMAZING. So easy, so delicious. My only change was to use melted butter instead of shortening, and it was delicious. One batch I made half butter/half olive oil, and it was delicious too (tasted the same, actually). I also used a vegetarian “beef” broth because I made several fillings and some of my guests were vegetarians. The masa was the best part. So delicious I had to stop myself from eating it raw. I made bigger ones (regular cupcake size) and they took about half an hour, I just waited until I could smell them. I did a shredded beef using your recipe and I can’t believe how good it is—I’m not usually a fan of beef unless it’s a t-bone.
All in all, EXCELLENT recipe. I will be making these well into the future. Also, I had some leftover masa and I fried it up in a skillet this morning and ate it with eggs! Amazing!
What a wonderful idea and recipe. Beautiful photos. I hope you have an extra bedroom, because I'm coming to live with you. I'll even do dishes. :-)
These look amazing! I love Mexican food but hate the fatty recipes. I could totally chow down on a few of these. Bookmarking it!
I have to tell you as a Mexican girl who also feels like there is never enough time this tamalitos look perfect! When I make tamales it is usually a 2 or even 3 day process for me alone to make them. But I always say that the effort is so worth it. With your recipe and technique I could still have the same taste presented cuter and prepared in a lot less time. This is such a brilliant idea!
THanks for posting a YBR badge and for joining us. I do hope to see you on next month's YBR as well. Have a great week.
What a great idea! I love this version!