Fondant Recipe
This fabulous homemade Fondant Recipe is made with a few simple ingredients and makes the softest and stretchiest covering for your favorite cake and decorations. This easy recipe tastes better than most fondants and will definitely impress your friends!

Sommer’s Recipe Notes
This homemade fondant recipe is SO much easier than you ever thought it could be, and trust me, it takes your baking game to the next level.
Not only does this fondant recipe make the coolest figurines and decorations, it also tastes a lot better than the store-bought version. So whether you’re baking a cake for a birthday, or just having fun in the kitchen, this foolproof recipe makes bakery-quality fondant right at home. The kids will LOVE it!!
Why You’ll Love This Fondant Recipe
- It saves tons of money – My local baking supply store sells fondant for $8 a pound. This recipe make 3 pounds for less than $5.
- Customizable – Add your favorite colors, glitter or whatever else your heart desires.
- Stretchy – This recipe makes the softest and most pliable fondant, so when you pull it apart it doesn’t break.
This easy fondant recipe is a must when it comes to baking and it will take all your decorating skills to the next level.

Ingredients and Tips
- Mini Marshmallows – Use white marshmallows, not the colored variety.
- Water – Use cold water.
- Flavored extract of choice – This is optional, although I used almond extract.
- Powdered Sugar – Make sure to use lots of it.
- Shortening – You can also use lard.
- Cornstarch – This is key for rolling.
- Food coloring – Use whatever color(s) you like!
Recipe Variations and Dietary Swaps
- Chocolate – To make the fondant taste chocolate-y, use unsweetened cocoa powder and powdered sugar.
- Marbled – For that fun marbled look, fold together at least two colors.
- Glitter – For that extra wow factor, fold in your favorite edible glitter and you’ll have sparkly fondant.
- Natural coloring – Use turmeric for yellow, beets for red or pink and spirulina instead of artificial food coloring.
How To Make Fondant
You might be intimidated to make homemade marshmallow fondant, and I get it! But trust me, this recipe is so easy and you’ll have the best time decorating cakes or making the cutest figurines.
Find the full Fondant recipe with detailed instructions and storage tips in the printable form at the bottom of the post!


Tips For Success
- The most important thing to remember is grease, grease, grease. Marshmallow fondant is very sticky until it’s finished. Grease everything it is going to touch… Including YOU.
- To make fondant at home, you simply need a large microwave-safe bowl and an electric mixer.
- Avoid Over-drying. If the fondant starts to tear or feel dry, add in small amounts of water until it is soft again.
Storage Notes
- Storing Leftovers – Wrap the leftover rolled fondant tightly in plastic wrap and store at room temperature for up to 2 months. Don’t freeze fondant!

Marshmallow Fondant Recipe
Video
Ingredients
- 16 ounces mini marshmallows
- 3-6 tablespoons water
- 1/2 teaspoon flavored extract of choice, optional
- 2 pounds powdered sugar
- 2/3 cup shortening
- Cornstarch for rolling
Instructions
- Place the shortening in a small bowl, you’ll need to dip into throughout the entire process.
- Grease a microwave-safe bowl, the electric mixer bowl, the paddle attachment and a spatula with shortening.
- Pour the marshmallows, 3 tablespoons of water and the extract in the microwave-safe bowl.
- Melt the marshmallows in the microwave in 30 second increments. Stir with the greased spatula in between.
- Continue until the marshmallows are completely smooth—2-3 minutes.
- Pour the marshmallows into the greased mixer bowl. Start the mixer on low and slowly add the entire bag of powdered sugar. Mix until the mixer starts to struggle. There will still be plenty of dried clumps in the bowl.
- Grease a clean work surface and your hands. Dump the mixture out on the surface, clumps and all. Start kneading and re-grease hands as needed.
- Knead for several minutes until the mixture is clump free. At this point, if it seems to be dry and rips when you pull it, add a little more water, 1 teaspoon at a time, until the fondant is soft, pliable and can stretch a little ways when you pull on it. *When you add the water, it is going to seem like a mistake for a moment, but re-grease your hands and keep kneading. The water will absorb into the fondant.
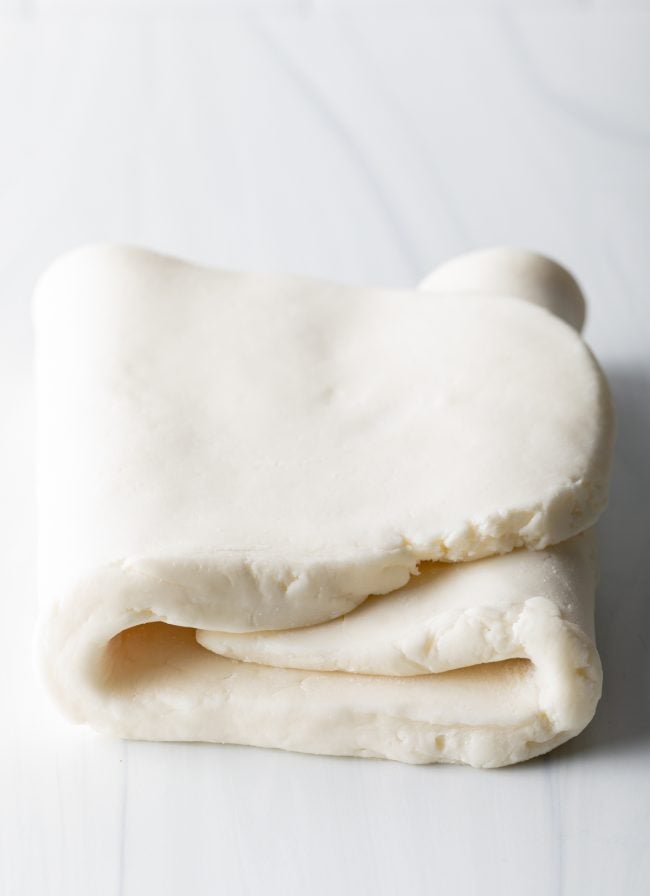
- Now, grease the whole ball and wrap with plastic wrap. Place the wrapped ball in a large zip bag and squeeze out all the air before sealing. Let it sit overnight to improve the texture and elasticity. *You can use it immediately in a “cake emergency” but it’s better to wait. *It’s best to color fondant right before using so the color doesn’t fade. Drop a few drops of food coloring on the fondant and knead in.
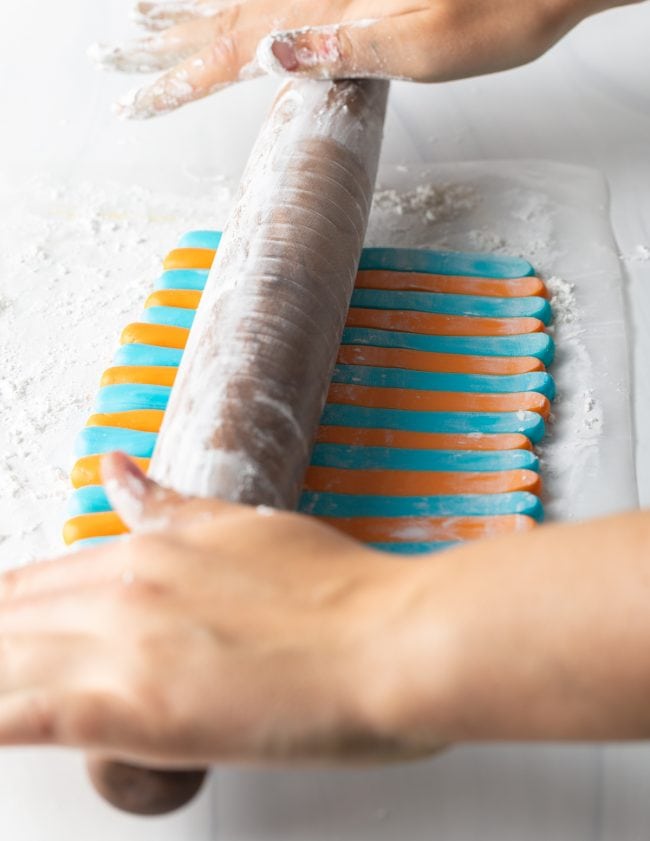
- Once it has sat overnight, sprinkle a clean work surface, and your hands, with cornstarch. *Some people use more powdered sugar for this, but they risk adding clumps to their perfectly smooth fondant. Cornstarch doesn’t clump.
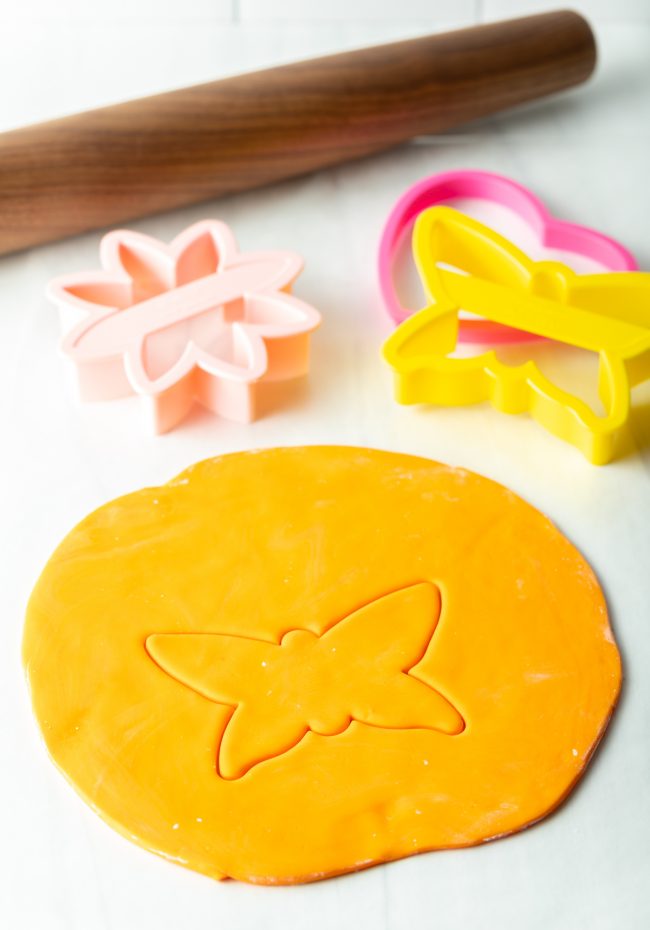
- If rolling out for a cake, rub cornstarch on the rolling pin and roll until just over 1/8-inch thick. Make sure to measure the cake and sides accordingly. Drape over a frosted cake and gently smooth any bumps or creases. Carefully cut the excess fondant around the bottom.
- If using for molding, HAVE FUN! It molds just like play dough. If wrapped well, it will keep at room temperature for a long, long time.
Nutrition
Frequently Asked Questions
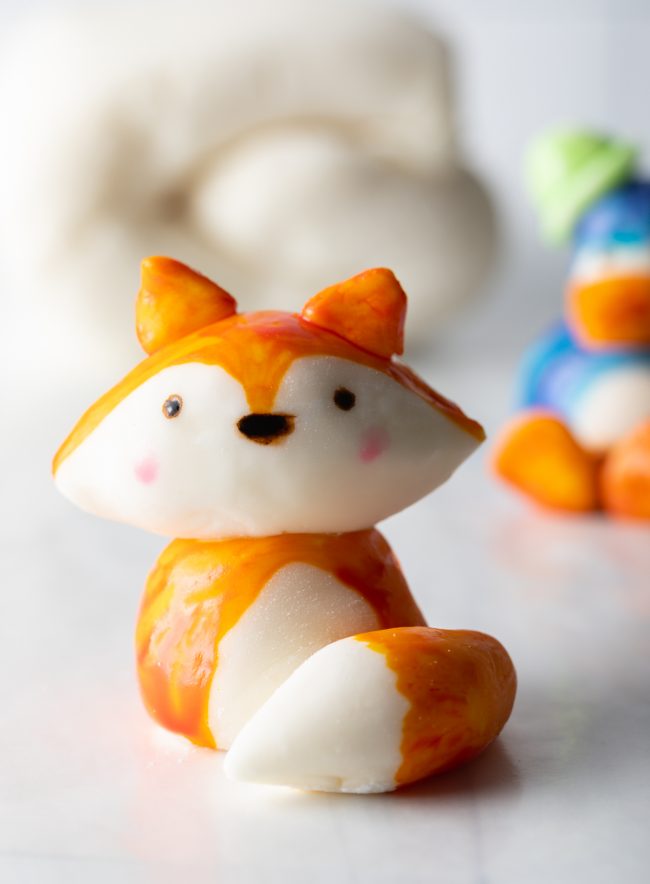
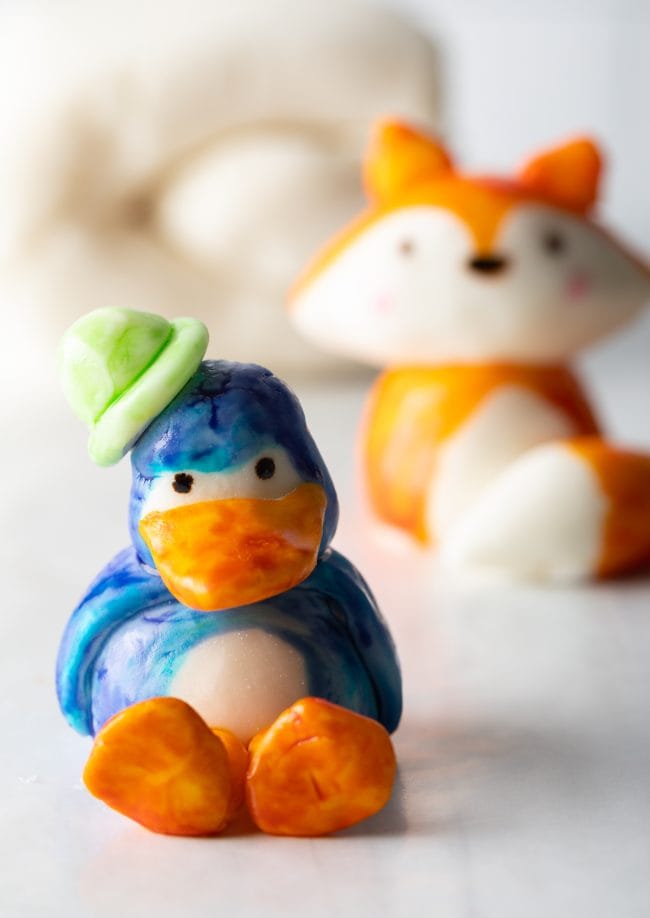
Your homemade fondant will be white. If you want to make solid colors, cut the fondant into chunks and knead food coloring into each piece until the color is smooth. (See images above for reference.) Gel food coloring offers the most saturated color.
You can also make shapes with white fondant and paint them with food coloring for a “watercolor” look. Simply mix food coloring with a small amount of water (about 1 tsp) until the edible paint is as dark or saturated as you want it to be. Then, use paintbrushes to decorate the fondant shapes. Allow the paint to dry thoroughly before moving.
You can, but it probably won’t get you very far. You’ll have to do most of the mixing by hand. It’s a good upper body workout!
When making fondant the air temp shouldn’t matter that much. It will be a little softer in warm temperatures and a little more firm in cooler climates, but not by much.
You can use your amazing fondant to cover cakes, mold into critters, and cut fun shapes for cupcake toppers. It rolls out like a dream and molds just like playdough.
Fondant is best used to create a smooth layer over cakes, for FLAT decorations, and for small squatty shapes that aren’t top-heavy. If you want to make standing bows or larger flowers you’ll need to use gumpaste, because it dries harder.


I’m saving this post. I usually hate the taste of fondant. I do like marshmallow fondant much better and you’ve made it look so easy to make!
I had absolutely no idea that it would be that easy. I can’t wait to give it a try and make my own. Thank you, thank you for showing us how to make it.
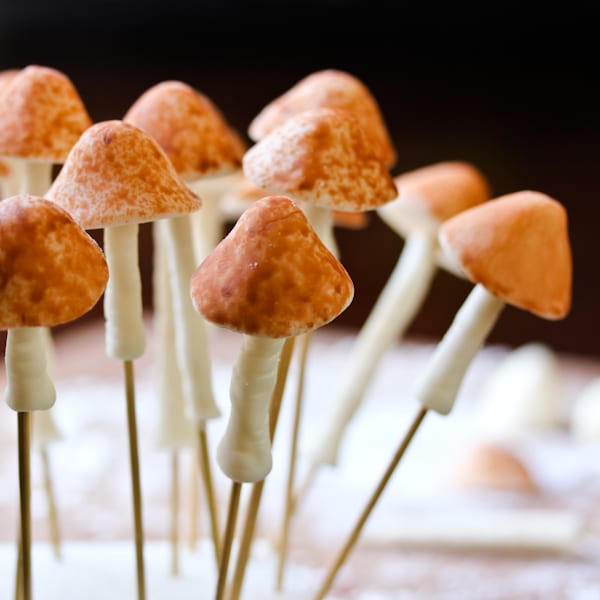
I adore those gnomes too. I don’t know that I’m up for that, but I bet I could conquer the mushrooms!
You are simply awesome, Sommer! That is just too cool. I’m so far removed from cake decorating, that I’ve never heard of marshmallow fondant. Adorable!
Oh Sommer – you are my hero! I have always wanted to try working with fondant and now you tell me I can make my own! Thank you a million times! Your gnomes are so adorable. Why or why don’t I work in a bakery instead at a desk?
WHOA. So impressive. Those shrooms look so real
I love Marshmallow fondant! I discovered it recently and it is loads of fun!
Love the mushrooms and gnomes!
You’re right. It does look cool. I probably won’t try this myself, but I know my wife will like it. She’s experimented with fondant a few times.
I love how easy marshmallow fondant is. And those mushrooms and gnomes are just adorable, Sommer!
All right, those are DARN cute.
Wow, I would never think to make my own fondant. How cute are your gnomes!
That is awesome!!!! I am so excited to try this….. great post!
wow how cool!