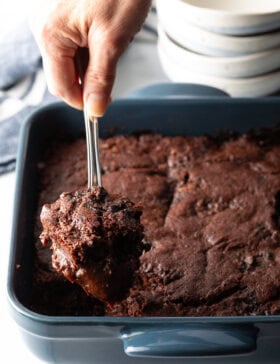
Cherry Pie Filling

Best Homemade Cherry Pie Filling – Skip the canned stuff and make a batch of sweet, thick, and delicious pie filling with fresh cherries and just a handful of simple ingredients. This scratch-made Cherry Pie Recipe is sure to be an instant family favorite!

Why We Love This Homemade Cherry Pie Filling Recipe
We love fruit pies, with sweet and juicy seasonal fruit nestled into a buttery and flaky crust. Cherry pie is a classic American treat for summer, but it is actually (surprisingly) easy to make with homemade pie filling any time of year!

Sommer’s Recipe Notes
You can make a delicious cherry pie recipe with fresh cherries, or you can use frozen cherries when fresh cherries are not in season.
Either way, the taste and texture of the filling are much more fresh and perky than the canned variety.
The filling comes together quickly and is perfect to enjoy baked in a homemade pie crust or store-bought pie crust, or with any number of fabulous desserts.
Making the filling fresh gives it that completely grandma’s kitchen made-from-scratch flavor, even when you need to cut corners on the dough. But while we love a good homemade pie crust, if you’re in a rush, this is a great tried-and-true recipe to use with refrigerated roll-out pie crust.

Ingredients You Need
- Pie crust – homemade butter pie crust or store-bought
- Cherries – fresh or frozen (sweet and tart cherries or sour cherries)
- Sugars – granulated sugar and coarse sugar for topping the pie
- Lemon – zest and juice
- Cornstarch – a gluten-free pie filling thickener
- Almond extract – or vanilla extract
- Egg – plus a bit of water


How to Make Cherry Pie Filling from Scratch
Step 1 – Prep the Cherries
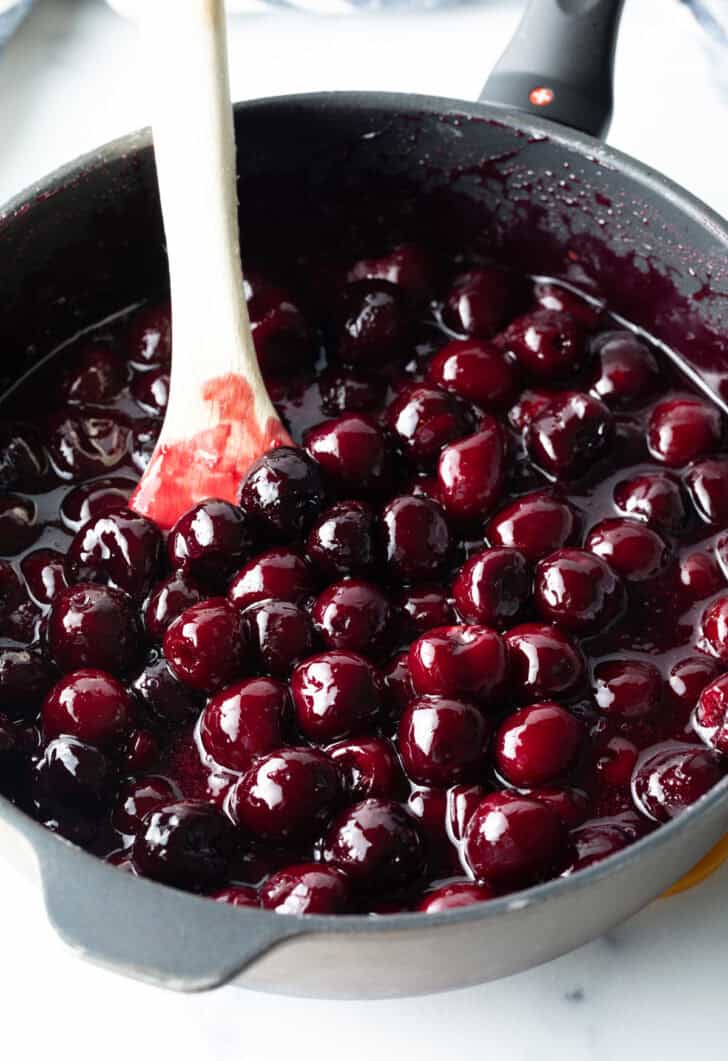
Use a cherry pitter to remove the pit and stem from fresh sweet cherries. Then place them in a medium saucepan.
Pro Tip: There’s nothing worse than biting into a piece of pie and nearly breaking your tooth on a cherry pit. Make sure to prep the cherries carefully, removing every pit.
Step 2 – Make the Cherry Pie Filling
Pour the sugar, lemon juice, lemon zest, and cornstarch into the sauce pot. Bring the cherries to a simmer and stir to release the juices and thicken the filling. Continue simmering until the cherries are mostly cooked through and the glaze is the consistency of thick syrup. Do not let the mixture boil.
Pro Tip: Stir continuously, so the sugar doesn’t burn while the juices release. Cherries are denser than berries, so cooking the filling ahead of time gives it a head start. Then, you don’t have to overbake the crust to get a perfect cherry pie filling inside.
Step 3 – Prep the Pie Crusts
Make our homemade pie dough recipe, separate the dough, wrap it in plastic, and chill until ready to use. Then, roll out two pie crusts into 9-inch circles when you’re ready to begin.
Pro Tip: It helps to use a pastry mat to roll out the pie crusts. Place each piece of dough on a piece of wax paper (or parchment paper) before rolling for easy moving.
Set out a deep dish 9-inch pie pan. Use a rolling pin to roll one crust into an 11-inch circle that fits over the bottom and sides of the pan, covering the lip as well. Place the bottom crust in the refrigerator while you work on the top crust.
For the top crust, you do not have to do any fancy decorating if you don’t want to. You can use a knife to simply slice 4 air vents (slits) in the top. However, if you want to create a classic lattice top, use a pizza roller to cut the pie crust into 1-inch strips.
Place 6 strips across the pie in one direction, leaving 1/2-inch gaps in between. Then, weave the remaining strips in the opposite direction, gently lifting the original strips up as needed. Here’s a handy video to see how it’s done! You can also use a diamond-shaped cookie cutter to cut out decorative vent holes in the top of the pie, like we did. It’s sort of a reverse-lattice look!
Step 4 – Preheat the Oven and Fill the Cherry Pie
Carefully pour the cooled pie filling into the cold pie crust. The filling should come to the top of the pie with a slight dome in the center. If you find your pie pan is not quite large enough to hold all the cherry filling, reserve some for another use.
Step 5 – Cover the Pie and Bake
Carefully move the top pie crust over the cherry pie filling. Crimp the two crusts together along the rim of the pan. You can do this with your fingers, or with a fork. Working with a lattice top, it’s best to roll the edges of the pie crust up over the lattice. If working with any other crust you can roll the two piecrust together downward to make the edges neat.
Pro Tip: Check the pie crust about halfway through cooking time. If it looks like it’s browning too early, place a piece of foil loosely over the top and continue baking.
Serve cherry pie as-is or with a scoop of vanilla ice cream or a dollop of whipped cream.
Find the full cherry pie filling recipe with ingredient proportions, detailed instructions, and a video tutorial in the printable form at the bottom of the post.

More Ways to Use Homemade Cherry Pie Filling
Aren’t you already in love with this cherry pie recipe? But don’t stop here! Our easy pie filling can be used to make a wide range of sweet and delicious treats. Give these a try:
- Hand pies (AKA Homemade Pop-Tarts!)
- Mini tarts and pies
- Slab pie
- Pie bars
- Cheesecake dip
- Sweet rolls
- Ice cream
- Dessert or yogurt topping

Recipe Variations
- Fresh or frozen – As noted, you can make this recipe with fresh or frozen cherries.
- Fruit – Use this basic scratch-made pie filling recipe to make all kinds of berry pies! Swap fresh or frozen cherries with blueberries, raspberries, or strawberries.
- Gluten-free – Simply use your favorite packaged gluten-free pie crust dough from the store.
- Canned filling – Short on time? No worries! You can use a can of pie filling and continue with the cherry pie recipe.

Frequently Asked Questions
If you don’t have cornstarch, you can use all-purpose flour to thicken the pie filling. Use twice as much flour as cornstarch, so a total of 1/2 cup of flour.
Rolling the dough to the right thickness and keeping the bottom pie crust in the refrigerator are two great tricks to prevent fruit pies from leaking. The cold crust helps the pie not to overbake and is, therefore, less likely to get dry and crack.
I recommend covering the cooled pie with plastic wrap or aluminum foil and keeping it in the fridge for 4-5 days.
Yes, you can! Assemble and bake the cherry pie in an aluminum pie plate. Let it cool completely before wrapping in a layer of plastic wrap and aluminum foil. Keep in the freezer for up to 3 months.
Thaw the pie in the fridge overnight, or defrost it on the counter for an hour or so. Bake at 350 degrees for 20-30 minutes until the pie is reheated and the cherry filling is bubbly.
Cool the filling completely and transfer to an airtight container. It will keep well in the fridge for up to a week.

Looking for More Dessert Recipes? Be Sure to Try:


Cherry Pie (Homemade Pie Filling Recipe)
Video
Ingredients
- Homemade pie crust recipe or 1 box refrigerated pie crusts with 2 crusts
- 7 cups fresh cherries pitted (or frozen cherries) about 3 lbs
- 1 cup granulated sugar
- ¼ cup fresh lemon juice + 1 teaspoon zest
- ¼ cup cornstarch
- ½ teaspoon almond extract or vanilla extract
- 1 egg + 1 tablespoon water
- 1 tablespoon coarse sugar
Instructions
- Prep the Cherries: If working with fresh cherries, use a cherry pitter to remove the pit and stem from each cherry. Measure the cherries and place them in a medium sauce pot. *There's nothing worse than biting into a piece of pie and nearly breaking your tooth on a cherry pit. Make sure to prep the cherries carefully removing every pit.
- Make the Cherry Pie Filling: Pour the sugar, lemon juice, lemon zest, and cornstarch into the sauce pot. Turn the heat on medium-low and bring the cherries to a simmer. Stir and simmer the cherries to release the juices and thicken the filling, about 8-10 minutes. Stir continuously, so the sugar doesn’t burn while the juices release. Then simmer until the cherries are mostly cooked through and the glaze is the consistency of thick syrup. Then turn off the heat and add the almond extract. Allow the cherry pie filling to cool completely before adding to the pie crust. *Cherries are more dense than berries, so cooking the filling ahead of time gives the cherry filling a head-start. That way, you don't have to overbake the crust in order to get a perfect cherry pie filling inside.
- Prep the Pie Crusts: If making pie crust from scratch, use the link to make our homemade recipe. Separate the dough, wrap the pieces in plastic, and chill until ready to use. Then roll out 2 pie crusts into 9-inch circles before proceeding. *It helps to use a pastry mat to roll out the pie crusts. Or place each piece of dough on a piece of wax paper (or parchment paper) before rolling for easy moving.
- Set out a deep dish 9-inch pie pan. Roll one crust into an 11-inch circle so that it fits over the bottom and sides of the pan, and covers the lip of the pan as well. Place the bottom crust in the refrigerator while you work on the top crust.
- For the top crust, you do not have to do any fancy decorating if you don’t want to. You can simply slice 4 air vents in the top. However, if you want to create a classic lattice top, use a pizza roller to cut the piecrust into 1-inch strips. Place 6 strips across the pie in one direction, leaving 1/2 -inch gaps in between. Then weave the remaining strips in the opposite direction gently lifting the original strips up as needed. You can also use a diamond shaped cookie cutter to cut out decorative vent holes in the top of the pie, like we did. It’s sort of a reverse-lattice look!
- Preheat the oven to 400°F.
- Fill the Cherry Pie: Carefully pour the cooled pie filling into the cold pie crust. The filling should come to the top of the pie with a slight dome in the center. If you find your pie pan is not quite large enough to hold all the cherry filling, reserve some for another use.
- Cover the Pie: Carefully move the top pie crust over the cherry pie filling. Crimp the two crusts together along the rim of the pan. You can do this with your fingers, or with a fork. Working with a lattice top, it's best to roll the edges of the pie crust up over the lattice. If working with any other crust you can roll the two piecrust together downward to make the edges neat.
- If you want the pie crust to be shiny on top, whisk together 1 egg and 1 tablespoon of water. Brush the egg wash over the top of the pie, then sprinkle with coarse sugar. *This step is completely optional – you do not have to eggwash the top.
- Place the pie on the center rack of the oven. Bake for approximately 40-45 minutes. Check the pie crust after 25-30 minutes. If it looks like it’s browning too early, place a piece of foil loosely over the top and continue baking.
- Allow the pie to cool completely before cutting and serving, otherwise the filling may not be fully set.

This was my first time making pie filling from scratch and also pie crust! It was so fun. I bought the cherry pitter tool on Amazon, and now it’s my favorite mini hobby, popping pits out of cherries. LOL!!!!!! The pie was amazing. I plan to make it again for July 4th. THANKS!
I just saw this appear on the homepage and remembered that I forgot to leave a comment when I made it! I made this pie filling AND the pie crust, which was my first time for crust. It turned out so wonderful. The pie filling was way better than the canned filling, and the crust was a little extra work, but totally worth the effort. I will make this again when our cherries come in. Thank you!