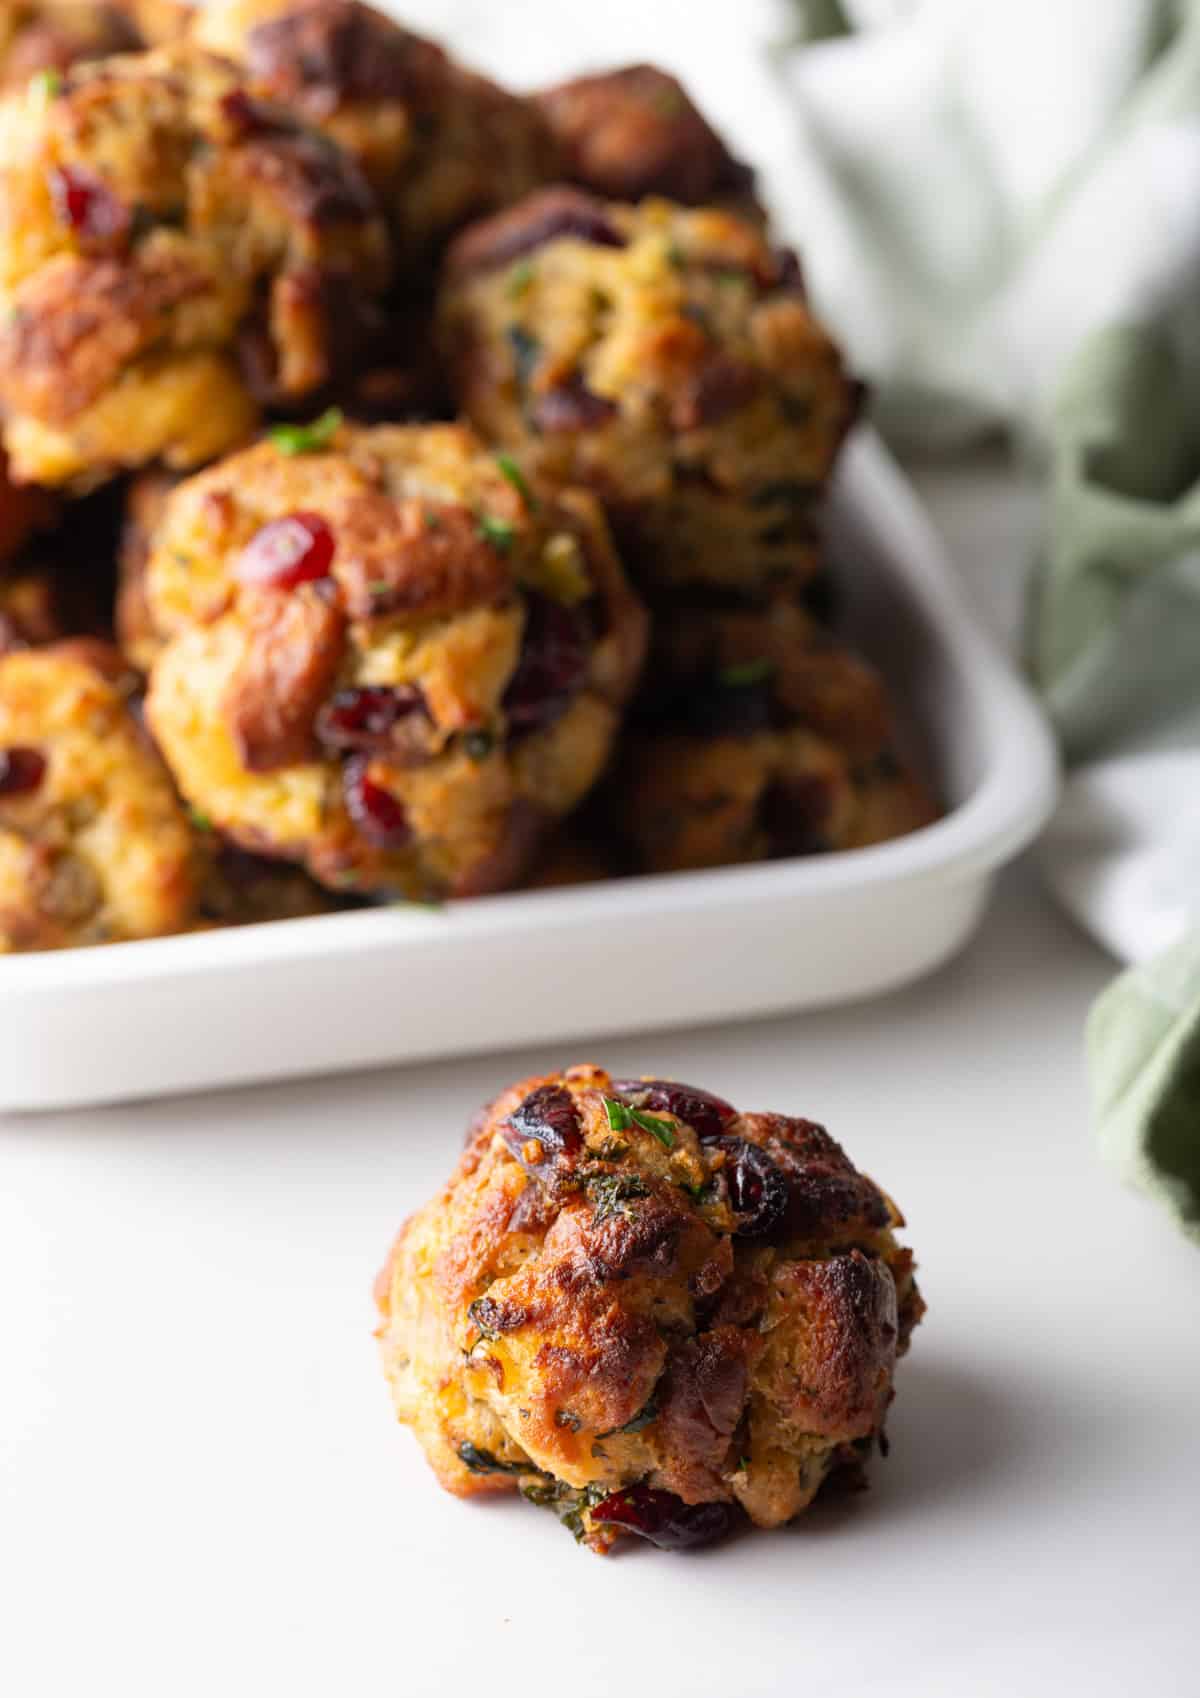
Stuffing Balls
Change up your traditional holiday menu with these savory, sweet, fluffy and crispy stuffing balls! They’re as fun to make as they are delicious to eat with your favorite Thanksgiving and Christmas comfort foods. But I love to bake up (and freeze!) batches any time of year for a tasty, carb-y side dish that I know will make the whole family happy.

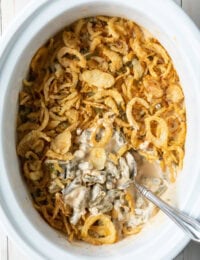
Last year my family spent Thanksgiving with some good friends, where we learned about their tradition of shaping the stuffing into little bite-sized pieces and then cooking. I thought this was a fun idea and love that the bites get golden brown on all sides! I decided to create a version with my own spin on it, of course, by using the same ingredients included in my family’s all-time favorite crock pot stuffing recipe as the foundation to make crispy stuffing balls. These beauties are perfect little golf ball-sized orbs packed with bread cubes, aromatic herbs and vegetables, plenty of butter, and a kiss of tangy-sweetness from dried cranberries. Try them this year and I’m sure you’ll make the recipe a holiday tradition, too!

Sommer’s Recipe Highlights
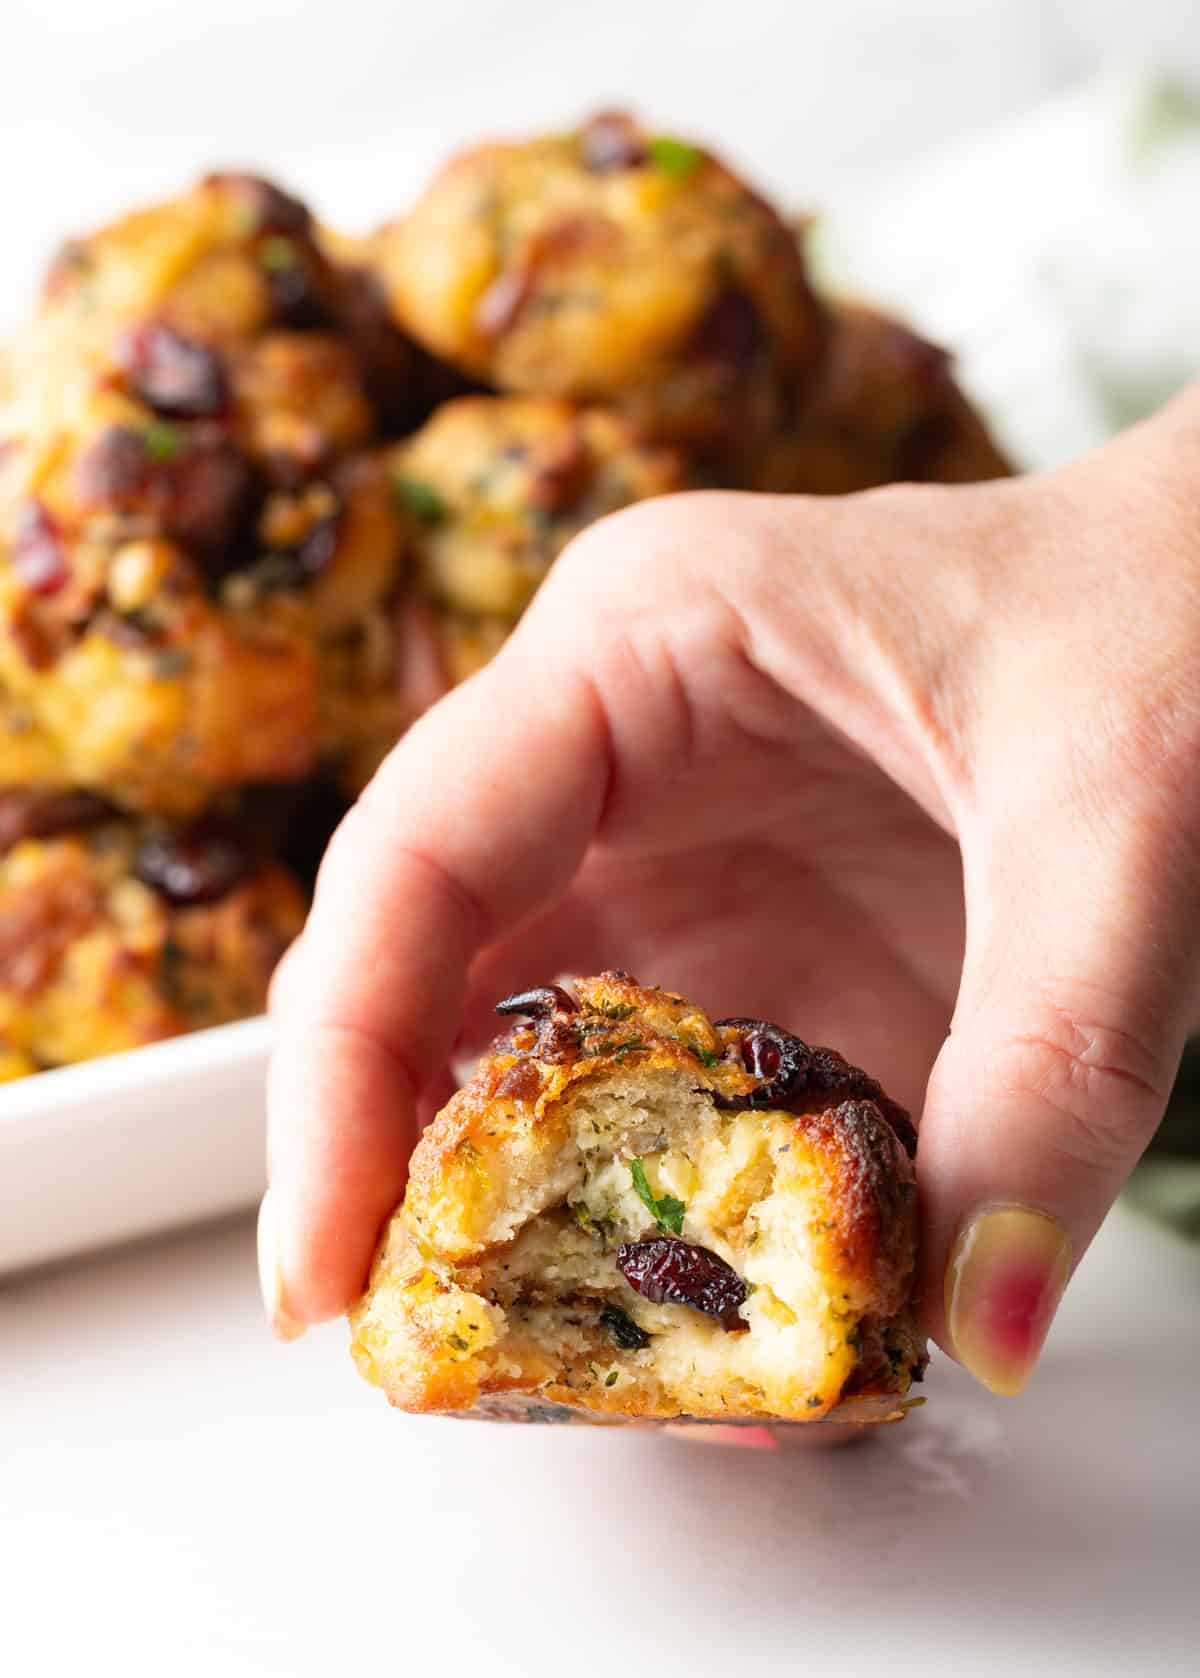
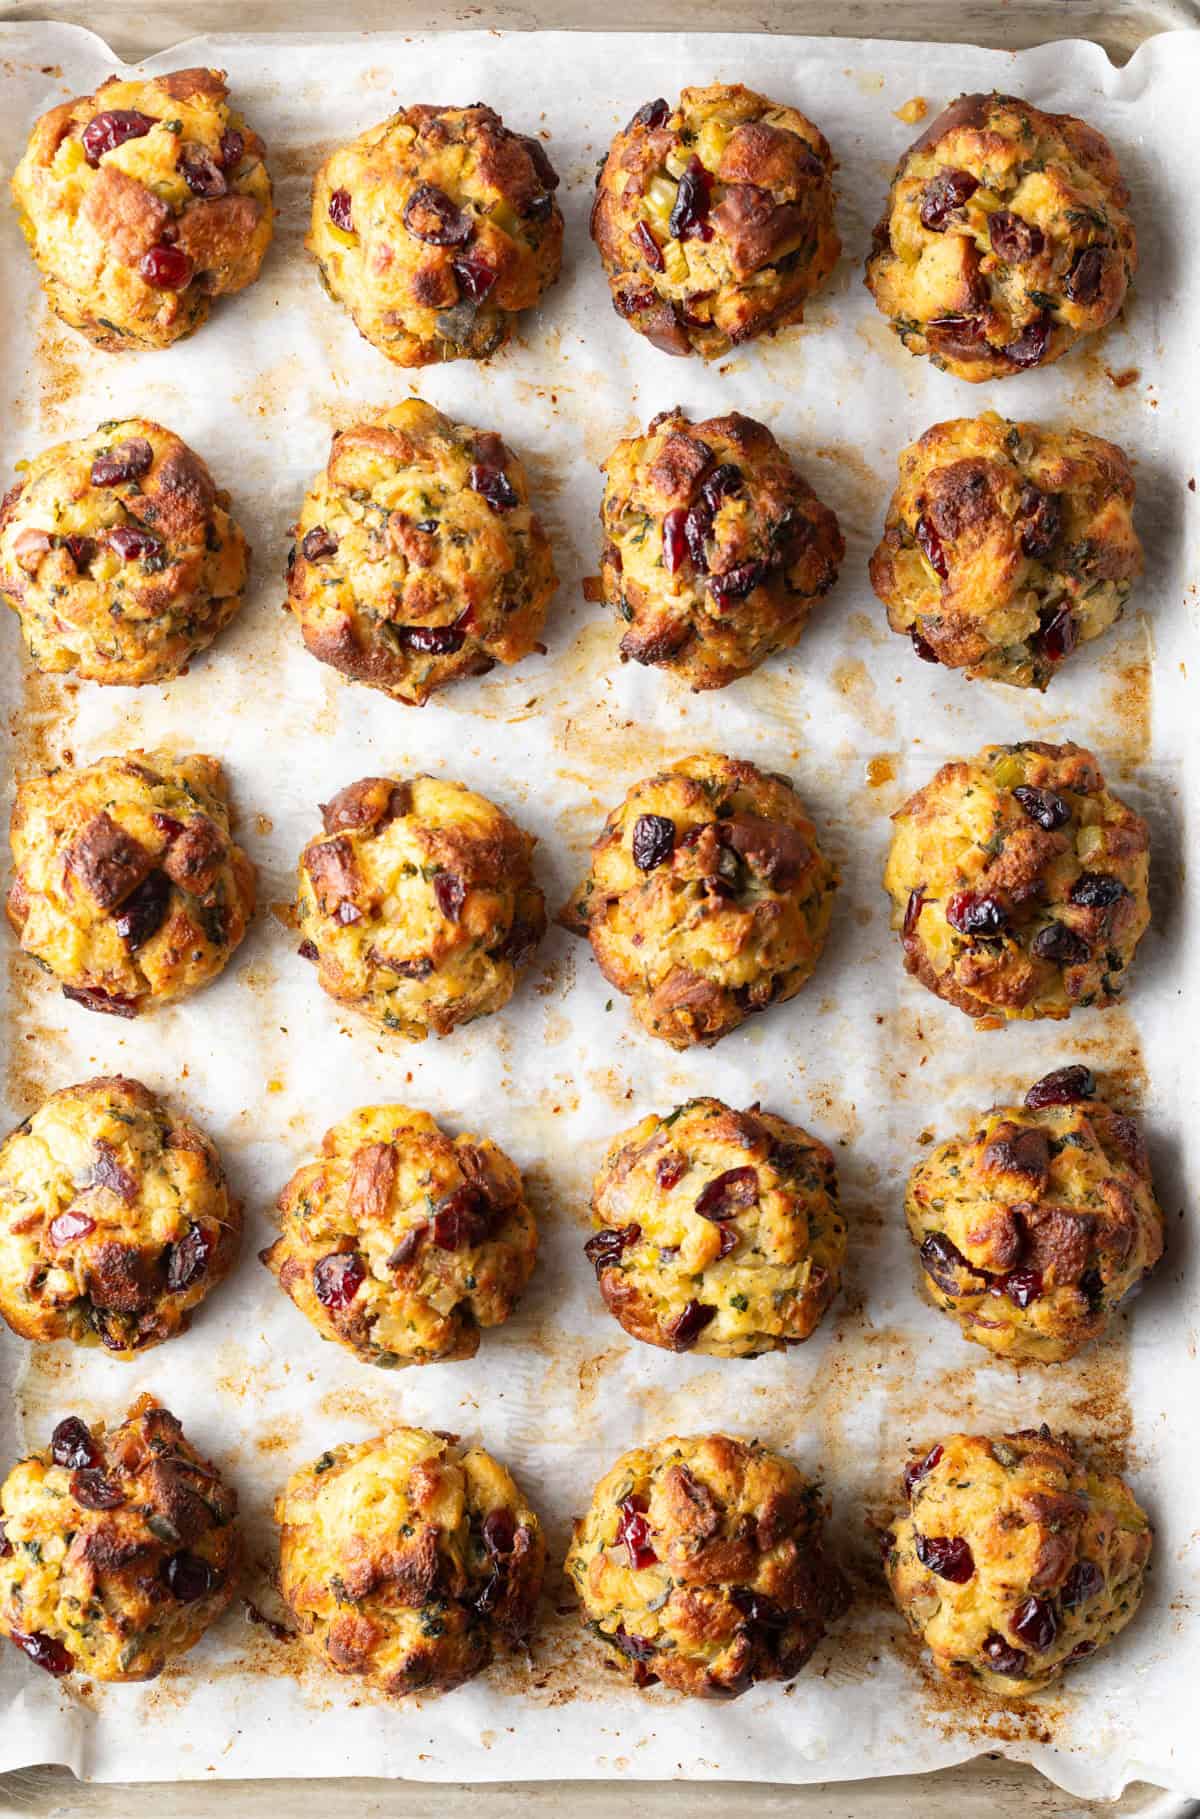
Perfect Texture – The interiors of the stuffing balls are soft and fluffy, but the outsides get extra crispy. That means every single person at the table gets the perfect stuffing textural experience!
Play with Your Food – These tasty little balls of stuffing are a playful, utensils-optional swap for the classic Thanksgiving and Christmas side dish. And my grown children agree, they’re fun to make with kids of all ages!
Make Ahead – This recipe is fantastic to make ahead for less day-of cooking stress. (Doesn’t that sound amazing?) I like to prep and roll the balls the Tuesday or Wednesday before Thanksgiving, then cover them and place them in the refrigerator or freezer until ready to bake.
Key Ingredients and Tips
- Dried bread cubes – You can buy packaged bread cubes, but I prefer to make my own. It’s way cheaper, and a great way to use up leftover white bread! I use a serrated knife to slice day-old bread into 1-inch pieces, then spread them out across a baking sheet. Leave them on the counter for the day and ta-da! They’re slightly stale and ready to use.
- Butter – I use unsalted butter in most of my recipes, so I have total control over how salty the dish is. There’s no kitchen crime worse than over-salting good food!
- Onions and celery – These two kitchen staple veggies are what get the whole flavor party started.
- Fresh herbs – Then I build on the veggies and include fresh chopped parsley, sage, and thyme to make stuffing with an ultra-cozy Thanksgiving feel and flavor.
- Broth – Chicken broth makes the stuffing moist and flavorful, without being too overpowering like a beef broth would be.
- Eggs – I recommend letting the large eggs come to room temperature before using them. Cold eggs can slow down the cooking process and mess with the stuffing texture.
- Dried cranberries – Yes, they are optional, technically. But cranberries add a delightful sweet, tangy flavor and light chewy texture that pairs beautifully with the crispy balls of stuffing. I highly suggest including them if you can for balance!
How to Make
Find the full recipe with ingredient proportions, detailed instructions, and a video tutorial in the printable form at the bottom of the post.
Prep – Knock out as much prep work as you can before getting to the cooking part. To start, I preheat the oven to 400 degrees and line a baking sheet with parchment paper. Then out come the knives to slice the bread into half-inch cubes, dice the veggies, and chop the fresh herbs. Whisk together the broth and eggs, and it’s time to bring in the heat.
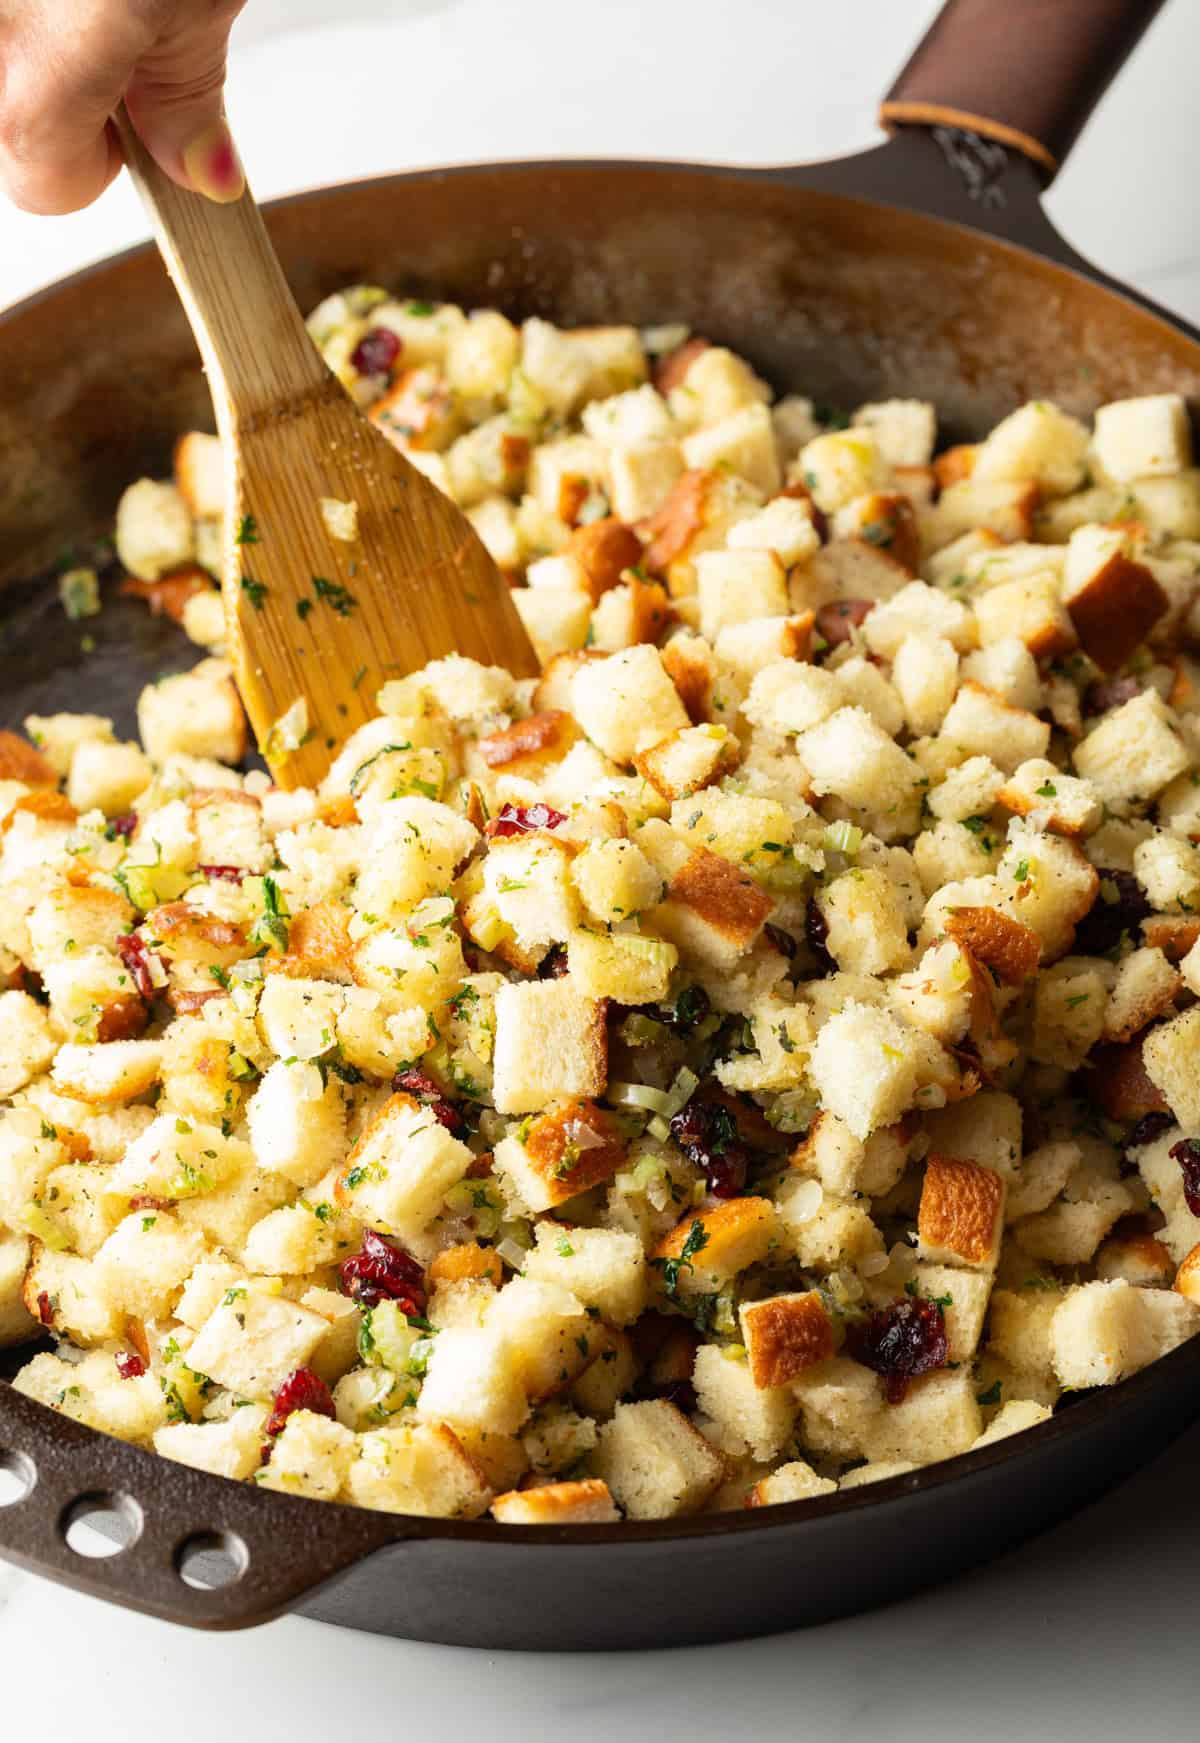
Start the Stuffing – Melt butter in a large skillet over medium heat so it’s almost bubbly-hot, but not browning. Add the veggies and herbs and sauté for 3-4 minutes, until the celery and onions are slightly soft and the kitchen smells all warm and, well, herb-y. You know that Thanksgiving smell I’m talking about!
Then gently, ever so gently, fold in the bread cubes and dried cranberries so they are fully coated in butter. Moist stuffing is good stuffing!
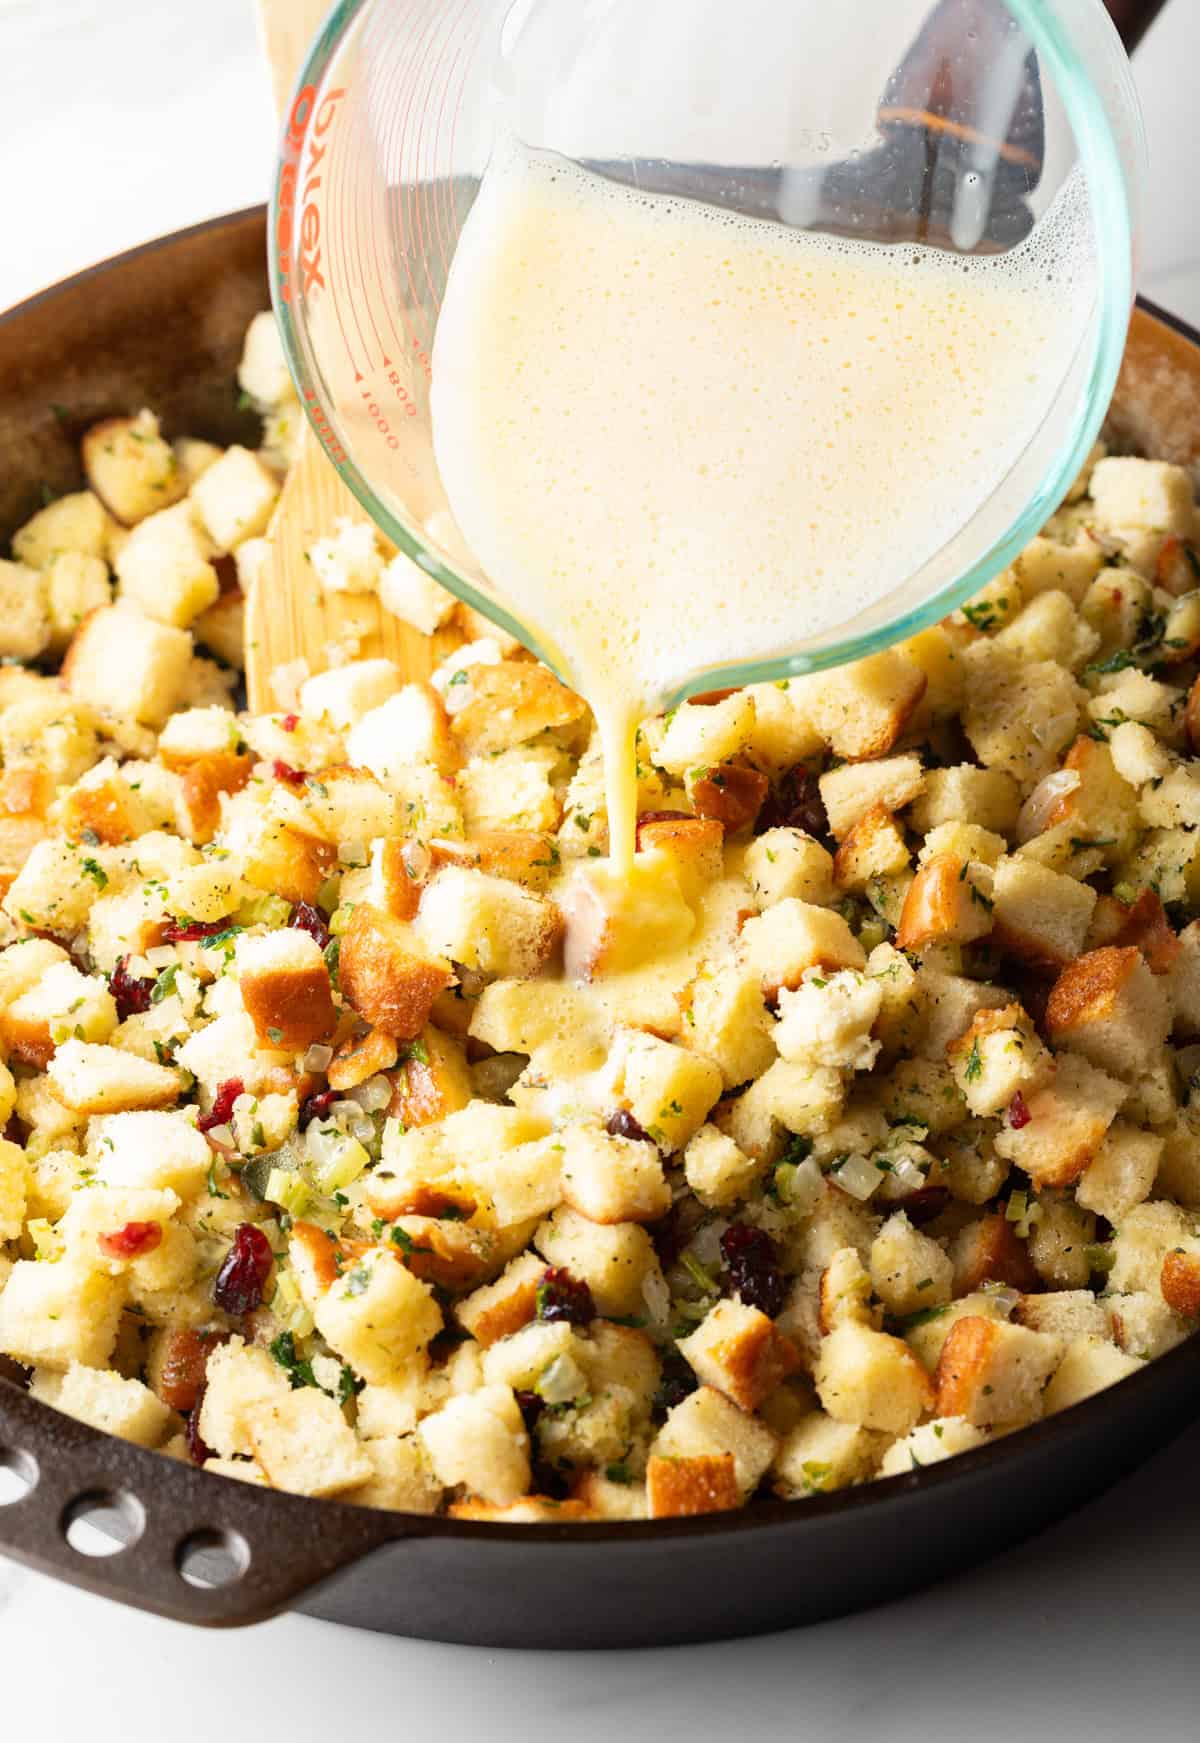
Finish the Stuffing – Remove the pan from the heat so the stuffing stops cooking and doesn’t get mushy. After it’s rested for a few minutes (it’s had a hard day, after all) pour the broth and egg mixture over the bread cubes, and stir gently.
Like with the butter, I always take care to make sure all the cubes are saturated so the stuffing is moist and fluffy, without any hard crunchy bits.
Let’s Roll – This is the part the kids really love to help with! Portion the stuffing mixture out into 2-inch balls, which is about the size of a golf ball. Roll them tightly with your hands and set them on the baking sheet. Give each ball some space and don’t let them touch, or they won’t get crisp all the way around.
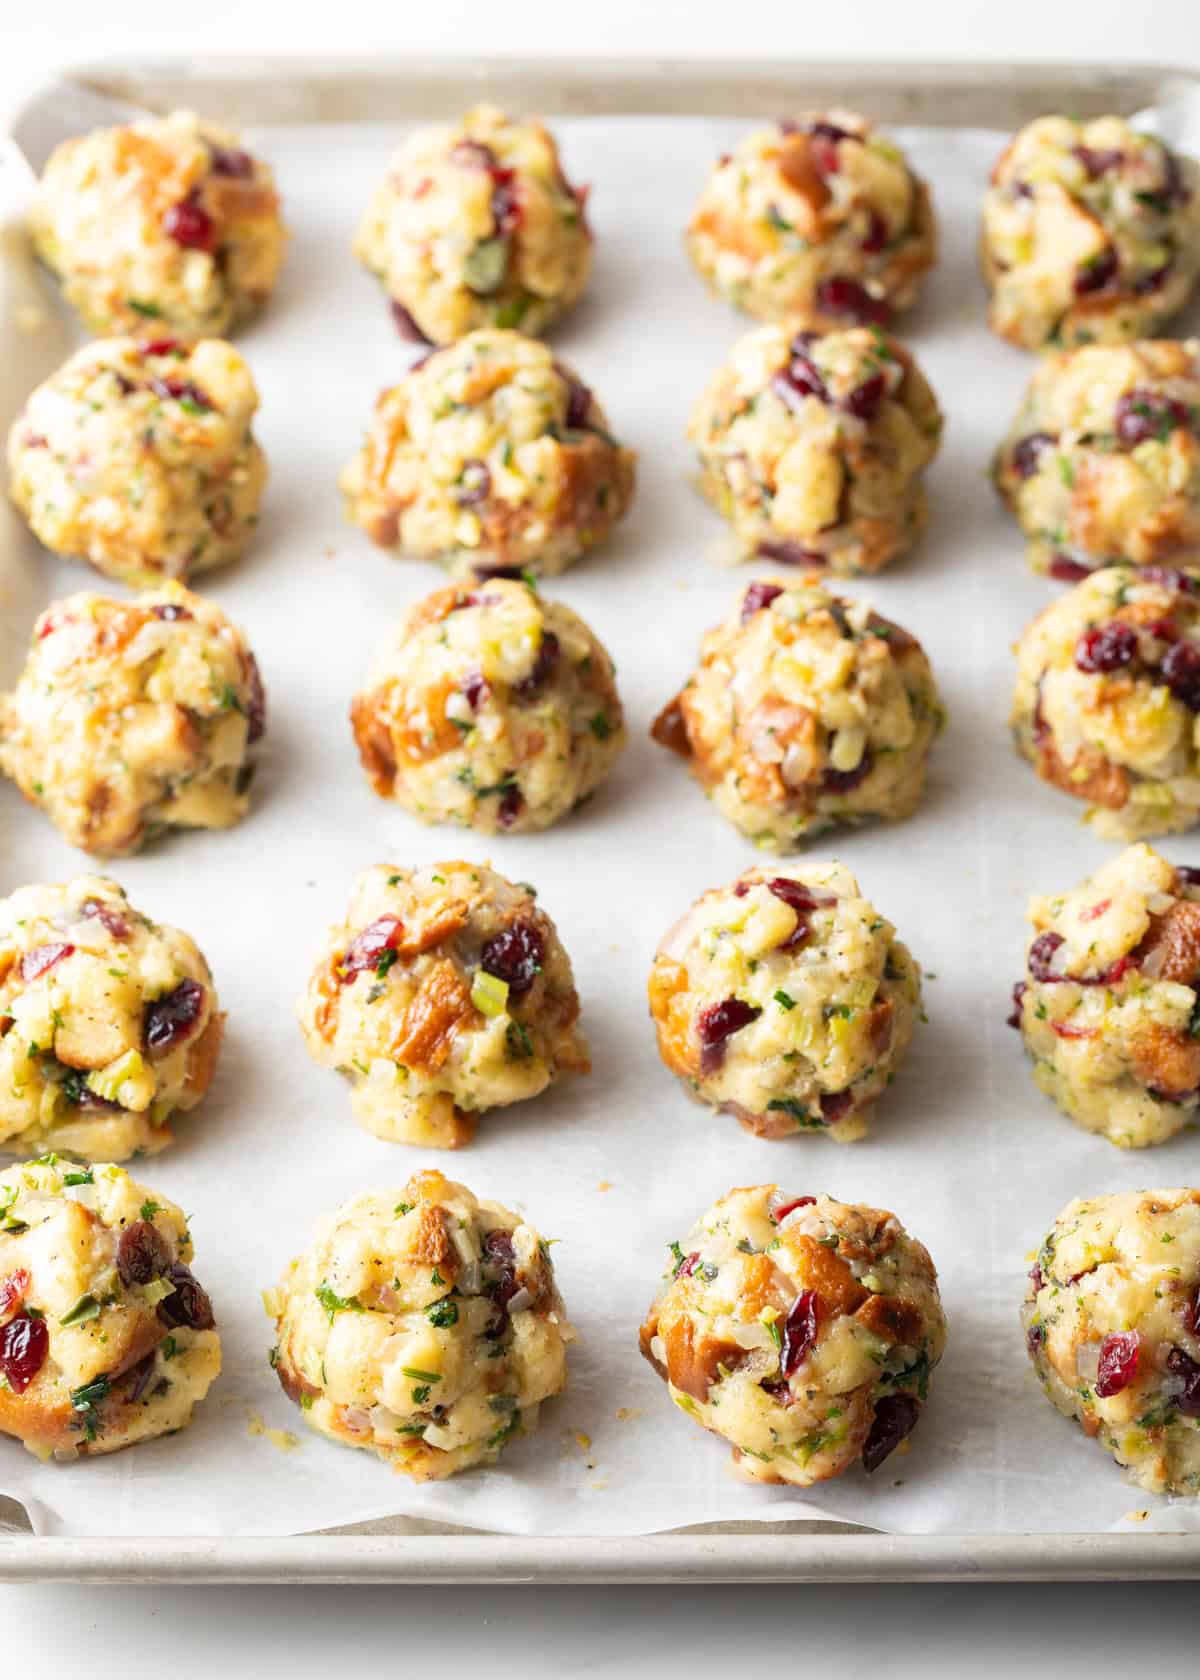
Bake – Once they are rolled, place the baking sheet in the oven for 20 minutes, or until the exteriors of the balls are golden brown.
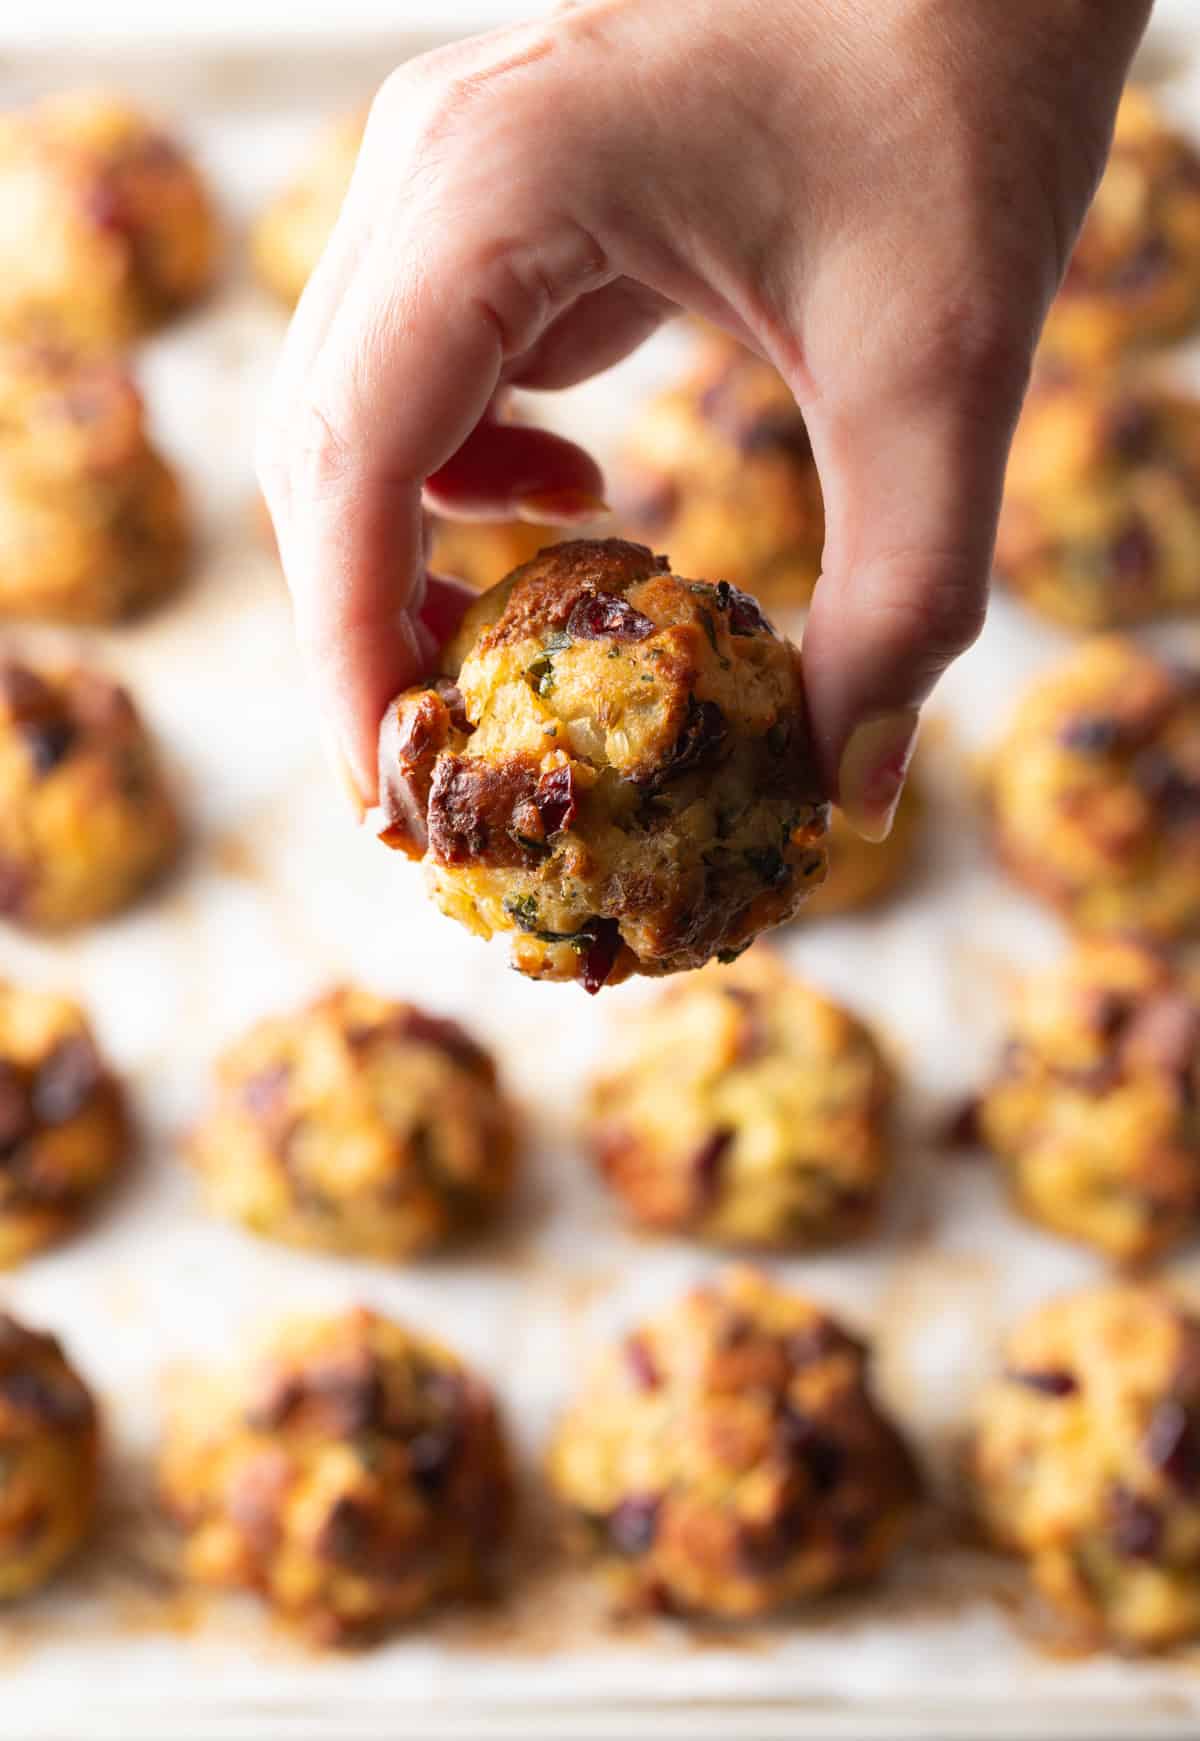
I’m super proud if you manage not to eat them right off the pan. But if you can’t help yourself, hey, no judgment here!
Expert Tip
I learned the hard way many years ago that if you have the opportunity to prep ahead for the holidays, do it. (It makes the Big Day so much lighter, and you actually get a chance to be present and enjoy the special occasions!) So I make the stuffing and roll the balls up a day in advance before the chaos kicks in, cover the pan with plastic wrap and leave in the fridge overnight. When ready to bake I simply take off the wrap and in the oven they go!
Make your life even easier and get these babies going way ahead of time! Flash freeze the unbaked balls for 1-2 hours on a baking sheet. Once they are rock solid, transfer them to a Ziploc freezer bag and squeeze out all of the excess air before sealing the bag. They freeze well for up to two months, so I suggest putting together an extra batch at Thanksgiving to have ready at Christmas!
Often I recommend thawing frozen foods in the fridge overnight before heating. But stuffing balls will get soggy if defrosted in the fridge, and no one wants that. To avoid any soggy sadness I bake them from frozen for an extra 10-15 minutes.
Cooking Tips
- Don’t Overmix – Stir gently so you don’t smoosh the bread cubes, or you wind up with gummy stuffing. Go on, ask me how I know.
- Don’t Eyeball It – I use a 3-tablespoon cookie dough scooper to portion out the perfect amount of stuffing every time.
- Roll ’em Right – This recipe is great to make with the kids. But, look, the balls of stuffing really need to be the same size and shape to cook evenly. So I’m just saying, you might want to supervise.
- Skip the Sticky – I add a tiny bit of water to my hands as I roll the balls to keep the stuffing from sticking. But don’t overdo it, or the outside of the balls won’t get crisp enough.
Serving Suggestions
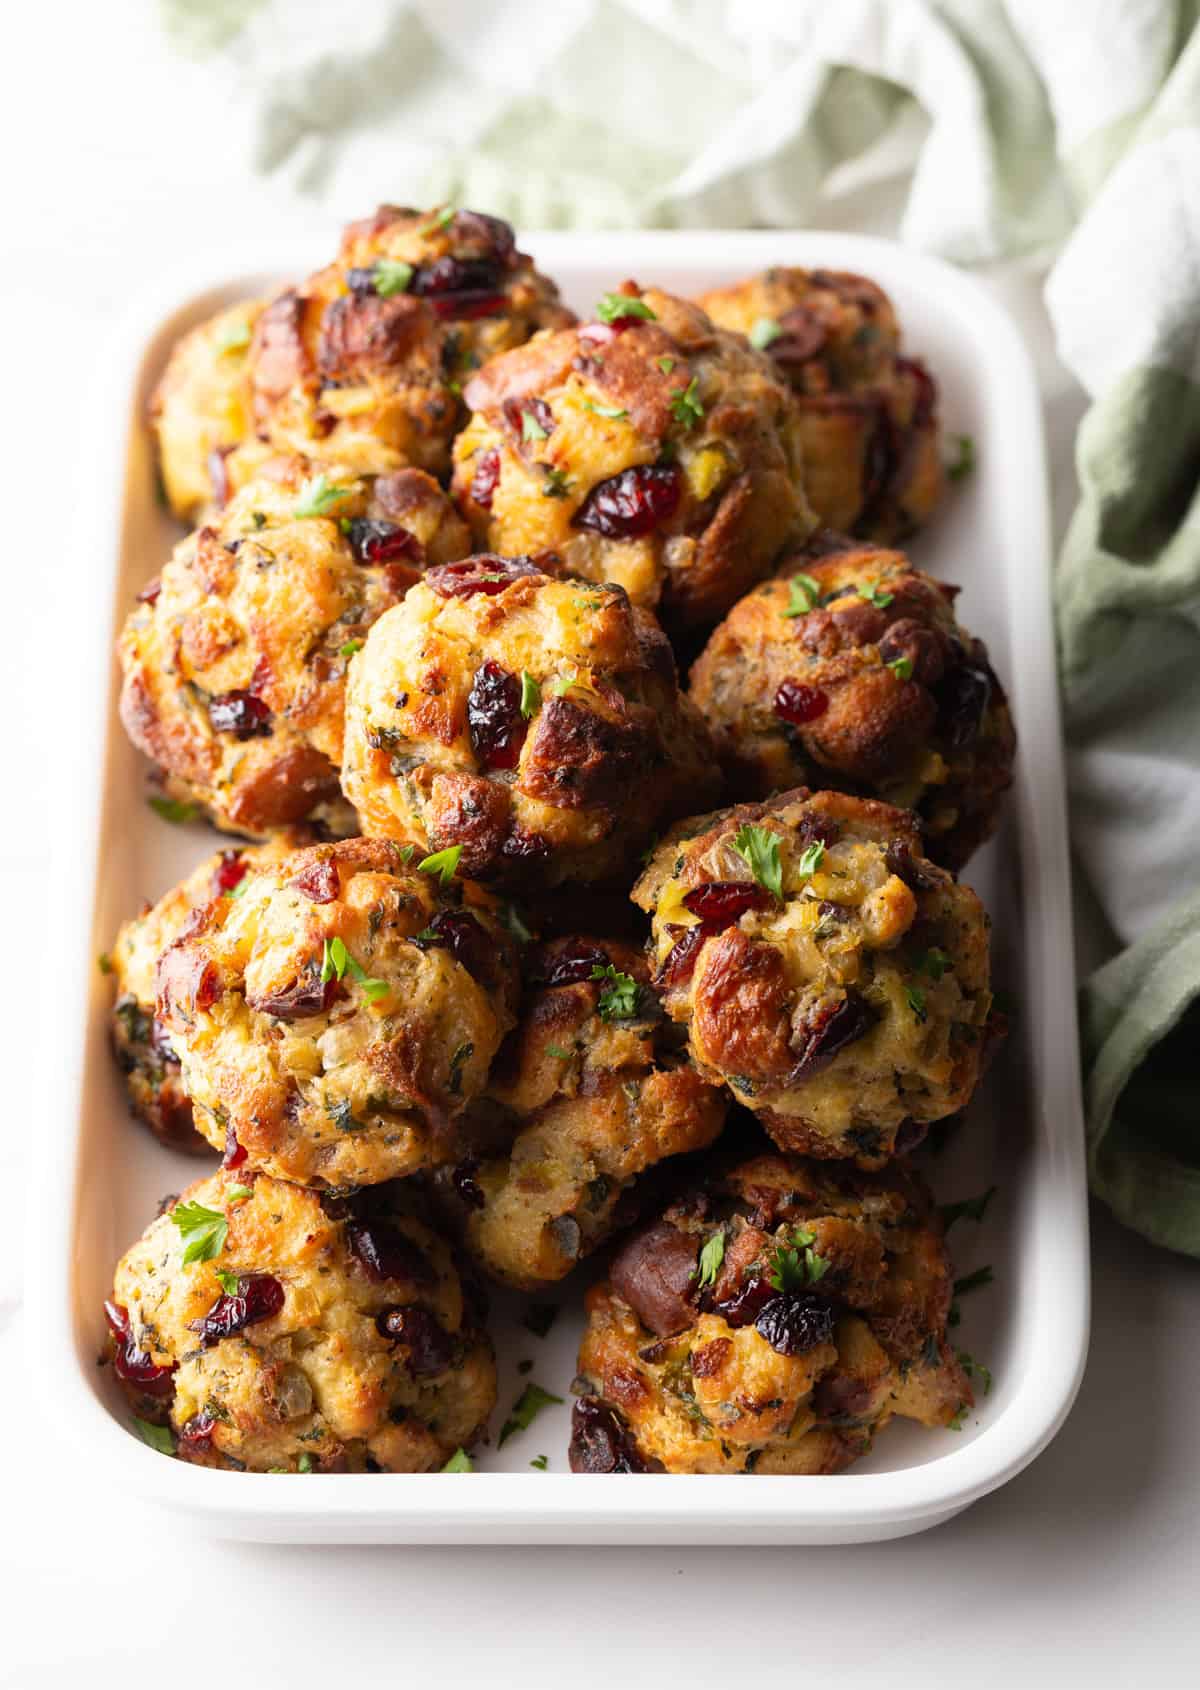
Of course, I’m going to “recommend” serving these as a holiday side dish with other Thanksgiving recipes and Christmas recipes like turkey, ham, gravy, mashed potatoes, etc. That seems pretty obvious… As does the fact that everyone at the table is going to love cute little crispy balls for a twist on classic stuffing!
But I’m not exaggerating when I say these are yummy for any casual or special dinner all year ’round, because they really are that good!
Storage Notes
- Storing Leftovers – Keep them in an airtight container in the refrigerator for a day or so. Any longer than that and they might become soggy. But honestly, I wouldn’t know, they never last that long in our house!
- Freezing – You can also freeze the stuffing balls after baking for up to 2 months. Put them together in a Ziploc freezer bag, and squeeze out as much air as possible before sealing. Less air in the bag means less chance of icky freezer burn.
- Reheating – Bake the refrigerated balls for 10-15 minutes, or from frozen for 15-20 minutes, at 350 degrees. They already got a crispy coating on the outside when originally baked at 400 degrees, so you can take it down a notch when reheating. You don’t want them to dry out!
Frequently Asked Questions
Eggs are the magic binding ingredient that keeps the bread cubes, veggies, and herbs formed in a ball. Be gentle but firm when you roll them together, then try not to mess with them much once they’re placed on the baking sheet.
No, the balls of stuffing are moist but don’t release moisture. A flat cookie sheet will work fine!
I don’t recommend using readymade stuffing for this recipe. The egg mixture is essential to keep the balls held together, and because leftover stuffing is already cooked with broth, I think that would be way too much moisture.
More Easy Holiday Recipes You Might Like


Stuffing Balls Recipe
Video

Ingredients
- 12-13 cups white dried bread cubes or any type of bread
- 1 cup butter
- 1 cup diced celery
- 1 cup diced onion
- ½ cup chopped parsley
- 2 tablespoons fresh sage chopped (2 tsp dried sage)
- 1 tablespoon fresh thyme chopped (1 tsp dried thyme)
- ¾ cup chicken broth or vegetable broth
- 3 large eggs
- ½ cup dried cranberries optional
- Salt and pepper
Instructions
- Preheat the oven to 400°F. Set out a large rim baking sheet and line it with parchment paper.
- Prep All Ingredients: Slice the bread into half-inch cubes and set aside. Finely dice the celery and onions. Chop the parsley, sage, and thyme. Then in a small bowl whisk together the chicken broth and eggs.
- Set a skillet over medium heat. Add butter to the skillet. Once melted, add the celery, onions, and all herbs. Sauté the veggies and herbs for 3-4 minutes. Add 1 tablespoon of salt and ½ – 1 teaspoon of cracked black pepper to the skillet. Stir well. Then gently toss in the bread cubes, and dried cranberries. Gently fold the ingredients to make sure the butter mixture is coating all the bread cubes.
- Remove the pan from heat and allow it to rest for 3-5 minutes. Then pour the broth and egg mixture over the bread cubes, stirring gently to make sure all cubes are saturated.
- Using a 3 tablespoon scoop, portion the stuffing mixture out into 2-inch balls, approximately the size of a golf ball. Roll them tightly with your hands and set them on the baking sheet.
- Once all the stuffing balls are rolled, place them in the oven for approximately 20 minutes, or until the exteriors are golden brown.
- Serve warm or at room temperature.

Made this for a friend’s gathering, used GF bread, left out the cranberries, and this was the star of the night. Not a bite was left at the end of our evening. I’m making this recipe again right now with regular bread and will definitely keep using it going forward! Love it!
I loved the balance of savory and sweet! They were fluffy inside and had that perfect golden crunch on the outside.
These stuffing balls were a hit at Thanksgiving! Perfectly crispy and so flavorful – everyone asked for the recipe.