Christmas Crack Candy
This Christmas crack candy is my absolute favorite holiday obsession to cook for sweet snacks and for homemade gifts. It’s rich and crunchy, and layered with toffee and chocolate ribbons that make this treat totally irresistible.
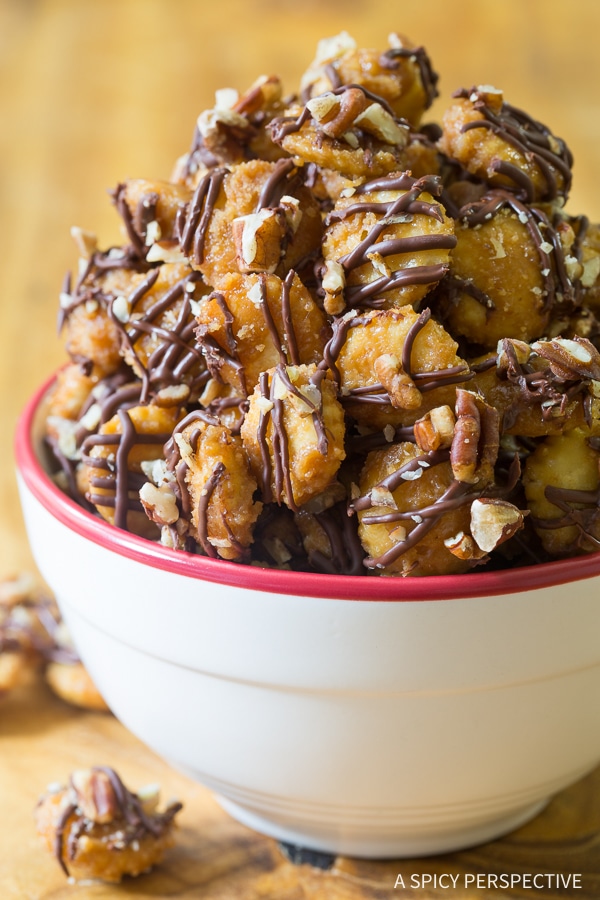
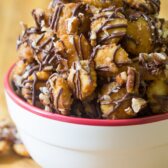
Meet the ultimate edible gift. I cannot begin to explain how absolutely delicious this sweet-and-salty combo of chocolate and toffee is. Every bite begins with thick saltine cracker nuggets, AKA oyster crackers, that are coated in a glossy toffee and topped off with melted chocolate and chopped nuts. I love to gift this treat to friends and family during the holidays, but I have to be honest…I nibble on so much of this crack candy while making it that sometimes I don’t have enough to share. So I mix a little extra of this saltine cracker toffee into each treat box to even things out!


Sommer’s Recipe Highlights
Incredibly easy to make – One of the reasons why I love this crack candy recipe is that it’s essentially impossible to mess it up. All you need is a handful of pantry classics, a cooking thermometer, and a little time, and you’ll have an impressive homemade dessert that looks gourmet.
Perfect for gifting – Every holiday season, my friends and family look forward to my little gifts. I pack this homemade candy and other sweet treats like my divinity candy in cute tins or plastic bags tied with ribbons. It’s easy to make in large batches, and it doesn’t break the Christmas budget.
Impossible to resist – Trust me, I try really, really hard not to pound this candy while I’m in the middle of making it. But it’s too hard to resist, so I usually end up making multiple batches. This is a recipe your friends and family will ask for, specifically year after year.
Key Ingredients and Tips
- Oyster crackers – These slightly salty crackers make up the entire base of the holiday treat. They’re crunchy, hollow in the middle, and they perfectly soak up the sweet and sticky toffee layer.
- Unsalted butter – To give the toffee a glossy finish, you’ll need a good-quality unsalted butter. I know that butter is “heavy” but you really can’t skip out on this ingredient. This is candy-making people, no time for macro counting. *wink*
- Light brown sugar – This is what gives the candy its signature caramel color, crackling finish, and note of sweetness. Make sure you have a fresh bag.
- Salt – A little bit of salt goes a loooong way here! I add a pinch to help balance and accentuate the flavors, and make the chocolate pop.
- Semi-sweet chocolate chips – I prefer melted semi-sweet chocolate chips for that silky layer because they’re sweet but not too sweet. You can always use dark or milk chocolate if you prefer.
- Chopped nuts – And for the pièce de résistance, I sprinkle my favorite finely chopped nuts on top. You can use pecans, almonds, pistachios, or walnuts. Or skip if needed.
How To Make
Find the full recipe with ingredient proportions, detailed instructions, and a video tutorial in the printable form at the bottom of the post.
Prep the candy station – First thing’s first, I prepare the candy making area. I line a baking sheet with parchment paper, where the candy will cool later on. Then, I set a saucepan over medium heat, clip on the candy thermometer, and pour in the butter, brown sugar, and salt.
Make the toffee – I let that mixture bubble, stirring constantly. It’s so important to keep stirring otherwise the butter and sugar will break apart, and then it’s game over. When the candy thermometer reads between 300 and 305 degrees Fahrenheit, I stop stirring. FYI, boiling sugar is very, very dangerous, so be careful!

Coat the crackers – Once the toffee mixture is ready, I turn off the heat and mix in the vanilla extract. Whoa, that smell is INCREDIBLE! Once that’s whisked together, I carefully stir in the oyster crackers until they’re covered in that candy magic all the way around.

Spread the candy – Now I spread out the toffee and cracker mixture onto the baking sheet I prepped earlier. Make sure to do this with a spatula so that the candy doesn’t stick together in uneven clumps. The candy mixture will dry and harden on its own, and pretty soon, you’ll see that glossy sheen.

Melt the chocolate – Now, I grab those mini semi-sweet chocolate chips and melt them in my double boiler. You can also do this in the microwave, but I actually enjoy the process of melting the chocolate until it gets nice and silky smooth.
Drizzle and decorate – Once the chocolate is melted, I pour it into a Ziploc bag and snip off the corner so I can get to decorating. I give that chocolate a generous drizzle all over the candy, and then top that off with finely chopped nuts. I usually go for pecans.
Break the candy apart – Now comes the best part (in my opinion). Break that candy apart and treat yourself to a bite…or two, or three.
Expert Tips
Make sure to use a reliable candy thermometer, and the best way to test is to dunk it in boiling water — it should read 212 degrees Fahrenheit.
Do NOT walk away from boiling sugar, or it will burn. And please be very careful when working with boiling sugar; it’s basically molten lava.
Recipe Variations
- Peanut butter – Drizzle a little bit of melted peanut butter chips on top of the chocolate for an even more indulgent version of this sweet.
- Peppermint – To amp up the holiday spirit of this recipe, sprinkle some crushed peppermint candies or candy canes for a pop of color and minty freshness.
- Oreos – I know kids go crazy for Oreos, so what’s better than adding some crumbled Oreos on top!
- Pretzels – You can swap the oyster crackers for pretzels for a fun and even crunchier twist on this classic Christmas treat.

Serving Suggestions
This candy recipe is a holiday moment on its own. But there are so many fun and festive ways to serve it, whether it’s with a beverage or as part of a dessert platter. Here are some of my favorite accompaniments:
- Caramel macchiato
- The ultimate frozen hot chocolate recipe
- Serve this crack candy alongside these peppermint Muddy Buddies and easy cinnamon pecan pralines.
Frequently Asked Questions
Pretty fast! About 25-30 minutes, plus dry time.
If you need the chocolate to dry faster, you can place the munch on baking sheets before drizzling it with chocolate, then refrigerate the baking sheets.
Absolutely! I’ve actually done that before. I just like the way the Munch looks when you can see the nuts on top.
Storing
Store this holiday candy in an airtight container at room temperature for up to 2 weeks.
Help Me Spread the Word about this Fabulous Free Recipe! Sharing this recipe link on Pinterest and Facebook is super impactful, and I greatly appreciate it! Find the share buttons below the recipe form.
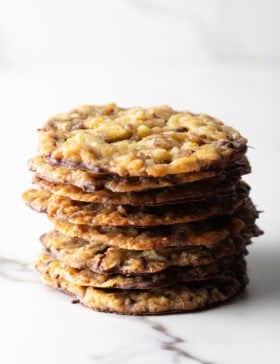
Other Holiday Recipes You Might Enjoy


Christmas Crack Candy
Video
Ingredients
- 10-12 ounces oyster crackers
- 1 cup unsalted butter
- 1 cup light brown sugar, packed
- 1 teaspoon salt
- 1 teaspoon vanilla extract
- 1 cup semi-sweet chocolate chips
- 1/2 cup finely chopped nuts, any variety
Instructions
- Lay a large piece of parchment or wax paper on the counter. Place a large stockpot over medium heat. Attach a candy thermometer to the side, making sure the tip reaches the bottom of the pot. Add the butter, sugar, and salt.
- Bring the sugar mixture to a rolling simmer, stirring the entire time. Continue gently stirring as it boils to keep the butter and sugar from separating, until the temperature reaches between 300-305 degreed F. If the butter and sugar separate, the candy will not have the proper texture. *Be careful; boiling sugar can be dangerous!
- Once you reach the desired temperature, immediately turn off the heat. Stir in the vanilla. Then gently pour in the oyster crackers and stir to coat well.
- Carefully, pour the crackers out on the parchment paper. Use a spatula to quickly separate the pieces, so they dry individually. *If your candy thermometer is accurate, and you have reached the proper temperature, the candy will dry and harden on its own. It will have a light glossy sheen. If it stays sticky or looks crystalized, your candy thermometer is probably inaccurate. You can fix this by moving the candy onto a parchment paper lined baking sheet. Bake in a single layer at 450 degrees F for 5 minutes.
- Once the candy is completely cool, melt the chocolate chips. Either place them in a double-boiler over low heat, stirring until melted, or place in a microwave-safe boil, and nuke in one minute increments, stirring in between until completely melted.
- Place the melted chocolate in a plastic zip bag. Snip a tiny piece off one corner to create a piping bag. Then use the bag to drizzle chocolate over all the candy. While the chocolate is still soft, sprinkle the chopped nuts over the top. Let the chocolate dry until hard.
- Once the chocolate is hard, break the candy apart and store in an airtight container for up to 2 weeks.

A bit tricky to make but delicious
This is truly crack, absolutely delicious!!! AND super easy❤️
How far in advance can this be made and how long does it keep? Thinking of making and mailing but do not know how it holds up over a period of time. Looks delicious and I can’t wait to make it!!
Hi There!
This is a great recipe to make and ship! It will last 3-4 weeks in a dry climate. :)
OH My Goodness!!! So I made it and WOW! 5 Stars! This baby will go in my recipes to hand down because once the kids get a hold of this with their Christmas goodies I KNOW they will want it every year. But me…I will have a secret stash of this on hand often or at least the ingredients in case I get a hankerin ;) Thank you for such a great recipe!
Your recipe has no sugar in it. I saw on the video that brown sugar was used, but there was no amount.
I was all ready to make this and saw there was no sugar in the recipe instructions. Upset I got everything ready to make and no proper instruction
It’s one cup Merideth! :)
This is an easy recipe and it tastes delicious. I took it to a party and it was a hit.
This is good. Have you ever tried it with popcorn?
I could have used another hand or two with getting the crackers separated before they cooled. But chunks are okay, too.